
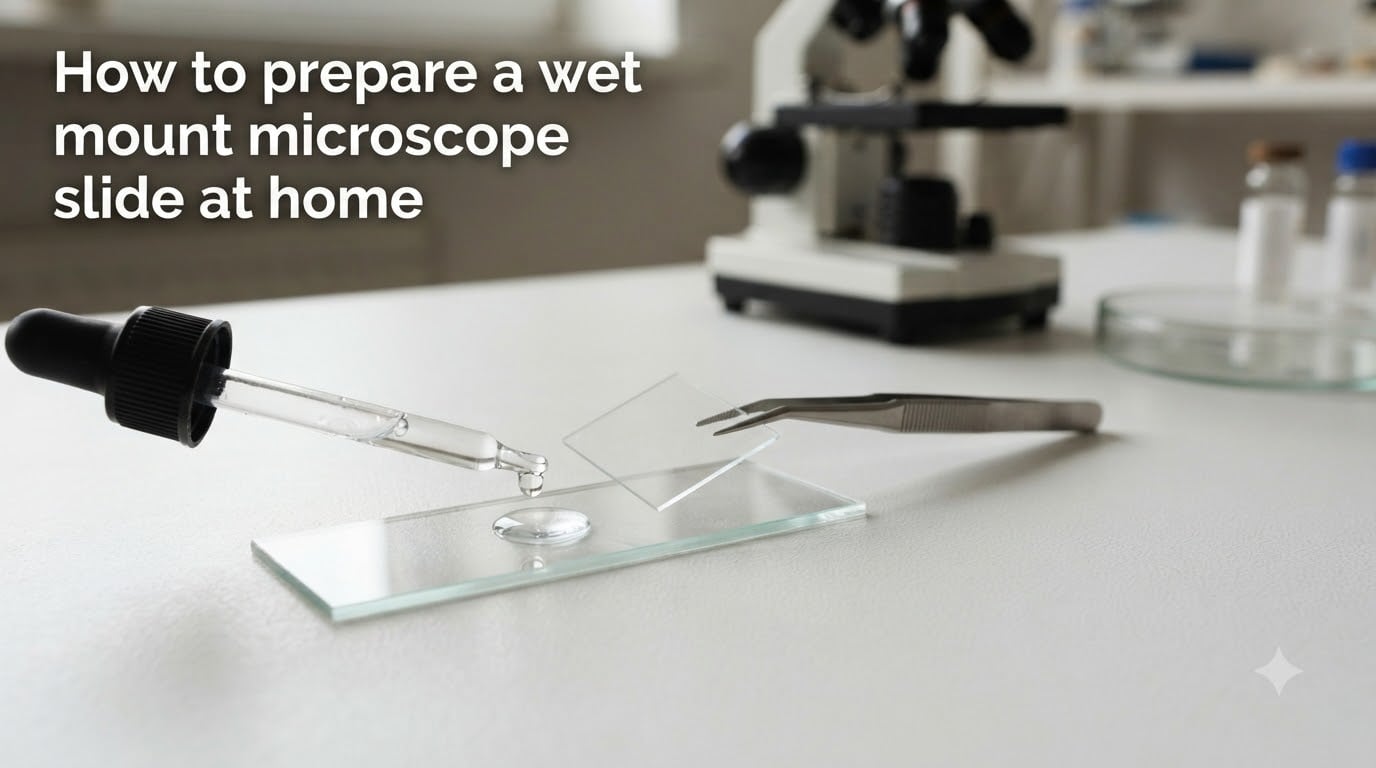
If you have ever wanted to look at pond water teeming with tiny living organisms or examine the cells inside an onion skin, learning how to prepare a wet mount microscope slide at home is the skill that makes it all possible. I have spent years teaching students and hobbyists how to create these temporary mounts, and the good news is that the process only takes a few minutes once you know the technique.
A wet mount is simply a specimen suspended in a drop of liquid between a glass slide and a cover slip. Unlike permanent slides that require fixing and staining, a wet mount lets you observe living things in real time. You can watch paramecia swim, see chloroplasts moving inside plant cells, and discover the hidden world inside a single drop of water.
This guide covers everything you need: the materials, the exact step-by-step procedure, how to place your cover slip without trapping air bubbles, what liquids to use, and how to fix the most common mistakes beginners make. I will also share home alternatives when you do not have access to professional lab supplies.
Table of Contents
What Is a Wet Mount Microscope Slide?
A wet mount microscope slide is a temporary preparation where a specimen is suspended in a drop of liquid and sandwiched between a flat glass slide and a thin cover slip. The liquid, usually water or saline, keeps the specimen hydrated and holds it in place through surface tension.
Because wet mounts do not involve chemical fixation or permanent mounting medium, they allow you to observe living organisms in their natural state. This means you can see natural colors, movement, and behaviors that would be destroyed in a permanent slide preparation. The trade-off is that wet mounts are temporary. They dry out within 30 to 60 minutes unless you seal them.
Wet mounts are the go-to technique for students, homeschool parents, hobbyists, and professional scientists who need to study living specimens under a microscope. They are also the simplest type of slide preparation you can do at home with minimal equipment.
Wet Mount vs Dry Mount: What Is the Difference?
Understanding the difference between wet and dry mounts helps you choose the right technique for each specimen. A dry mount involves placing a specimen directly on a slide and covering it with a cover slip, with no liquid added. This works well for dry, solid specimens like hair, pollen, insect parts, or feathers.
A wet mount adds liquid to the equation, which is essential for any specimen that needs moisture to maintain its structure or life. Here is how the main slide preparation types compare:
Dry mount: No liquid used. Best for dry specimens like hair, pollen, and insect wings. Simplest to prepare but unsuitable for living organisms.
Wet mount: Specimen suspended in a liquid drop. Ideal for living organisms, aquatic samples, and fresh tissue. Temporary, dries out over time.
Section mount: A thin slice of specimen is cut and mounted, often in liquid. Used for plant stems, root tips, and tissue samples where internal structure matters.
Smear mount: A thin layer of specimen is spread across the slide. Commonly used for blood smears and bacterial samples where a uniform single layer is needed.
For most home microscopy, the wet mount is your most versatile option. It works with the widest range of specimens and requires only basic supplies.
Materials Needed to Prepare a Wet Mount Microscope Slide
The beauty of wet mount preparation is that it requires very few materials. Here is what you need to gather before you start.
Essential supplies:
– Clean glass microscope slides (flat slides work for most specimens; depression well slides are better for larger aquatic samples)
– Square cover slips (also called cover glasses), typically 18mm or 22mm
– A dropper, pipette, or eyedropper to apply liquid
– Mounting liquid (distilled water, tap water, or physiological saline)
– Tweezers or forceps to handle the cover slip
– Your specimen (pond water, plant tissue, saliva, onion skin, or whatever you want to observe)
– A clean cloth or lens paper for wiping slides
Home alternatives when you lack lab supplies:
If you do not have a lab kit, you can improvise many of these items. Toothpicks work well for transferring small specimens like saliva samples or scraping cheek cells. An eyedropper from a medicine cabinet substitutes perfectly for a pipette. Tap water works fine for most specimens, though distilled water is better for observing salt-sensitive organisms. You can even use a clean glass from a picture frame as a makeshift slide if actual microscope slides are unavailable, though standard slides are thin enough to work properly with your microscope stage.
One thing I always tell beginners: do not be afraid of breaking cover slips. They are fragile, but they are also inexpensive. A box of 100 typically costs only a few dollars. You will break some while learning, and that is completely normal.
Choosing Your Mounting Liquid
The liquid you choose for your wet mount matters more than most beginners realize. The wrong liquid can cause your specimen to swell, shrink, or even die before you get a good look at it.
Distilled or tap water is the default choice for most specimens, especially pond water samples, plant tissues, and aquatic microorganisms. Water maintains a natural environment for freshwater organisms and lets you observe them behaving normally.
Physiological saline (0.9 percent salt solution) is essential when working with human or animal cells. If you place cheek cells or blood cells in plain water, osmotic pressure will cause the cells to swell and burst because water rushes into them. Saline matches the natural salt concentration of the body, keeping cells intact. You can make a simple saline solution at home by dissolving roughly half a teaspoon of salt in a cup of warm water, though precise lab-grade saline is better for consistent results.
Glycerin (also called glycerol) slows down fast-moving organisms like paramecia and rotifers, making them easier to observe at higher magnifications. Glycerin also slows evaporation, giving you more viewing time. Many hobbyists mix glycerin with water at a 50/50 ratio for this purpose. ProtoSlo, a commercial product, achieves the same slowing effect and is widely recommended in microscopy forums.
For most home microscopy with pond water and plant specimens, plain water works perfectly. Reach for saline when working with animal cells, and use glycerin when organisms move too fast to track.
How to Prepare a Wet Mount Microscope Slide: Step-by-Step
This is the core procedure. Follow these steps in order, and you will have a clean, bubble-free wet mount ready for observation in under five minutes.
Step 1: Clean the slide and cover slip.
Hold a glass slide up to the light and check for dust, fingerprints, or smudges. Wipe both sides with lens paper or a clean, lint-free cloth. Do the same with your cover slip, handling it by the edges only with tweezers or your fingertips. Even a tiny fingerprint on the glass can obscure your view under high magnification.
Step 2: Place your specimen on the slide.
Using tweezers, a toothpick, or your dropper, transfer a small amount of your specimen to the center of the slide. For solid specimens like onion skin or a thin leaf section, lay it flat on the slide. For liquid samples like pond water, move straight to the next step. Keep the specimen small. A piece roughly the size of a fingernail clipping is plenty for most observations.
Step 3: Add one drop of mounting liquid.
Using your pipette or dropper, place a single drop of water or saline directly on top of the specimen. The drop should be small, about the size of a matchstick head. Too much liquid will cause the cover slip to float and slide around. Too little will leave air gaps. One drop is almost always the right amount for a standard cover slip.
Step 4: Position the cover slip at a 45-degree angle.
This is the most important step for avoiding air bubbles. Hold the cover slip with tweezers at a 45-degree angle to the slide, with one edge touching the slide next to the water drop. The opposite edge should be raised up, forming a ramp. The edge touching the slide needs to make contact with the edge of the liquid drop.
Step 5: Slowly lower the cover slip.
Let the water spread along the edge of the cover slip through capillary action. Gently and slowly lower the raised edge down onto the slide, as if closing a book. The liquid will spread evenly underneath the cover slip, pushing air out ahead of it. If you lower it too quickly, you will trap air bubbles. Take your time. The slower you go, the fewer bubbles you will get.
Step 6: Press gently if needed.
If the liquid does not quite reach the corners of the cover slip, place a finger gently on top and press very lightly. The surface tension of the water should pull the cover slip flat against the slide. If you see large air bubbles trapped underneath, you can sometimes coax them out by pressing gently on the cover slip near the bubble with the tip of a pencil.
Step 7: Clean up excess liquid.
If water has squeezed out from under the cover slip, wipe it away with a paper towel or lens paper. Do not lift the cover slip to add more liquid once it is in place. If the mount is unsalvageable, start over with a fresh slide rather than trying to fix a bad preparation.
Step 8: Place on the microscope stage.
Your wet mount is ready. Place the slide on the microscope stage with the cover slip facing up. Start at the lowest magnification to locate your specimen, then work your way up to higher magnifications. Remember that wet mounts can dry out under the heat of the microscope lamp, so try to complete your observation within 30 to 60 minutes.
Best Specimens for Wet Mount Slides
Part of the fun of making wet mounts is choosing what to look at. Here are some of the best specimens for home microscopy, ranked from easiest to most rewarding.
Pond water is the undisputed champion of wet mount specimens. A single drop can contain paramecia, amoebas, rotifers, nematodes, algae, and dozens of other microorganisms. Collect water from a pond, puddle, or aquarium, especially near plants or debris where organisms concentrate. This is the specimen most likely to make you gasp the first time you look.
Onion skin is perfect for beginners because it is easy to prepare and shows clear, organized plant cells. Peel a thin, transparent layer from the inside of an onion and mount it in water. You will see rows of rectangular cells with visible cell walls and nuclei.
Saliva or cheek cells require a toothpick scrape from the inside of your cheek, mounted in saline. These flat human cells show nuclei clearly and are a popular choice for school projects. I have seen many students fascinated to discover the microscopic world inside their own mouths.
Yogurt or yeast suspension shows living bacteria or fungal cells. Mix a tiny amount in water and mount a drop. Baker’s yeast activated in warm sugar water will show budding cells within an hour.
Aquarium water, moss extracts, and flower pollen are all excellent choices. Experiment with whatever you find around you. Half the excitement is not knowing what you might discover.
Common Mistakes and How to Avoid Them
Every beginner runs into the same handful of problems. Here is how to fix the four most common wet mount mistakes.
Problem: Air bubbles trapped under the cover slip.
This is the number one complaint from beginners. Air bubbles appear as dark circles with bright rims under the microscope, and they block your view of the specimen. The fix is in your cover slip placement. Always lower the cover slip slowly from a 45-degree angle, starting with one edge touching the liquid drop. Let the water spread by capillary action before lowering the rest of the way. If you already have bubbles, start over with a fresh slide rather than fighting a bad mount.
Problem: The specimen dries out too quickly.
Under the heat of a microscope lamp, even a well-made wet mount can dry out in 30 minutes. To slow evaporation, use a larger volume of mounting liquid, add glycerin to the water, or seal the edges of the cover slip (see the sealing section below). You can also periodically add a tiny drop of water to the edge of the cover slip, where it will wick underneath by capillary action.
Problem: Cover slip floats or slides around.
This means you used too much liquid. One drop is almost always enough. If the cover slip is floating, use a paper towel to gently draw excess liquid out from one edge by capillary action. The cover slip should sit flat against the slide, held in place by surface tension.
Problem: Specimen moves too fast to observe.
Fast-swimming organisms like paramecia can be impossible to track at high magnification. Add a drop of glycerin or a commercial slowing agent like ProtoSlo to your mounting liquid. This increases the viscosity and slows organisms down without killing them, giving you time to observe their structure and behavior in detail.
Problem: You cannot see anything at all.
Check that your specimen is thin enough. Thick specimens block light and produce blurry images. For solid tissues, slice them as thin as possible. For liquid samples, make sure you actually transferred organisms to the slide. Pond water from the surface or near plants will have far more life than clear open water.
How to Seal a Wet Mount Slide for Extended Observation?
If you want to observe your wet mount for more than an hour, or if you want to keep a particularly interesting slide for a day or two, you need to seal the edges. Sealing prevents evaporation and locks the liquid in place.
Vaseline seal: The simplest method is to run a thin line of petroleum jelly (Vaseline) around the edges of the cover slip using a toothpick. This creates a barrier that slows evaporation dramatically. A vaseline-sealed wet mount can remain usable for several days if stored flat in a cool place. This is the method most recommended in microscopy forums for keeping organisms alive for extended observation.
Nail polish seal: For a more durable seal, apply clear nail polish around the edges of the cover slip with a fine brush. The nail polish hardens and creates a permanent seal. This is useful if you want to transport a slide or store it for several days. Be aware that nail polish fumes can affect sensitive organisms, so let the polish dry fully before observation.
Valap seal: Advanced hobbyists sometimes use Valap, a 1:1:1 mixture of Vaseline, lanolin, and paraffin wax, melted together and applied warm. This creates a professional-grade seal that lasts weeks. It is more effort than most home users need, but it is the gold standard for long-term wet mount preservation.
Even sealed slides are still temporary mounts. They will eventually degrade as organisms die or the specimen breaks down. For truly permanent preservation, you would need to transition to a permanent mounting medium like Canada balsam or a synthetic resin, which involves dehydration and chemical fixation steps beyond the scope of basic wet mount preparation.
Frequently Asked Questions
What are the steps for preparing a wet mount microscope slide?
To prepare a wet mount: 1) Clean a glass slide and cover slip. 2) Place a small specimen in the center of the slide. 3) Add one drop of water or saline on top of the specimen. 4) Hold a cover slip at a 45-degree angle with one edge touching the liquid. 5) Slowly lower the cover slip to avoid trapping air bubbles. 6) Wipe away excess liquid. The slide is ready for viewing under the microscope.
How to prepare a microscope slide at home?
You can prepare a microscope slide at home using a clean glass slide, a cover slip, a dropper, and water. Place your specimen on the slide, add one drop of water, and lower the cover slip slowly at a 45-degree angle. Common household items like toothpicks and eyedroppers work well as substitutes for lab tools.
What are common errors in wet mount preparation?
The most common errors are trapping air bubbles by lowering the cover slip too quickly, using too much or too little liquid, placing too thick a specimen on the slide, and letting the mount dry out under the microscope lamp. To avoid bubbles, lower the cover slip slowly from a 45-degree angle. Use exactly one drop of liquid and keep specimens thin.
When preparing a wet mount slide, how should you place the cover slip?
Hold the cover slip at a 45-degree angle with one edge touching the slide next to the water drop. The liquid should make contact with the lowered edge. Slowly lower the raised edge down, letting the water spread underneath by capillary action. This technique pushes air out ahead of the liquid and prevents bubbles from forming.
What liquid should I use for a wet mount slide?
Use distilled or tap water for most specimens like pond water, plant tissue, and aquatic microorganisms. Use physiological saline (0.9 percent salt solution) for human or animal cells to prevent them from bursting. Use glycerin mixed with water to slow down fast-moving organisms like paramecia for easier observation.
How long does a wet mount slide last?
An unsealed wet mount typically lasts 30 to 60 minutes before drying out under the microscope light. Sealing the edges with Vaseline can extend this to several days. Nail polish seals last even longer. For truly permanent preservation, you need to transition to a permanent mounting medium with chemical fixation.
Conclusion
Learning how to prepare a wet mount microscope slide at home opens up an entire hidden world of microscopic life and cellular structure. With just a glass slide, a cover slip, a drop of liquid, and a steady hand, you can observe living organisms that most people will never see in their lifetime.
The key takeaways: clean your glass thoroughly, use exactly one drop of liquid, lower the cover slip slowly from a 45-degree angle to prevent air bubbles, and choose the right mounting liquid for your specimen. Start with pond water for the most exciting results, and do not be discouraged if your first few attempts trap bubbles. Like any skill, it gets easier with practice.
Grab a slide, find some water from a nearby pond or puddle, and start exploring. The microscopic world is waiting.