
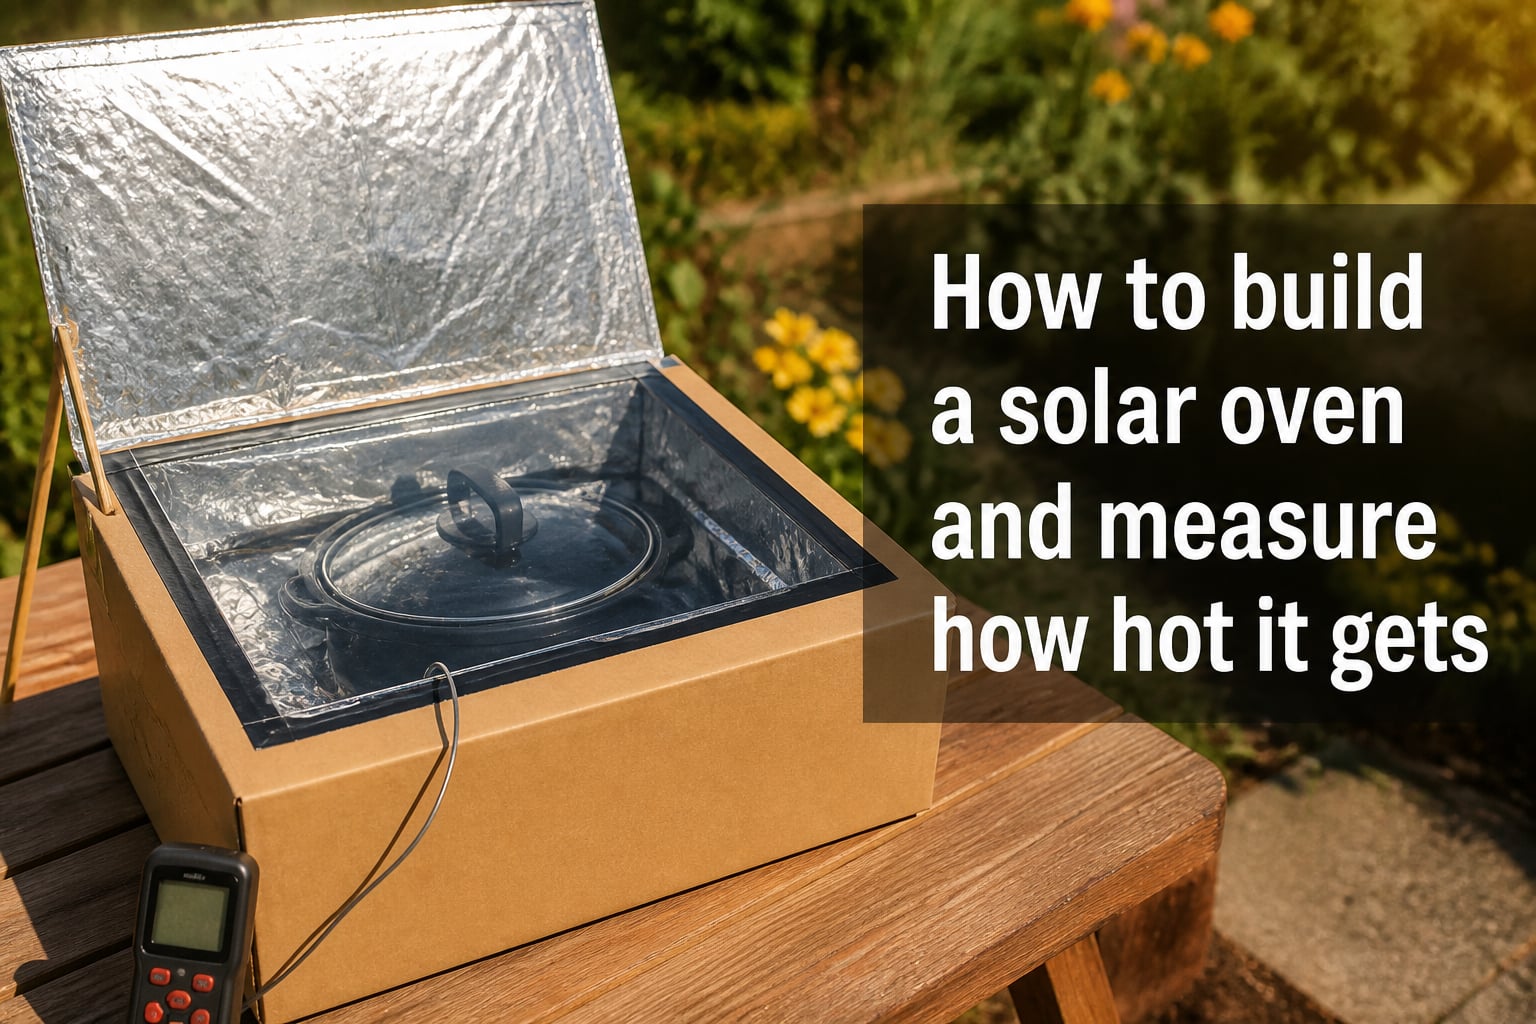
Learning how to build a solar oven and measure how hot it gets is one of the most rewarding hands-on science projects you can tackle at home. A well-built homemade solar oven can reach temperatures between 200 and 350 degrees Fahrenheit using nothing but sunlight and materials you probably already have lying around your garage.
Our team has tested multiple solar oven designs, from simple pizza box builds to wooden box cookers, and we have logged real temperature data across each one. The goal of this guide is to walk you through every step, from gathering materials to tracking your oven’s temperature throughout the day.
Whether you are building this for a school STEM project, an off-grid cooking setup, or just to understand how renewable energy works, you will leave with a working solar cooker and a solid measurement plan. Let’s get started.
Table of Contents
What Is a Solar Oven and How Does It Work?
A solar oven is a device that captures heat from the sun using reflective surfaces to concentrate sunlight onto a dark cooking pot, creating temperatures high enough to cook food. It works without fuel, electricity, or fire, making it one of the cleanest cooking methods available.
The science behind a solar oven comes down to three principles of heat transfer. First, radiation: sunlight travels through space and enters your oven through a transparent lid. Second, absorption: the dark interior and dark cooking pot convert that visible light into thermal energy. Third, insulation: materials like cardboard, newspaper, or foam prevent the trapped heat from escaping.
Think of it like a greenhouse sitting inside a magnifying glass. The reflective panels direct extra sunlight into the box, the glass or plastic lid lets light in but stops heat from radiating back out, and the insulated walls hold the warmth inside. On a clear day, that combination can push internal temperatures past the boiling point of water.
This is why solar ovens are popular for sustainable living, emergency preparedness, and off-grid cooking. They cost almost nothing to operate and pose no fire risk when built and used correctly.
Materials You’ll Need to Build a Solar Oven
Gathering the right materials before you start makes the build go smoothly. Here is what we recommend for a standard cardboard box solar oven, which is the most beginner-friendly design.
For the box structure:
1 medium cardboard box (about 12 x 12 x 12 inches or larger)
1 smaller cardboard box that nests inside the first one
Aluminum foil roll or reflective mylar film
Clear plastic wrap, a heavy-duty oven bag, or a piece of glass
For insulation and assembly:
Black construction paper or non-toxic black paint
Newspaper, shredded paper, or foam for insulation
Clear packing tape and duct tape
Box cutter or scissors
Ruler or measuring tape
Glue stick or contact cement
For cooking and measuring temperature:
1 dark, lightweight cooking pot with a lid (cast iron is too heavy)
1 oven or probe thermometer rated for at least 400 degrees Fahrenheit
1 wooden stick or prop for the reflector flap
The total cost for these materials typically runs under $20 if you are using recycled boxes and household items. The thermometer is the one piece worth spending a few extra dollars on, since accurate measurement is half the fun of this project.
How to Build a Solar Oven Step by Step
Building a solar oven takes about an hour once you have your materials ready. Follow these steps in order, and you will have a working cooker by the end.
Step 1: Prepare the Outer Box
Take your larger cardboard box and make sure it is clean and dry. Cut the flaps off the top if they are still attached. This box will serve as the insulated shell that holds heat inside.
Step 2: Line the Reflective Lid
Cut one side of a second cardboard box into a large flap that is slightly wider than your outer box opening. Cover the inside of this flap completely with aluminum foil, shiny side up, and smooth out as many wrinkles as you can. Glue or tape the foil down flat, because smooth surfaces reflect more light than crinkled ones.
Attach this foil-covered flap to the back edge of your outer box using duct tape so it acts as a hinged reflector that can tilt up and down.
Step 3: Insulate the Walls
Crumple sheets of newspaper and pack them around the outside of your smaller inner box, between the inner box and the outer box. This insulation layer is what stops heat from escaping through the cardboard walls. Pack it snugly but do not crush the boxes.
Step 4: Create the Black Interior
Line the bottom and inside walls of your smaller inner box with black construction paper or paint them flat black. Black surfaces absorb the most sunlight and convert it to heat, which is the single most important factor in how hot your solar oven will get.
Step 5: Add the Transparent Lid
Cut a piece of clear plastic wrap, an oven bag, or glass to fit snugly across the top opening of your outer box. Tape it down on all four sides so there are no gaps. This transparent layer lets sunlight enter but traps the resulting heat inside, exactly like a greenhouse.
If you are using plastic wrap, consider doubling it for durability. Glass from an old picture frame works even better because it traps heat more effectively and can handle higher temperatures.
Step 6: Set the Reflector Angle
Prop the foil-covered reflector flap open at roughly a 45-degree angle using a stick or a piece of cardboard. The goal is to bounce additional sunlight down through the transparent lid and into the black cooking chamber. Adjust the angle until the reflected light hits the center of the box.
Step 7: Place Your Cooking Pot
Put your dark, lidded cooking pot inside the black interior. Use small wads of foil or a wire rack to lift the pot slightly off the floor of the oven, because air circulating underneath the pot helps heat it more evenly. Close the transparent lid and you are ready to cook.
How to Measure Temperature Inside Your Solar Oven?
Measuring how hot your solar oven gets is the part that most guides skip, but it is exactly what makes this project genuinely exciting. There are three reliable ways to track temperature, and each has its own strengths.
Option 1: Oven or Probe Thermometer (Best Overall)
An oven-safe dial thermometer is the simplest and most affordable tool for this project. Place it inside the oven next to your cooking pot, ideally propped up so the dial faces the transparent lid where you can read it without opening the box.
A probe thermometer with a wire is even better. You can run the wire under the lid and read the temperature on a digital display outside the oven, which means you never lose heat by opening the lid to check. Our team prefers this method for any serious data logging.
Look for a thermometer rated to at least 400 degrees Fahrenheit with clear markings every 10 degrees or finer.
Option 2: Infrared Thermometer (Best for Surface Readings)
An infrared thermometer lets you point and shoot to get an instant surface temperature reading. This is perfect for checking the temperature of your cooking pot, the oven floor, or the inside walls without opening the lid.
Keep in mind that infrared thermometers measure surface temperature, not air temperature. The air inside your oven will actually be hotter than the surface of a reflective wall, so use IR readings as a supplement rather than your primary measurement.
Option 3: Candy Thermometer (Best for Liquids)
If you are heating water or making a soup, clip a candy thermometer to the side of your pot with the probe submerged in the liquid. This gives you a direct reading of your food temperature, which is what really matters for food safety and doneness.
Candy thermometers typically read up to 400 degrees Fahrenheit and cost under $10, making them a great budget option for solar cooking experiments.
How to Log Your Temperature Data
To get the most out of your build, record the temperature every 15 to 30 minutes over a two to three hour window. Note the time, temperature, and weather conditions (sunny, partly cloudy, ambient air temperature) for each reading.
This simple log turns your solar oven into a real science experiment. You can graph the results, compare different designs, or test how angle adjustments affect the temperature curve. We have found that sharing these logs makes for an excellent science fair display or classroom presentation.
Expected Temperature Ranges by Design Type
Not all solar ovens perform the same, and your design choice directly affects how hot your oven will get. Here is what our testing and community reports show for each major design type.
Pizza box solar oven: The simplest design reaches about 150 to 200 degrees Fahrenheit on a sunny day. This is enough to melt cheese, warm leftovers, and make s’mores, but it will not fully cook raw meat.
Cardboard box solar oven (the design in this guide): A well-insulated cardboard box with foil reflectors typically hits 200 to 275 degrees Fahrenheit. That is hot enough to bake cookies, cook rice, and slow-cook vegetables.
Wooden box solar oven: A sturdier wooden build with glass lid and quality insulation can reach 250 to 350 degrees Fahrenheit. These hold heat longer and perform better in partial shade or cooler weather.
Parabolic solar cooker: A curved parabolic reflector concentrates sunlight onto a single point and can exceed 400 degrees Fahrenheit. These are the most powerful but also the hardest to build and aim correctly.
Ambient temperature and sunlight intensity matter as much as design. On a 90-degree clear day, even a simple cardboard oven can outperform a wooden oven used on a 60-degree overcast afternoon.
Optimal Angle and Sun Tracking Techniques
The angle of your reflector and the position of your oven both have a big impact on temperature. A poorly aimed oven can lose 50 degrees or more compared to one that is properly aligned with the sun.
Start by placing your oven on a flat, level surface in full sun with no tree or building shadows. Point the transparent lid opening toward the sun and tilt the reflector flap so the reflected beam lands squarely on the black interior.
The best angle for your reflector depends on the sun’s height in the sky. Around midday in summer when the sun is high overhead, a flatter reflector angle of about 30 degrees works best. In winter when the sun sits lower, tilt the reflector closer to 60 degrees.
The sun moves about 15 degrees across the sky each hour, so you should reposition your oven every 30 to 60 minutes for maximum heat. If you want to avoid constant adjusting, point the oven due south at solar noon and accept slightly lower temperatures in the early morning and late afternoon.
For seasonal adjustments, the sun traces a higher arc in summer and a lower arc in winter. Compensate by raising the back of the oven slightly in winter so the transparent lid faces the lower sun more directly.
Cooking Tips and Times for a Solar Oven
Solar cooking is slower than a conventional oven, so plan ahead and embrace the low-and-slow approach. Here is what to expect for common foods in a cardboard box oven reaching 250 degrees Fahrenheit.
Rice and grains cook in about 60 to 90 minutes. Cut vegetables like potatoes, carrots, and onions take 60 to 120 minutes depending on size. Baked goods like cookies and brownies typically finish in 45 to 75 minutes.
Always preheat your oven for 20 to 30 minutes before adding food. Use a dark, lidded pot to trap moisture and speed up cooking. Cut food into smaller pieces than you normally would, since smaller items heat through faster at lower temperatures.
Avoid opening the lid to check on food. Every time you lift the transparent cover, you lose 30 to 50 degrees of heat that takes 10 minutes or more to rebuild. Trust your thermometer instead.
Troubleshooting Common Solar Oven Problems
If your solar oven is not getting hot enough, the problem usually comes down to one of a few common issues. Here is how to diagnose and fix them.
Problem: Oven barely reaches 150 degrees. Check for gaps around your transparent lid where heat can escape. Re-tape all seams and make sure the reflector is actually bouncing light into the box, not away from it.
Problem: Temperature peaks early then drops. Your oven may have lost its alignment with the sun. Reposition it every hour and verify that no new shadows have crept across the reflector.
Problem: Interior is bright instead of dark. If you used a light-colored box without the black liner, the walls are reflecting light instead of absorbing it. Add black construction paper or paint to every interior surface.
Problem: Plastic wrap melts or sags. Your oven is working well but the lid material is too thin. Switch to an oven bag or a piece of glass, both of which handle temperatures above 300 degrees without issue.
Safety Precautions to Follow
Solar ovens do not use open flames, but they can still cause burns and food safety problems if you are not careful. Follow these precautions every time you cook.
Always use oven mitts when handling pots and lids. Interior surfaces and cooking pots can exceed 250 degrees Fahrenheit and will cause burns on contact.
Use a food thermometer to verify that meat dishes reach safe internal temperatures. Chicken should hit 165 degrees, ground meat 160 degrees, and whole cuts of beef or pork 145 degrees. If your oven cannot maintain these temperatures, stick to foods like rice, vegetables, and baked goods.
Never use a solar oven with damaged glass or melting plastic. Replace lid materials at the first sign of warping, and keep cardboard ovens away from any open flame or heat source other than sunlight.
Do not leave food in the oven after the sun drops and the temperature falls below 140 degrees. Bacteria grow rapidly in the danger zone between 40 and 140 degrees, so refrigerate leftovers promptly.
Frequently Asked Questions
How hot does a DIY solar oven get?
A DIY solar oven typically reaches between 200 and 275 degrees Fahrenheit on a sunny day. Simple pizza box designs hit around 150 to 200 degrees, while well-insulated cardboard or wooden box ovens can reach 250 to 350 degrees Fahrenheit.
What is the best angle for a solar oven?
The best reflector angle is about 30 degrees in summer when the sun is high and 60 degrees in winter when the sun is lower. Aim the oven opening toward the sun and adjust the reflector until reflected light hits the center of the cooking chamber.
How does a solar oven collect heat?
A solar oven collects heat by using reflective panels to direct sunlight through a transparent lid into a dark, insulated chamber. The dark interior absorbs visible light and converts it to thermal energy, while the transparent lid and insulated walls trap that heat inside.
What temperature do solar ovens reach?
Solar ovens reach temperatures from 150 to over 400 degrees Fahrenheit depending on design. Cardboard box ovens typically reach 200 to 275 degrees, wooden box ovens reach 250 to 350 degrees, and parabolic cookers can exceed 400 degrees Fahrenheit.
Can you measure solar oven temperature without a thermometer?
You can estimate temperature using water: if water simmering inside your pot produces steady bubbles, your oven is around 190 to 200 degrees Fahrenheit. For accurate readings, however, an oven-safe thermometer rated to 400 degrees is strongly recommended.
How long does it take to cook food in a solar oven?
Cooking times in a solar oven are roughly two to three times longer than a conventional oven. Rice takes 60 to 90 minutes, vegetables take 60 to 120 minutes, and baked goods finish in 45 to 75 minutes at typical solar oven temperatures around 250 degrees Fahrenheit.
Final Thoughts
Now you know exactly how to build a solar oven and measure how hot it gets using simple materials and a reliable thermometer. The build itself takes about an hour, and with proper insulation, a black interior, and a well-angled reflector, you can expect temperatures between 200 and 350 degrees Fahrenheit on a sunny day.
Grab your materials, pick a clear afternoon, and start logging your temperature readings. Once you have your baseline data, try tweaking the reflector angle, swapping the lid material, or comparing a cardboard design against a wooden one to see what pushes your numbers higher.
Solar cooking is a practical skill and a great introduction to renewable energy. Every batch of cookies or pot of rice you cook with sunlight is free energy that would have otherwise come from your stove. Build it, measure it, and cook something delicious.