
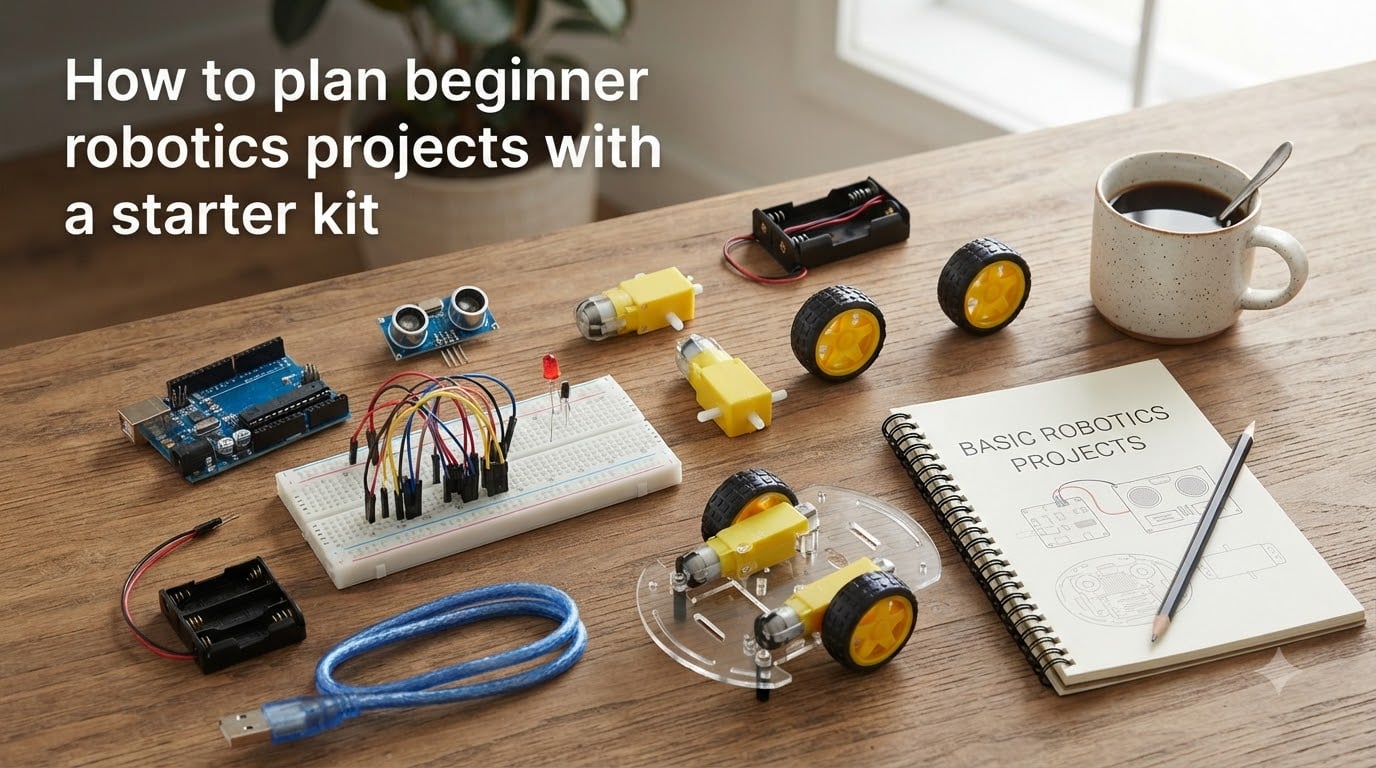
If you have ever opened a robotics starter kit, stared at the small plastic bag of wires and circuit boards, and thought “where do I even begin?” you are definitely not alone. We have been there, and it is exactly the moment this guide was written for.
Planning beginner robotics projects with a starter kit does not require an engineering degree, a massive budget, or even any prior programming experience. It only requires a clear system: understanding what the kit contains, choosing the right project for your skill level, learning the smallest possible set of programming concepts, and following a few repeatable steps before, during, and after each build. In this guide, I will walk you through that exact system, drawing on the most common kit layouts, the projects I have seen succeed in classrooms and homes, and the pain points Reddit users keep raising.
By the end, you will have a clear roadmap for turning a box of unfamiliar parts into a working robot that you programmed, wired, and built yourself. Let us get started.
Table of Contents
What Is a Robotics Starter Kit?
A robotics starter kit is a pre-selected bundle of components that gives a beginner everything needed to build, program, and learn from a small robot. At its core, a kit includes a microcontroller (the small “brain” of the robot), sensors (so the robot can sense the world), motors (so it can move), and the supporting hardware (wires, breadboard, chassis, and a USB cable) to connect everything together.
The genius of these kits is that they remove the hardest part of starting robotics: figuring out which parts are compatible. Instead of buying a microcontroller from one shop and a motor driver from another, you get a matched set tested to work together. Most kits also include a printed or digital guide with sample projects, so you are not staring at silent components.
Who needs one? Pretty much anyone dipping a toe into STEM robotics. Students aged 10 and up, adults returning to hobbies, homeschool families, after-school clubs, and teachers building a STEM curriculum all use robotics starter kits as the entry point. The actual complexity scales with the kit: a $30 kit may simply blink an LED, while a $150 kit can support Bluetooth-controlled cars with obstacle avoidance.
Looking ahead to 2026, robotics kits are increasingly bundling AI-friendly microcontrollers and lesson libraries, but the underlying planning approach stays the same.
Essential Components of a Robotics Starter Kit
Most beginner robotics projects rely on the same core components. Knowing what each one does turns a confusing pile of parts into a clear toolbox. Here is what you will typically find in an educational robotics starter kit.
Microcontroller. The microcontroller is the brain that runs your code. The Arduino Uno is the most common choice for beginners because it is inexpensive, has thousands of tutorials, and works with drag-and-drop coding environments. Raspberry Pi Pico and ESP32 boards appear in more advanced kits, but they add complexity.
Sensors. Sensors let your robot react to its environment. The most common types in a starter kit are ultrasonic sensors (measuring distance for obstacle avoidance), infrared sensors (detecting lines or nearby objects), light sensors, and temperature sensors. A beginner project using an ultrasonic sensor is one of the most rewarding first builds.
Motors and motor drivers. DC motors spin the wheels, and servo motors move arms or pan cameras. Motors need more current than a microcontroller can supply directly, so a motor driver board (like the L298N) sits between them.
Chassis and mechanical parts. The chassis is the frame your robot lives on. Most kits include acrylic or metal plates, four wheels, screws, and standoffs. Higher-end kits include a chassis with mounting holes for sensors and a battery holder.
Passive parts. Resistors, capacitors, LEDs, pushbuttons, a breadboard, and jumper wires round out the kit. These are the unsung heroes that make circuits work and let you prototype without soldering.
USB cable and battery pack. The USB cable connects your microcontroller to a computer for programming, and the battery pack (usually AA or 18650) powers the robot once it is untethered.
How to Choose the Right Kit for Your Goals
Choosing the right starter kit is the single biggest decision in beginner robotics projects. The wrong kit leads to frustration, abandoned projects, and a pile of unused parts. The right kit grows with you for a year or more.
Match the kit to your age and skill level. Most manufacturers label kits for ages 8+, 10+, 12+, or 14+. For children under 10, look for kits with snap-together parts and block-based coding (Scratch or Blockly). For teens and adults, a kit with Arduino IDE compatibility is the best long-term investment because text-based coding is more powerful and transferable.
Decide between Arduino and Raspberry Pi. Arduino is the safer choice for pure robotics beginners because it runs one program at a time, has predictable behavior, and is forgiving of wiring mistakes. Raspberry Pi is a full computer, which means more power but also more ways to break things. For motor control and sensor integration, Arduino wins. For image recognition or web-connected robots, Raspberry Pi begins to make sense.
Think about classroom vs home use. Classroom kits need to be durable, easy to reset, and ideally reusable across multiple students. Many STEM robotics kits marketed for schools include parts storage boxes and workbooks. Home kits can be more experimental and less structured.
Plan your budget. A reliable beginner robotics kit runs between $50 and $150. Below $50, you risk missing essential components (especially motor drivers) or poor documentation. Above $150, you are usually paying for a brand name or a more advanced microcontroller you do not yet need. Reddit users consistently warn against kits under $30 because they often skip critical parts like the motor driver or include no tutorials.
Check the documentation and community. Before buying, search for “[kit name] tutorial” or “[kit name] project ideas”. A kit with an active community, YouTube tutorials, and an updated website is worth paying a little more for, because it will save you hours of troubleshooting.
How to Plan Beginner Robotics Projects with a Starter Kit: Step by Step
Most beginners jump straight into building without planning, then feel lost when something breaks. A short planning pass before each project saves hours and leads to better outcomes. Here is the planning framework I use with my own students and at science fairs.
Step 1: Define the goal in one sentence. Write down what the robot should do. “Make a car that avoids walls” beats “build a robot” because it is testable. A clear goal drives every later decision about which sensors, motors, and code you need.
Step 2: Identify the components you will use. Open your kit and lay out the parts. Match the goal to the components: obstacle avoidance needs an ultrasonic sensor and two motors; line-following needs two IR sensors and two motors. Do not use parts that are not in the goal. Beginners often over-build, which triples the chance of bugs.
Step 3: Draw the wiring before you plug anything in. On paper, draw the microcontroller, the sensor, and the motor driver. Mark which pins connect. This is the single habit that prevents the most common beginner failure: wiring errors. A 30-second sketch avoids the 30-minute debug session later.
Step 4: Build the robot chassis first. Assemble the wheels, motors, and frame before adding electronics. A robot with a stable chassis is easier to debug than one held together with tape.
Step 5: Test each subsystem in isolation. Upload a simple sketch to read the sensor value and print it to the serial monitor. Confirm the motors spin the right direction. This step catches 80% of wiring errors before they become mysterious bugs.
Step 6: Combine subsystems with simple logic. Once each part works alone, write the combined code. Start with the simplest version: “if distance is less than 20 cm, stop and turn.” Avoid adding features until the simple version works.
Step 7: Test, iterate, and document. Run the robot. Watch what it does. Predict what should happen, then compare. Note what went wrong and fix it. Take a short video each iteration. The documentation becomes your debugging journal and your future reference.
This seven-step process is what most competitors skip, and it is the biggest reason beginners get stuck. Treat each project as a small experiment, not a single attempt at success.
Programming Basics for First-Time Builders
Programming is the part that intimidates beginners the most, but robotics programming is more approachable than general software development because you can see your code do something in the real world. Here is the minimum you need to start.
Block-based coding: Scratch and Blockly. These visual environments let you drag and drop code blocks like puzzle pieces. They are great for absolute beginners, especially younger learners, and they introduce core concepts (loops, conditions, variables) without syntax errors. Most Arduino kits include a Scratch-style interface as their entry point.
Text-based coding: Arduino IDE. When you are ready, switch to the Arduino IDE. The language is based on C++ but is heavily simplified. A typical beginner sketch is 20 to 40 lines. You only need to learn a few concepts: variables (to store sensor readings), digitalRead and digitalWrite (to read sensors and control LEDs), analogRead (to read light or distance sensors), and if/else statements (to make decisions).
Core concepts to learn first. Order matters. Before writing your first line of code, focus on four ideas: inputs and outputs (reading a sensor is an input, controlling a motor is an output), conditions (if the sensor reads X, then do Y), loops (repeat these actions continuously), and variables (store a value to use later). Roughly 90% of beginner robotics projects use only these four concepts.
When to leave block-based coding behind. Drag-and-drop is fine for the first few projects, but it can hold you back. Reddit users strongly recommend learning text-based coding within a few weeks because it is the language used in real-world robotics, Arduino forums, and almost every tutorial beyond the basics.
Beginner Robotics Projects You Can Build This Week
Project ideas matter because the wrong first project either feels too easy (and you never learn anything) or too hard (and you quit). Here is a progression that builds skills in the right order.
Project 1: Blink an LED. This is the “hello world” of robotics. You will install the Arduino IDE, connect your board, and upload a sketch that makes an LED blink. It teaches software setup, code upload, and the basic structure of a sketch. Takes 30 minutes.
Project 2: Control a motor. Wire a single DC motor to your microcontroller through a motor driver. Write code that spins the motor forward for 3 seconds, then backward for 3 seconds. This teaches motor drivers and PWM (pulse width modulation) for speed control.
Project 3: Read a sensor. Connect an ultrasonic sensor and print the distance to your serial monitor. Wave your hand in front of it and watch the numbers change. This teaches sensor reading and serial communication, two skills you will use in every later project.
Project 4: Build an obstacle avoidance robot. Combine two motors and one ultrasonic sensor. Write code that drives forward, stops when an obstacle is closer than 20 cm, looks left and right, and turns toward the clearer side. This is the classic first “real” robot and it teaches integration of subsystems.
Project 5: Build a line-following robot. Replace the ultrasonic sensor with two IR line sensors mounted under the chassis. Write code that makes the robot follow a black line on a white surface. This teaches feedback loops and is a great stepping stone to more complex autonomous behavior.
Project 6: Add a Bluetooth module. Once your robot moves reliably, add an HC-05 Bluetooth module and a simple phone app. Drive the robot from your phone. This teaches serial communication with external devices and opens the door to remote control projects.
Each project should take 1 to 4 hours. If a project is taking longer than a weekend, simplify the goal. The goal is to build skills, not to finish a single build.
Common Problems and How to Fix Them
Almost every beginner runs into the same handful of problems. Forewarned is forearmed. Here is a troubleshooting checklist for the most common frustrations.
Problem: Code does not upload. This is almost always the wrong board selected in the Arduino IDE or the wrong serial port. Go to Tools > Board and pick your exact microcontroller, then Tools > Port and pick the COM or USB port that appeared when you plugged in the cable. If neither works, try a different USB cable (many charging cables do not carry data).
Problem: Motor does not spin. Check that the motor driver is receiving power (usually a separate battery pack, not the USB cable). Verify the wiring: enable pin, input pins, and ground. Test the motor directly with a battery to confirm it is not broken.
Problem: Sensor reads zero or random values. The most common cause is missing ground wires. Every sensor needs three connections: power, ground, and signal. A missing ground is the silent killer of beginner projects. Also check that you are using the correct pin mode in your code (input vs output).
Problem: Robot moves but does not respond to the sensor. The wiring is probably right but the code logic is wrong. Print the sensor value to the serial monitor and check whether the threshold in your if statement is correct. Beginners often set the threshold too high or too low.
Problem: Pieces do not fit. Cheap kits sometimes have slightly misaligned holes or instructions written for a different version. Check the manufacturer’s website for the latest instructions PDF. Some kits also publish 3D-printed correction files if a part is consistently wrong.
Problem: I do not know what to do next. This is the most common beginner robotics projects problem, and the most overlooked. The answer is to pick a more challenging version of what you already built: add a second sensor, add Bluetooth, switch to a different microcontroller, or add a display. The progression is the project plan.
Frequently Asked Questions
What is a robotics starter kit?
A robotics starter kit is a pre-selected bundle of components including a microcontroller, sensors, motors, a chassis, and connecting hardware. It is designed to give beginners a matched set of parts that work together, removing the guesswork of buying compatible components separately. Kits typically include tutorials or sample projects to guide the first builds.
What is usually found in an educational robotics starter kit?
Most educational robotics starter kits include a microcontroller (most commonly an Arduino-compatible board), one or more sensors (often ultrasonic and infrared), DC motors with a motor driver, wheels and a chassis, a breadboard, jumper wires, LEDs, resistors, a USB cable, and a battery pack. Better kits also include printed instructions or access to an online project library.
In what way does a STEM robotics starter kit aid learning?
A STEM robotics starter kit combines electronics, mechanical assembly, and programming into a single hands-on activity. This integration builds problem-solving skills, teaches the scientific method through trial and error, and gives learners an immediate, tangible result for their code. The combination of disciplines is what makes robotics one of the most effective STEM learning tools.
Are these kits appropriate for use in the classroom?
Yes, many robotics kits are designed specifically for classroom use. Look for kits with durable components, organized storage, lesson plans aligned to curriculum standards, and reusable parts. Classroom kits typically cost more but include teacher guides and support materials that home kits often lack.
Is any prior skill in programming necessary to use these kits?
No prior programming is required for most beginner kits. Most include a block-based coding interface (Scratch or Blockly) that lets newcomers drag and drop code blocks. After a few projects, it is highly recommended to learn text-based coding in the Arduino IDE, since that is the language used in real-world robotics and most advanced tutorials.
What is the ideal age for these kits?
Simple kits with block-based coding are suitable for ages 8 and up. Kits with Arduino text-based coding and more complex wiring are appropriate for ages 12 and up, including adults. The key factor is reading level and patience for troubleshooting, not raw age. Many adults find robotics kits more rewarding than kids do.
What kind of robot would you build for learning robotics?
The most common first robot is a two-wheeled car with an ultrasonic sensor for obstacle avoidance. It teaches every core skill: motor control, sensor reading, decision-making logic, and mechanical assembly. From there, most learners build a line-following robot, then add Bluetooth or a second sensor for more complex behavior.
Are robotics kits good for learning actual transferable tech skills?
Yes. Robotics builds skills in programming (especially C++ via Arduino), electronics, mechanical assembly, debugging, and systems thinking. These skills transfer directly to careers in software engineering, embedded systems, electrical engineering, and product design. Hobbyists often find robotics the most practical gateway into STEM fields.
Start Building Today
Planning beginner robotics projects with a starter kit is not about getting everything right on the first try. It is about building a repeatable process: define the goal, pick the right components, sketch the wiring, test each subsystem, and iterate. That is the same process that professional engineers use, scaled to a 24-hour project.
Pick one starter kit that matches your age and budget. Start with the blink-an-LED project. Move to motor control, then sensor reading, then your first obstacle avoidance robot. By the end of your first week, you will have a small but real robot that you built and programmed yourself. That is the moment everything clicks, and it is the start of a much bigger journey into STEM robotics, electronics, and programming.
The best time to start beginner robotics projects is today. The kit is on your desk, the parts are waiting, and the only thing missing is the first sketch upload.