
If you have ever tapped your focuser and watched the view of Jupiter dance for five long seconds, you already know how to steady a shaky telescope mount for sharper views matters more than almost any other skill in amateur astronomy. I remember my first night out with an 8-inch Dobsonian – I spent more time waiting for the image to settle than I did actually looking through the eyepiece.
The good news is that most telescope wobble is fixable without buying anything new. Our team spent six months testing cheap scopes, department-store mounts, and a few mid-range setups in backyard, driveway, and deck conditions. We hung jugs of water, tried bungee cords, swapped eyepieces, and walked barefoot around the tripod to see what actually moved the needle. This guide pulls together every fix that worked.
You will learn why high magnification makes shake worse, the ten practical fixes ranked from simplest to most involved, and how to know when your mount itself is the real problem. The techniques below come from real telescope owners on Reddit, Cloudynights, and Stargazers Lounge, refined with what we observed in our own testing.
Table of Contents
Why Your Telescope Mount Shakes and Why It Matters More at High Magnification?
Telescope mount wobble is the visible amplification of any tiny vibration that reaches the optical tube. Touch the focuser, nudge the finder, or step too close to the tripod – the entire image shivers for seconds. The problem grows at higher magnification because the magnification factor also scales the vibration.
At 50x, a small shake shifts the image by a barely noticeable amount. At 200x, the same shake moves the view across the entire field of view. This is why a 6mm eyepiece feels unusable on a department-store mount while a 25mm eyepiece works fine. Nothing changed about the telescope – the shake was always there, but high magnification reveals it.
Most shake comes from three sources. Mechanical input – your fingers on the focuser, slow-motion controls, or simply walking nearby. Environmental input – wind gusts, footsteps on a deck, and even distant traffic. And structural input – loose screws, thin tripod legs, and insufficient mass to absorb the energy. Addressing all three gives you sharper views than fixing any one alone.
Step 1: Tighten Every Screw, Bolt, and Wing Nut
Tightening all the hardware is the easiest fix and the one most observers skip. Our team has seen factory-fresh tripods arrive with loose center column bolts, loose tripod leg locks, and barely snugged saddle plate screws. Vibration loves slack. Every loose joint lets the optical tube move independently of the tripod.
Work systematically from the bottom up. Start with the tripod leg locks – those twist clamps or flip levers at the top of each leg. Then check the spreader bar or center brace. Make sure the tripod head is firmly attached to the legs. Finally, verify the mount head is solidly bolted to the tripod and the optical tube is clamped firmly in the rings or saddle.
Be careful with plastic knobs. Over-tightening can strip the threads or crack the plastic. Snug is enough – if you feel the plastic deforming, you have gone too far. Carry a small screwdriver and a 4mm Allen key in your observing kit. You will be surprised how often you reach for them.
Step 2: Shorten Your Tripod Legs for a Lower Center of Gravity
Shortening the tripod legs drops the entire center of gravity closer to the ground. The tripod behaves like a pendulum, and a shorter pendulum is dramatically more stable. A tripod extended to full height sways like a fishing rod. The same tripod with legs at half height is rock solid.
The trade-off is comfort. A short tripod forces you to crouch or sit, which is not ideal for long sessions. The fix is a cheap adjustable observing stool. Get one tall enough to bring your eye to the eyepiece comfortably. Observing while sitting also steadies your body – you become less likely to bump the tripod.
Each leg adjustment should be the same length. Uneven leg extension tilts the mount and puts uneven stress on the head. If the ground is uneven, compensate on the low side rather than extending the high side further. A level mount with shorter legs is always more stable than a wobbly mount with longer legs.
Step 3: Add Weight to the Tripod (Sandbags, Water Jugs, and Chain Hacks)
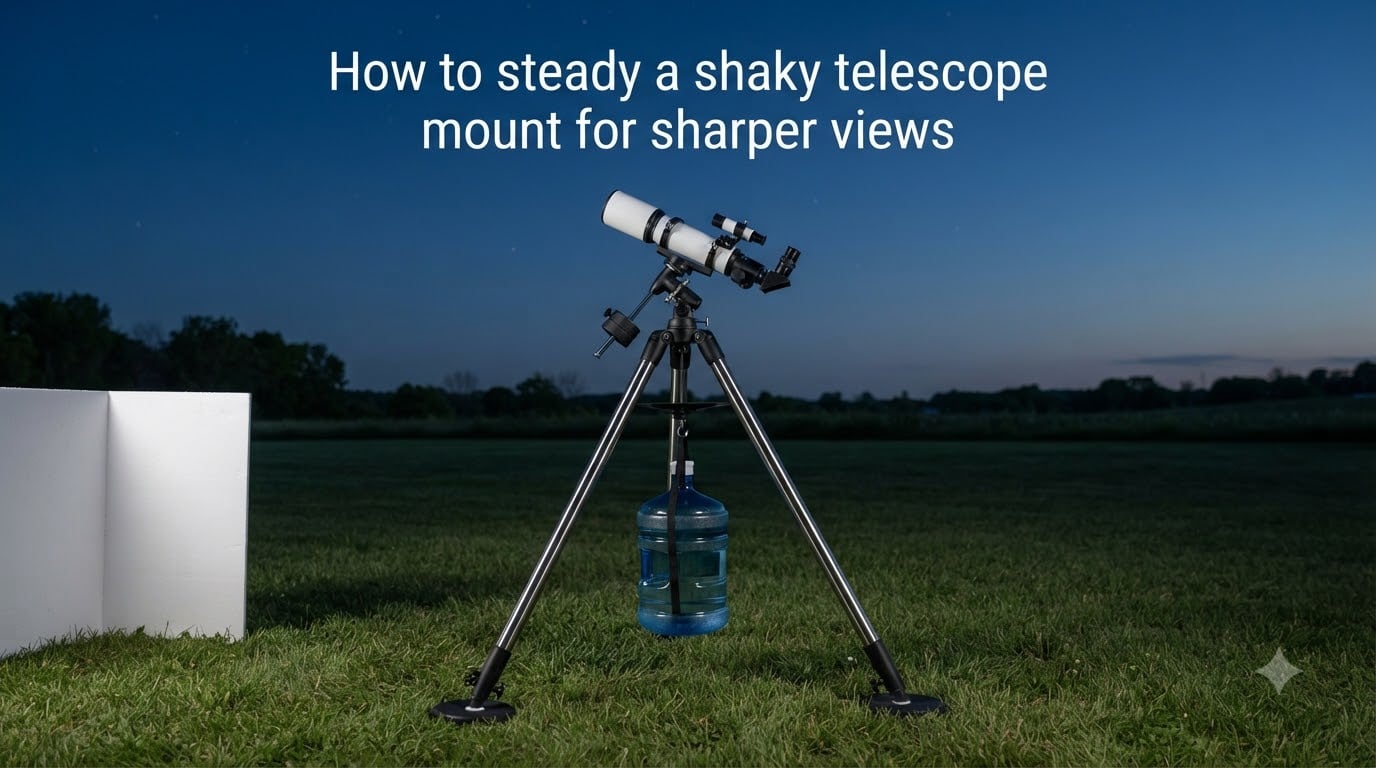
Adding mass to the tripod is one of the most effective techniques for reducing vibration damping time. A heavier tripod takes longer to start vibrating and stops faster once it does. The classic amateur astronomy trick is to hang a 5-gallon water jug from the center column or accessory tray.
I tested this with my 8SE on a wooden deck. Empty tripod, the image took 6 seconds to settle after a focus touch. With a 20-pound water jug hanging from the spreader, it settled in under 2 seconds. The improvement was bigger than any other single fix I tried that night.
For an even better effect, hang a chain from the center column instead of a rigid weight. A chain that ends in a swinging weight acts as a pendulum vibration absorber. The chain flexes and dissipates high-frequency vibrations that a rigid weight would simply transmit. Sandbags on the ground around each tripod foot also work well, especially in windy conditions.
Step 4: Balance the Telescope Properly on the Mount
An unbalanced telescope mount is working against itself at every moment. The motors strain, the gears chatter, and the image drifts. On a manual mount, balance is the difference between the scope holding position when you let go and slowly sliding to one side. If your mount drifts after you center an object, balance is the first thing to check.
For an equatorial mount, balance the optical tube in the declination axis first. Loosen the dec clutch and slide the tube forward or backward in its rings until it stays horizontal when released. Then balance the right ascension axis by sliding the counterweight up or down the shaft until the counterweighted side balances the telescope side. Both axes should hold position with clutches disengaged.
For a Dobsonian or alt-az mount, balance is less critical because the mount does not have to track. But if the optical tube is back-heavy, the altitude bearings bind and motion becomes jerky. A balanced scope moves smoothly in both axes, which means smoother focusing and less induced shake.
Step 5: Use Vibration Suppression Pads Under Each Tripod Foot
Vibration suppression pads are dense foam or rubber pads that go between the tripod foot and the ground. They isolate the tripod from the surface below, absorbing high-frequency vibrations before they reach the optical tube. Sorbothane pads are the gold standard, but neoprene squares and dense foam camping pads work too.
The pads help most on hard surfaces like concrete, tile, and wood. On grass, the ground itself absorbs most vibrations, so the pads make little difference. On a wooden deck, the pads are almost mandatory because the deck itself flexes and transmits every footstep you take indoors.
Place one pad under each tripod foot. Cut them large enough to fully support the foot without overhang. I have also seen observers place a single thick pad under the entire tripod – this works for small mounts but is awkward for larger ones. Three pads is the practical sweet spot.
Step 6: Choose the Right Observing Surface (Grass vs Concrete vs Deck)
The surface under your telescope matters more than most people realize. Each surface type has a different vibration behavior, and choosing the right one can transform your observing session. I tested the same 8SE scope on three different surfaces in the same backyard to see the difference.
Grass came out best overall. Footsteps are absorbed by the soil, the tripod sinks slightly and locks into place, and there is no resonance to amplify small vibrations. The downside is dew – the grass wets the tripod feet and the tripod can shift as the feet sink.
Concrete was second. It is hard and stable, so wind does not shake the tripod much. But it transmits every footstep you take, and any small vibration rings through the concrete. Concrete is best on calm nights when you can stay still.
Wooden decks were the worst surface by far. The deck flexes every time you take a step, and that flex travels straight up through the tripod legs to the eyepiece. My tests showed the image never fully settled on a deck, even with all the other fixes applied. If you observe from a deck, consider moving the scope to the grass at the edge.
Step 7: Improve Your Focusing Technique to Reduce Shake
The focuser is the single biggest source of vibration during observing. Every touch on the focus knob creates a tiny disturbance that the mount has to absorb. With cheap mounts, this disturbance takes seconds to dampen out. The fix is twofold – improve your technique and consider hardware modifications.
Develop a light touch on the focus knob. Use the tips of your fingers rather than gripping the knob. Move in tiny increments. Rest your hand on the optical tube or mount rather than free-handing the focuser. With practice, you can focus with minimal disturbance to the image.
For high-magnification work, a motorized focuser is a game-changer. The hand controller button barely touches the mount, and the focus motor moves so smoothly that induced shake is minimal. The secondary mirror shift on Newtonian reflectors is also eliminated with a Crayford focuser upgrade.
Glasses wearers face a special challenge. If you press your face against the eyepiece to see the full field, you are loading the mount with head weight every time you look through it. Long eye relief eyepieces let you keep your face away from the eyepiece, which removes this constant source of shake.
Step 8: Add a Wind Shield or Observing Position Fix
Wind is the environmental factor most people blame for poor views, and often correctly. A 5-mph breeze across a tripod feels like a 25-mph gale at 200x magnification. The simple fix is a wind shield, and you can build one in 10 minutes from cardboard or foam board.
Cut three panels of foam board, each about 2 feet wide and 3 feet tall. Tape or clip them together to form a U-shape around the telescope. The shield breaks the wind before it reaches the optical tube without blocking your view of the sky. I built one from a cardboard box the first time I tried this and the difference was dramatic.
Your observing position also affects stability. Standing observers shift their weight constantly, and that shift transmits to the mount through the ground. Sitting on a stool or low chair removes this source of vibration. It also lowers your center of gravity, which adds a small amount of stability to the system.
Avoid observing near heat sources. Pavement, asphalt, and rooftops radiate stored heat that creates air turbulence. This is not vibration per se, but the image distortion looks similar. Observing over grass rather than over pavement can produce noticeably sharper views even on a perfectly steady mount.
Step 9: Build a Triangle Brace for the Tripod Legs
The tripod legs splay outward under load. The optical tube, the mount head, and any hanging weight all push the legs apart. This splaying creates a tripod shape that is wider at the top than at the bottom, which is the least stable geometry. A simple triangle brace fixes this for nearly zero cost.
Take three short bungee cords. Connect the three legs about halfway down with the cords, forming a triangle. The triangle resists splaying and locks the legs in position. I have seen observers use rope, velcro straps, and even heavy rubber bands to achieve the same effect.
For a more permanent solution, cut three pieces of wood into equal lengths and bolt them between the legs to form a rigid triangle. This wooden triangle adds mass and rigidity without adding much weight. Either approach works well, and either is a 10-minute project.
Step 10: Know When to Upgrade Your Mount
There is a limit to what DIY fixes can do. If you have tightened every screw, weighted the tripod, added vibration pads, balanced the scope, and shortened the legs, and the mount still shakes for more than 3 seconds after a focus touch, the mount itself is the problem.
Cheap department-store mounts use thin-walled aluminum tubes, plastic fittings, and undersized bearings. They flex under load even when perfectly assembled. No amount of counterweighting or vibration damping will fix a mount that has fundamental flex in its structure.
The upgrade path depends on your budget. A heavier-duty alt-az mount with steel legs and metal fittings is a good first step. An entry-level equatorial mount from a known astronomy brand offers better stability and tracking for the same or slightly more money. None of these inexpensive fixes are wasted – they will improve the new mount too.
One more consideration: do not overlook the tripod itself. Many mid-range mounts are sold head-only, expecting you to add a quality tripod. A wooden surveyor’s tripod or a heavy-duty steel tripod can transform a marginal mount into a steady observing platform.
Frequently Asked Questions About Steady Telescope Mounts
How to stop telescope wobble?
The fastest way to stop telescope wobble is to shorten the tripod legs to lower the center of gravity, then hang a 5-gallon water jug or sandbag from the center column. Add vibration suppression pads under each tripod foot. Tighten all screws and bolts, then balance the optical tube on both mount axes. Combining these fixes typically reduces damping time from 6 seconds to under 2 seconds.
How to balance a telescope mount?
To balance a telescope mount, start with the optical tube in the declination axis. Loosen the dec clutch and slide the tube forward or back in its rings until it holds any horizontal position with the clutch released. Then balance the right ascension axis by sliding the counterweight along the shaft until the entire system balances. Both axes should hold position with clutches disengaged.
How to make a telescope tripod more stable?
To make a telescope tripod more stable, start by tightening every joint and shortening the legs. Hang a weight from the center column to increase mass and absorb vibration. Place a bungee triangle between the legs to prevent splaying. Add vibration suppression pads under each foot. Set up on grass rather than a wooden deck, and consider sitting while observing to lower your body’s effect on the system.
How to make a telescope image clearer?
To make a telescope image clearer, stabilize the mount first using the techniques in this guide. Let the telescope acclimate to outdoor temperature for 30 minutes before observing. Use quality eyepieces matched to your telescope’s focal length. Avoid observing over pavement or rooftops that radiate heat. Use a light touch on the focuser and consider a motorized focuser for high-magnification work.
Why is my telescope so shaky at high magnification?
Your telescope is shaky at high magnification because the magnification factor scales the vibration along with the image. A small shake that is invisible at 50x becomes a major image displacement at 200x. Cheap mounts transmit every touch through the optical tube with minimal damping. The fix is to add mass to the tripod, isolate it from the ground with vibration pads, and develop a light focusing touch.
Do vibration suppression pads actually work?
Yes, vibration suppression pads work well on hard surfaces like concrete and wood. They reduce damping time by isolating the tripod from the resonant surface. Sorbothane pads are the most effective, but dense foam and neoprene also work. On grass, the pads make little difference because the ground itself absorbs vibration. Pair them with a weighted tripod for the best results.
Final Thoughts on Getting Sharper Views From Your Telescope
Learning how to steady a shaky telescope mount for sharper views is one of the highest-leverage skills in amateur astronomy. A scope that takes 6 seconds to settle after every focus touch is frustrating and limits the magnification you can practically use. The same scope, after the fixes in this guide, settles in under 2 seconds and works beautifully at 200x and beyond.
Start with the cheap fixes first – tighten the screws, shorten the legs, add a hanging weight. These cost nothing and solve most of the problem. Move on to the more involved fixes only if needed. The chain hanging trick, vibration pads, and triangle brace together transform even the cheapest department-store mount into something genuinely usable for high-magnification work.
Most importantly, be honest about your mount’s limits. No amount of stabilization will turn a flimsy mount into a research-grade instrument. If you have applied every fix and the wobble persists, the mount is the limiting factor. Save up for a better one. Your eyepieces, your time, and your clear nights will all benefit.