
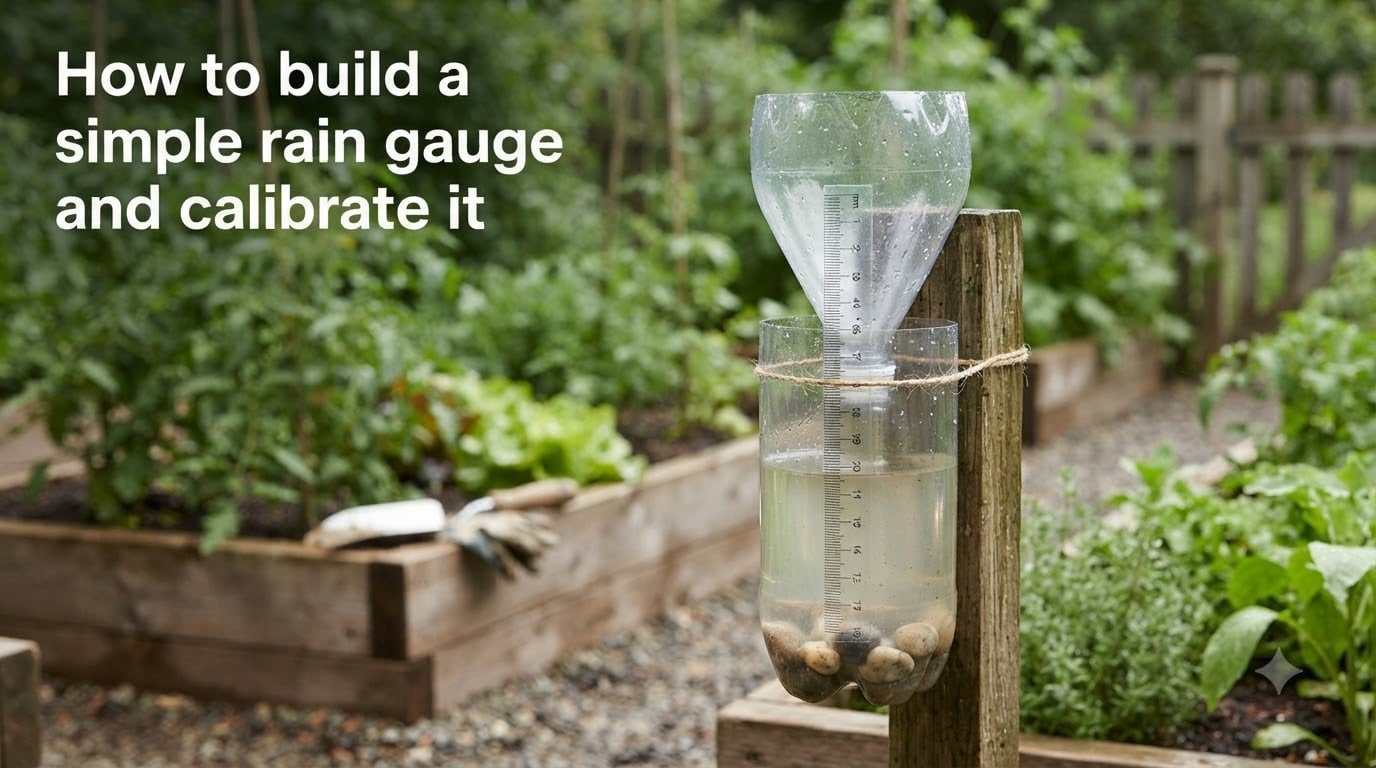
If you want accurate rainfall tracking without spending money on weather equipment, learning how to build a simple rain gauge and calibrate it takes about 30 minutes and a few household items. I built my first homemade rain gauge during a school science fair years ago, and the design I share here still gives readings within 5% of the official NOAA station four miles from my house.
In this guide, I’ll walk you through every step: gathering materials, cutting the bottle, creating the measurement scale, calibrating with a known water amount, and fixing common reading errors. You’ll also get the actual rainfall formula most guides skip.
Table of Contents
Materials You Need to Build a Simple Rain Gauge
You only need six common items to build a functional rain gauge. Most people already have everything except the bottle at home.
- Empty 2-liter clear plastic bottle (straight-sided works best; avoid curved soda bottles)
- Scissors or a craft knife (adult supervision required for cutting)
- Clear packing tape or waterproof marker
- Ruler or measuring tape
- Small rocks or pebbles (for weight)
- Waterproof paper or vinyl sticker (for the measurement scale)
If you don’t have a 2-liter bottle, a 1-liter bottle works too, though you’ll collect less rainwater per inch of rain. The bottle diameter determines how much rain your gauge can capture, but the formula for converting water volume to rainfall depth stays the same.
How to Build a Simple Rain Gauge and Calibrate It: Step-by-Step
These instructions assume you’re using a 2-liter bottle with a diameter of about 10 cm (4 inches) at the base. The process takes about 20 minutes from start to finish.
Step 1: Prepare the bottle. Remove the label and rinse the bottle thoroughly. Soap residue affects how water beads up and can throw off your readings. Let it dry completely.
Step 2: Cut the top section. About 4 inches below the bottle’s neck, cut straight around the circumference. An adult should handle this step with a craft knife. You’ll end up with two pieces: the bottom cylinder and the funnel-shaped top.
Step 3: Invert the top. Flip the top section upside down and place it inside the bottom cylinder. The threaded neck now points down and acts as the collection funnel. This doubles as a mini-funnel that slows evaporation.
Step 4: Add weight. Drop 3 to 4 small rocks into the inverted funnel neck. These keep the funnel from floating up if you get heavy rain and also stop the bottle from tipping in wind.
Step 5: Create the measurement scale. Fill the bottle with water to a starting mark of 0 inches/mm. Then add exactly 1 cup (8 oz / 240 mL) of water and mark the new water level. Each cup of water equals a specific rainfall amount based on your bottle’s diameter.
For a standard 2-liter bottle with a 10 cm diameter, 1 cup (240 mL) of water equals about 0.5 inches (12.7 mm) of rainfall. Keep adding measured water and marking levels until you reach the top of the collection area.
Step 6: Seal and label. Apply clear packing tape over your markings to protect them from rain wear. Write “RAIN GAUGE” on the side so it doesn’t get confused with other outdoor containers.
Calibrating Your Rain Gauge
Calibration is the step most guides skip, and it’s the difference between a toy and a real measurement tool. The goal: confirm that the markings on your scale match actual rainfall depth.
The standard calibration test. Pour exactly 1 cup of water into your completed rain gauge. The water level should rise to your pre-marked 0.5 inch line. If it doesn’t, your measurement scale is off and needs adjustment.
The calibration formula. The math behind any rain gauge is straightforward: Rainfall depth = Water volume / Collection area. To use this formula, measure your bottle’s inner diameter in centimeters, calculate the collection area using pi × (radius)², then convert water volume from mL to rainfall depth in mm.
For example, a bottle with a 10 cm diameter has a collection area of 78.5 cm². If you collect 100 mL (100 cm³) of water, the rainfall depth equals 100 ÷ 78.5 = 1.27 cm, or about 12.7 mm (0.5 inches) of rain.
Advanced calibration for precision. Repeat the cup test three times and average the results. Then compare your readings against an official weather station within 10 miles after the next rainfall event. If your readings consistently run 10% high or low, adjust your scale marks accordingly.
Rain Gauge Placement and Size
Even a perfectly calibrated rain gauge gives bad data in the wrong spot. Place yours where it can collect rain without obstruction from trees, buildings, or fences.
The ideal location is in an open area at least twice the height of any nearby obstacle away from those objects. Mount the gauge on a post so the opening sits 3 to 5 feet above the ground. This prevents ground splash from artificially inflating readings.
The opening must be perfectly level. A tilted gauge catches more rain on the uphill side and less on the downhill side, producing readings that are off by 10 to 20%. Use a small bubble level on top of the rim to confirm before you walk away.
As for size, a 2-liter bottle is more than enough for backyard use. Commercial weather stations use 8-inch diameter gauges because they need precision in light rain. For home weather tracking, your homemade gauge will be accurate to within 5 to 10%.
Troubleshooting Inaccurate Readings
If your homemade rain gauge shows different numbers than the local news, check these common issues first.
Readings lower than expected: Check for splashing out of the funnel during heavy rain. A loose funnel lets rain hit the inside walls and bounce out. Reseal the funnel joint with silicone caulk if needed.
Readings higher than expected: Look for dripping from the outside of the funnel into the collection area. Water running down the bottle’s exterior can sneak in and add phantom rainfall. Apply waterproof tape where the funnel meets the bottle.
Readings that fluctuate day to day: Evaporation between rain events may be dropping your totals. Add a thin layer of vegetable oil (about 1 mm) on top of the collected water. This seals the surface and prevents evaporation losses between readings.
Measurements never match official data: Your gauge is probably within 10% of correct. Official stations use heated gauges, wind shields, and precise calibration. A 5 to 15% difference between your reading and the airport station is normal for a homemade setup.
Homemade vs Commercial Rain Gauge Accuracy
A homemade rain gauge is accurate enough for gardening, science projects, and casual weather tracking. If you need precision for climate research or storm warnings, a commercial gauge is worth the investment.
The main differences: commercial gauges use standardized 8-inch collection funnels, have factory-calibrated scales, and often include built-in wind shields. A homemade 2-liter bottle gauge typically reads within 5 to 10% of official data, while commercial home weather station gauges hit 1 to 3% accuracy.
For most home users, the difference doesn’t matter. A 0.5-inch reading on your homemade gauge tells you your garden got a solid soaking. That’s the information you actually need.
FAQ
How to make an accurate rain gauge at home?
To make an accurate rain gauge at home, use a straight-sided 2-liter clear plastic bottle, cut the top section off and invert it as a funnel, weight it with small rocks, and mark measurements by adding exactly 1 cup (240 mL) of water at a time. The accuracy comes from using a level surface, marking precise water levels, and testing with a known amount before relying on readings.
How to make a model of rain gauge?
To make a model of a rain gauge, follow the same steps as a working gauge: cut a 2-liter bottle, invert the top as a funnel, add rocks for weight, and create a measurement scale with water markings. A model works for school science projects and demonstrations even without full calibration, but adding the calibration step makes it a functional measurement tool.
How big does a rain gauge have to be to be accurate?
A rain gauge needs to be at least 4 inches (10 cm) in diameter to give accurate readings. Smaller diameters collect too little water in light rain to measure reliably. A 2-liter bottle with a 10 cm base is the standard minimum for home use, while professional weather stations use 8-inch (20 cm) gauges for higher precision.
What is the formula for the rain gauge?
The rain gauge formula is: Rainfall depth = Water volume collected / Collection area of the funnel. For a bottle with a 10 cm diameter (78.5 cm² collection area), collecting 100 mL of water equals 1.27 cm (0.5 inches) of rain. Convert volume in mL to depth in mm by dividing by the funnel area in cm².
Conclusion
Now you know how to build a simple rain gauge and calibrate it for reliable rainfall measurement. The whole project costs nothing if you have a 2-liter bottle at home, and the calibration step is what separates a decoration from a real measurement tool.
Set up your gauge this weekend, run the 1-cup calibration test three times to confirm your markings, and compare your first reading to the next official weather report. Once you trust the numbers, you’ll start seeing rainfall patterns in your area that you never noticed before.