
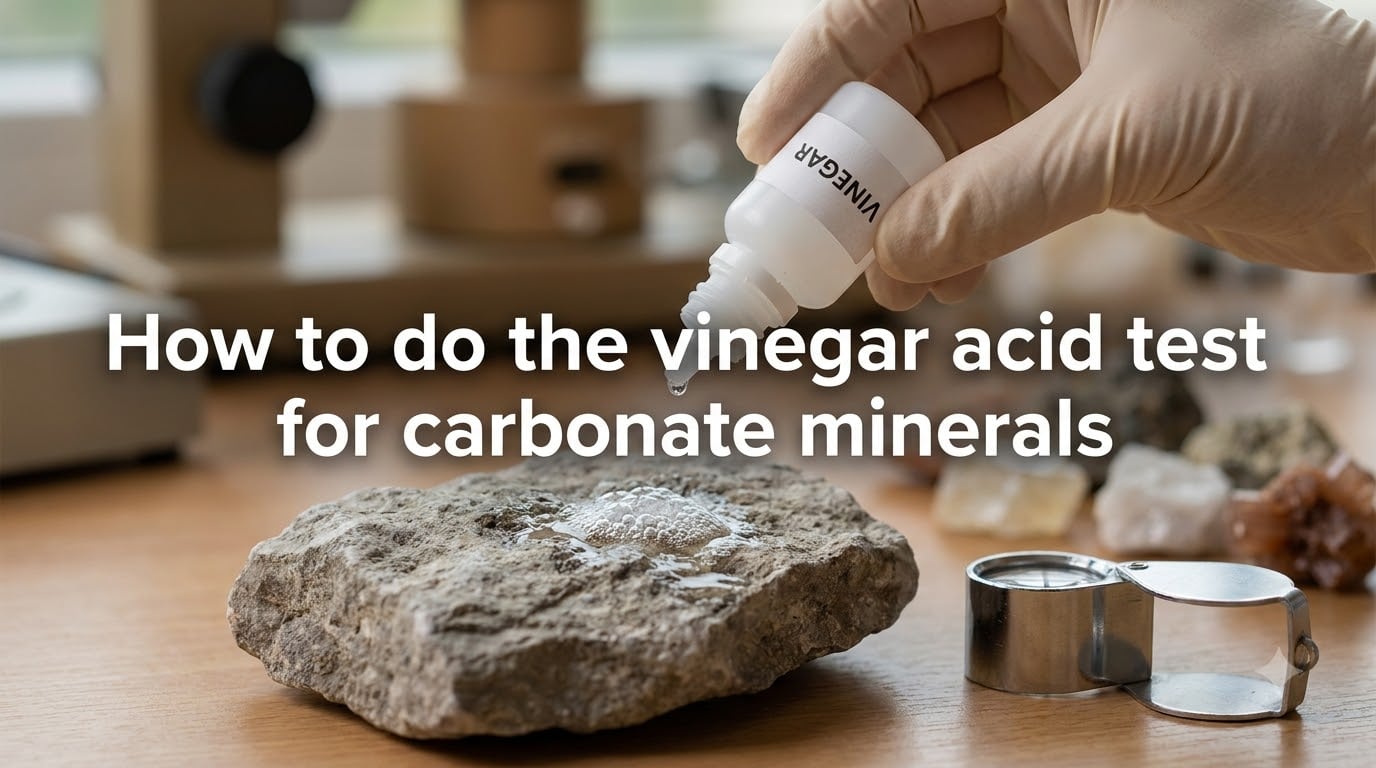
The vinegar acid test for carbonate minerals is the safest, easiest way to tell if a rock contains calcite, dolomite, or another carbonate. You place a drop of white vinegar on the specimen and watch for bubbles. If bubbles of carbon dioxide appear, the rock contains carbonate minerals. If nothing happens, it does not.
I have used this test on hundreds of rocks during fieldwork and at home. It works because vinegar contains dilute acetic acid, which reacts with the carbonate ion in minerals like calcium carbonate. The reaction releases carbon dioxide gas, and those CO2 bubbles are what you actually see fizzing on the rock surface.
This guide walks you through the chemistry, the materials, the exact procedure, and how to interpret weak or strong reactions. By the end, you will be able to identify limestone, dolostone, marble, and calcite-bearing rocks at home using nothing more than a bottle of vinegar from your kitchen.
Table of Contents
What Is the Vinegar Acid Test for Carbonate Minerals?
The vinegar acid test is a quick field and classroom method for identifying carbonate minerals in rocks. You place a small drop of vinegar, which is dilute acetic acid, on a freshly broken surface of the specimen. If carbon dioxide bubbles form and fizz, the rock contains one or more carbonate minerals such as calcite, aragonite, or dolomite.
Geologists have used versions of this test for over 150 years. The traditional version uses 10% hydrochloric acid, but vinegar is a popular alternative because it is safe, cheap, and available in any grocery store. The trade-off is that vinegar is weaker than HCl, so it produces a visible reaction with strongly reactive carbonates like calcite but can miss weak-reacting minerals like magnesite and siderite.
The acid test is one of the first identification steps taught in any introductory geology course. It separates carbonate rocks (limestone, dolostone, marble) from silicate rocks (granite, basalt, quartzite) in seconds. Our team has used it on everything from museum specimens to driveway gravel, and the results are reliable when you follow the procedure correctly.
How Does the Vinegar Acid Test Work? The Chemistry Explained
The bubbles you see during the vinegar acid test are carbon dioxide gas escaping from a chemical reaction between acetic acid and the carbonate mineral. The simplified equation for calcite reacting with vinegar looks like this:
CaCO3 + 2 CH3COOH → Ca(CH3COO)2 + H2O + CO2
In plain language, calcium carbonate plus acetic acid produces calcium acetate, water, and carbon dioxide. The CO2 is what fizzes. This same reaction drives everything from limestone cave formation to the fizz in school chemistry volcanoes, and it is the foundation of carbonate mineral identification.
Heat speeds up the reaction. If your vinegar is cold and the rock does not fizz, try warming the acid slightly or scratching the rock harder to expose fresh mineral powder. Warm acid on powdered calcite can produce a vigorous, almost violent fizz that is easy to see even without a hand lens. Cold acid on a smooth calcite surface produces a slower, more delicate stream of bubbles that you might miss without magnification.
Materials You Need for the Vinegar Acid Test
You only need a few inexpensive items to run a vinegar acid test at home. Here is what our team uses in the field and the classroom.
White vinegar (5% acetic acid, the standard grocery-store kind)
Eyedropper or small dropper bottle for precise application
Hand lens or 10x magnifying loupe to see weak bubbles
Rock hammer or chisel to expose a fresh surface
Paper towels and clean water for rinsing
Notebook or phone to record results
Standard white vinegar is 5% acetic acid, which means 5% of the liquid is acid and the rest is water. This is strong enough to detect calcite and limestone reliably. Higher concentrations, like cleaning vinegar at 6% or 8%, work slightly better, but ordinary cooking vinegar is what most people have at home.
Step-by-Step Procedure: How to Do the Vinegar Acid Test
Follow these steps in order. The whole test takes less than two minutes per rock, and you can run it on dozens of specimens in an afternoon.
Step 1: Choose a fresh surface. Use a rock hammer or the corner of a chisel to break the specimen and expose an unweathered interior. Weathered surfaces often react weakly or not at all because rainwater has already dissolved the outer carbonate. Fresh surfaces give the most reliable results.
Step 2: Clean the surface. Wipe off dust and loose fragments with a paper towel. Soil, clay, or salt crusts can block the acid from reaching the mineral and produce false negatives.
Step 3: Place the rock on a flat, stable surface. A table, clipboard, or large flat stone works well. You want the specimen to stay still while you observe the reaction.
Step 4: Draw vinegar into the eyedropper. Squeeze the bulb, insert the tip into the vinegar, and release slowly to fill. One drop is enough.
Step 5: Apply a single drop to the test surface. Hold the eyedropper about half an inch above the rock and squeeze gently. Watch the drop closely.
Step 6: Observe and listen. Vigorous reactions produce visible bubbles, hissing, and even foam. Weak reactions produce one or two bubbles per second that you may need a hand lens to see. No bubbles at all means the rock is not a carbonate.
Step 7: Record your result and rinse. Note the rock, the location, and the reaction strength in your field notebook. Rinse the surface with clean water and pat dry before testing the next specimen.
Carbonate Minerals That Fizz in Vinegar (With Reaction Strength)
Not all carbonates react the same way. Some fizz violently in cold vinegar, while others need powdered mineral or warm acid to show a visible reaction. The table below lists the most common carbonate minerals and how they respond to a standard 5% vinegar test.
Calcite (CaCO3): Vigorous fizz in cold vinegar, even on smooth surfaces. The classic positive test.
Aragonite (CaCO3): Vigorous fizz, very similar to calcite. Same chemical composition, different crystal structure.
Limestone and chalk: Vigorous fizz because they are mostly calcite. Fizzes strongly within seconds.
Marble: Moderate to vigorous fizz. Reaction depends on grain size and purity.
Dolomite (CaMg(CO3)2): Weak fizz in cold vinegar. Powdered dolomite reacts more clearly. Warm acid works best.
Dolostone: Weak fizz on a fresh surface. Often missed without a hand lens or powdered sample.
Magnesite (MgCO3): Very weak or no reaction in cold vinegar. Often requires HCl to confirm.
Siderite (FeCO3): Weak fizz, only visible when the mineral is powdered.
Rhodochrosite (MnCO3): Weak to moderate fizz, more visible when powdered and warmed.
Smithsonite (ZnCO3): Weak fizz in cold vinegar; clearer with warm acid.
If you see a strong fizz, you are almost certainly looking at calcite, limestone, or marble. If you see a faint reaction only with a hand lens, the rock may be dolomite or a less common carbonate, and you should confirm with hydrochloric acid or a powder test.
Vinegar vs Hydrochloric Acid: Which Should You Use?
The choice between vinegar and hydrochloric acid comes down to safety, availability, and how strong a reaction you need to detect. Both are acids, both produce the same chemical reaction with carbonates, but they differ in concentration and handling.
Vinegar is 5% acetic acid, which is weak enough to handle without gloves and safe enough to use with children in a classroom. It produces visible fizz on calcite and limestone reliably. It often misses magnesite, siderite, and weakly reacting dolomites because the acid is not strong enough to overcome the mineral structure quickly.
Hydrochloric acid at 10% concentration is the professional standard for the acid test. It reacts with every common carbonate, including dolomite and magnesite, often within seconds. The downside is that HCl is corrosive, gives off fumes, and requires safety glasses, gloves, and a ventilated workspace. It is also harder to buy and store safely at home.
Use vinegar when safety is the priority, when working with children, or when testing suspected calcite and limestone. Use HCl when you need to confirm weak reactions, identify dolomite reliably, or run professional mineral identification work. If vinegar gives a borderline result, that is a useful signal in itself, and it tells you the mineral is not calcite.
What Minerals Do NOT React to the Acid Test?
Many rocks and minerals show no fizz at all in vinegar, and that is just as informative as a strong reaction. A clean negative result tells you the specimen is not a carbonate and saves you from misidentifying silicate rocks as limestone.
Quartz, including amethyst, citrine, and smoky quartz, shows no reaction. Granite, basalt, and gabbro are silicate rocks that do not fizz. Feldspar, mica, olivine, pyroxene, and amphibole are all non-reactive in cold vinegar.
Gypsum and halite are soft and can look similar to calcite at a glance, but neither fizzes in vinegar. Gypsum is calcium sulfate, not calcium carbonate, and halite is sodium chloride. Sandstone usually shows no reaction unless the cement holding the grains together is calcite. If a sandstone fizzes, you have identified calcite cement, which is a useful piece of information for the rock’s history.
Common Mistakes and Troubleshooting Weak Reactions
I have watched dozens of students miss obvious fizz because of small mistakes. Here are the most common problems and how to fix them.
Testing a weathered surface is the number one reason for false negatives. Outdoor rocks develop a leached outer layer where rainwater has already dissolved carbonate. Always break the rock to expose fresh material before testing.
Confusing trapped air with effervescence is another common trap. Porous rocks like tuff and some sandstones can release air bubbles when vinegar soaks into them. True effervescence happens immediately at the contact point and produces bubbles of consistent size. Air bubbles are irregular and rise from cracks rather than the surface where you applied the drop.
Missing weak reactions without magnification is a frequent issue with dolomite. Dolomite often produces only one bubble every second or two, which is invisible to the naked eye. Use a hand lens and look for tiny bubbles clinging to the rock surface.
If the reaction is weak or absent and you still suspect a carbonate, try the powder test. Scrape the rock with a knife to produce a small pile of powder, then drop vinegar on the powder. Powdered minerals react faster because more surface area is exposed. This trick saved me from misidentifying a dolostone boulder during a field trip last summer.
Safety Tips for the Vinegar Acid Test
Vinegar is one of the safest acids you can use, but a few precautions still apply. Always wash your hands after handling mineral specimens, especially if you do not know what they are. Some rocks contain traces of toxic elements like lead, arsenic, or uranium that you do not want on your food.
Wear safety glasses when working with rock hammers or chisels. Flying chips can cause serious eye injuries, and the acid is not the main hazard in mineral testing.
Work in a ventilated area when using vinegar, and never taste minerals to identify them. The old practice of licking rocks is unsafe because it exposes you to dust, pathogens, and potentially toxic elements.
If you ever upgrade to hydrochloric acid for stronger tests, treat it with real respect. Wear chemical safety glasses, nitrile gloves, and work near a window or fume hood. Pour used acid into a labeled waste container, never down the drain. Most school laboratories now recommend vinegar as the default acid for exactly these safety reasons.
Frequently Asked Questions
What is the acid test for carbonate minerals?
The acid test for carbonate minerals is a quick identification method where a drop of dilute acid is placed on a rock to see if carbon dioxide bubbles form. If bubbles appear, the rock contains carbonate minerals such as calcite or dolomite. Vinegar (5% acetic acid) is a safe, accessible alternative to hydrochloric acid for this test.
How do you test for calcite with vinegar?
To test for calcite with vinegar, break the rock to expose a fresh surface, clean off any dust, and place a single drop of white vinegar on the spot. If bubbles of carbon dioxide appear within seconds and produce a steady fizz, the sample contains calcite. Use a hand lens if the bubbles are faint.
What does 5% acidity mean on vinegar?
A 5% acidity label on vinegar means that 5% of the liquid is acetic acid and the rest is water. This concentration is strong enough to react visibly with calcite and limestone in the acid test. Cleaning vinegars at 6% to 8% acidity work slightly better but are not required.
What mineral fizzes in vinegar?
Calcite, aragonite, limestone, chalk, and marble fizz vigorously in vinegar. Dolomite and dolostone fizz weakly and may need a hand lens or powdered sample to see. Magnesite, siderite, rhodochrosite, and smithsonite may not fizz visibly in cold vinegar and often require hydrochloric acid to confirm.
Can you test limestone with vinegar?
Yes, limestone tests very well with vinegar. Because limestone is mostly calcite, it produces a strong, immediate fizz when a drop of vinegar touches a fresh surface. This makes vinegar the standard home test for telling limestone apart from non-carbonate rocks like quartzite or granite.
Why does dolomite not fizz in vinegar?
Dolomite often does not fizz visibly in cold vinegar because its crystal structure is denser than calcite and reacts more slowly with weak acids. Warming the acid, powdering the sample, or switching to 10% hydrochloric acid produces a clear fizz. A weak or absent reaction in vinegar does not rule out dolomite.
Can I use lemon juice instead of vinegar for the acid test?
Lemon juice contains citric acid and can be used for a quick fizz test on calcite and limestone. It is slightly weaker than vinegar but works on strongly reactive carbonates. For reliable identification of weak-reacting minerals like dolomite, vinegar or dilute hydrochloric acid is a better choice.
Final Thoughts on the Vinegar Acid Test for Carbonate Minerals
The vinegar acid test for carbonate minerals is the most accessible identification method in geology. With one bottle of vinegar and a hand lens, you can quickly tell whether a rock is limestone, dolostone, marble, or something else entirely. The chemistry is simple, the procedure takes minutes, and the results are reliable when you test fresh surfaces and watch carefully.
Start with vinegar if you are new to mineral identification. Move up to dilute hydrochloric acid only when you need to confirm weak reactions or test rocks professionally. Either way, the acid test will give you a fast answer to one of geology’s most common questions: does this rock contain carbonate minerals?
If you are looking to expand your identification skills, try the streak test, hardness test, and specific gravity test next. Combined with the vinegar acid test for carbonate minerals, those four tests will identify the vast majority of common rocks and minerals you encounter.