
CRITICAL SAFETY WARNING: Looking at the sun through a telescope without a properly installed objective solar filter causes instant and permanent eye damage, including blindness. A telescope concentrates sunlight by thousands of times, so even a brief glimpse can burn your retina in under one second. Every step in this guide is designed to keep your eyes safe, so please read the entire article before pointing your telescope at the sun.
Building a DIY solar filter for a telescope is one of the most rewarding weekend projects for amateur astronomers. I built my first filter cell eight years ago using AstroSolar film and scrap cardboard, and it still serves me well during eclipse season. In this guide, I will walk you through the same process I use, share the safety rules I follow, and explain the small mistakes that have ruined filters for other astronomers on Reddit and Cloudynights forums.
By the end of this article, you will know exactly which materials to buy, how to assemble the filter without stressing the film, and how to verify the filter is safe before every observation session in 2026.
Table of Contents
Why You Must Never Look at the Sun Through a Telescope Without a Filter?
An unfiltered telescope focuses sunlight into a cone that is many thousands of times brighter than the ambient daylight hitting your eye. The concentrated beam can melt plastic, scorch wood, and ignite paper in seconds. Your retina does not have pain receptors, so the damage happens silently and irreversibly.
Eye doctors call this condition solar retinopathy. It occurs when the focused light destroys photoreceptor cells, leaving a permanent blind spot in the center of your vision. There is no treatment, no surgery, and no recovery. This is why every reputable astronomy organization, including the American Astronomical Society, requires a certified solar filter on the front aperture of any telescope used to observe the sun.
I keep a laminated safety checklist on my observatory desk. The first line reads: front-of-telescope filter only, no exceptions. That habit has kept my eyes intact through ten solar eclipses and hundreds of sunspot sessions.
Why Eyepiece-Mounted Solar Filters Are Dangerous?
Old astronomy catalogs sold small filters that screwed into the telescope eyepiece. These eyepiece-mounted solar filters are unsafe and should never be used. The focused sunlight heats them well beyond their design rating, and they can crack or shatter without warning.
When the filter fails, your eye is exposed to the full concentrated beam for the entire time it takes to react. Several amateur astronomers have posted on Cloudynights about cracked eyepiece filters that vented hot glass into the focuser drawtube. The telescope itself can also be damaged, since the heat can melt internal baffles and adhesives.
An objective solar filter, mounted on the front of the telescope, intercepts sunlight before it enters the optical system. This keeps the heat outside the tube and reduces the light to safe levels before any focusing occurs. Every modern safety standard, including EN ISO 12312-2 for eclipse viewing, is built around this principle.
What Is Optical Density 5.0 and Why It Matters
Optical density, often abbreviated OD, measures how much light a filter blocks. An OD 5.0 filter transmits only 0.001 percent of incoming light, which means it blocks 99.999 percent. That reduction is required for direct solar observation through any optical instrument.
AstroSolar Safety Film and Baader Solar Film are both rated to OD 5.0 for visual use. AstroSolar also sells a Photo Film at OD 3.8, which is intended only for camera sensors with very fast shutters and is unsafe for visual use. Mixing these up is a common mistake I see beginners make on r/telescopes every eclipse season.
Always check the optical density rating printed on the film packaging before purchase. If the package does not clearly state OD 5.0 for visual observation, do not use it for looking at the sun.
Materials You Need to Build a DIY Solar Filter
Here is the exact shopping list I use when helping friends assemble their first filter. All items are available from astronomy retailers or hardware stores.
AstroSolar Safety Film (OD 5.0) or Baader Solar Filter Film, sized for your telescope aperture plus a 2 inch margin on every side
Two sheets of stiff corrugated cardboard or foam board, at least 1.5 mm thick
A compass or circular template matching your telescope objective diameter
A sharp craft knife and a metal ruler
Double-faced adhesive tape, roughly 12 mm wide
Gaffer tape or strong black electrical tape for finishing the edges
Black marker paint or matte black paper to coat the inside surfaces
A soft brush and lint-free cloth for handling the film
The total cost typically runs between $25 and $45 for an 8 inch telescope, which is a small price to pay for years of safe solar viewing. AstroSolar film is the most trusted brand in the amateur community, and Baader is an equally respected alternative.
How to Make a DIY Solar Filter for a Telescope: Step-by-Step
Work on a clean, flat surface and avoid windy conditions. Solar filter film is delicate, and a single fingerprint or crease can ruin a sheet. Wash your hands and lay down a clean cotton towel before you begin.
Step 1: Measure and Cut the Cardboard Rings
Measure the outer diameter of your telescope objective or dew cap. Add roughly 50 mm (about 2 inches) to get the outer ring diameter. Cut two identical rings from the stiff cardboard using your compass or template. The width of each ring should be at least 19 mm (three-quarter inch).
Step 2: Cut the Solar Film to Size
Lay the film flat on the clean towel. Cut a square or circle of film that is at least 30 mm larger than the outer edge of your cardboard rings. Never cut the film while it is suspended in the air, since tension can stretch and damage the coating.
Step 3: Prepare the Filter Cell Sandwich
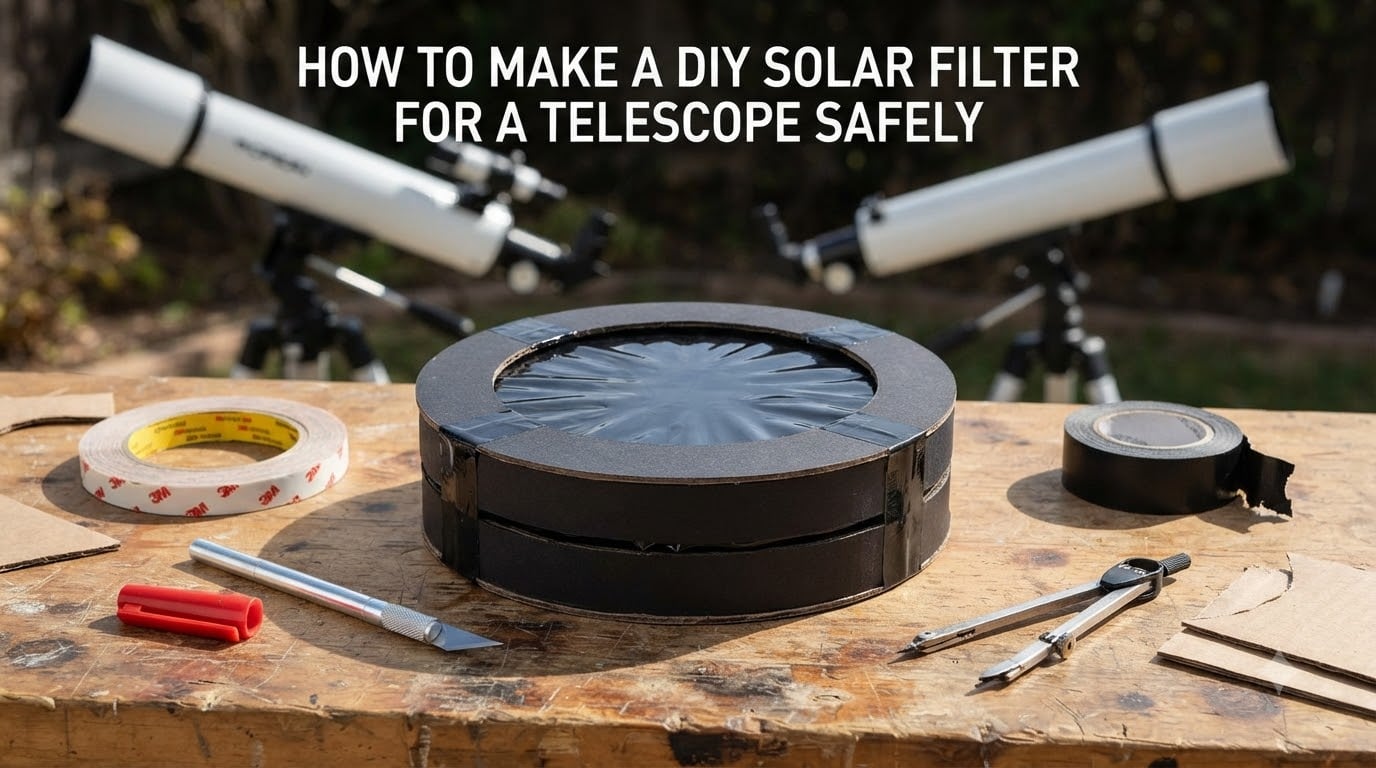
Apply a continuous strip of double-faced adhesive tape around the outer edge of the inner cutout on the first cardboard ring. Press the tape firmly so there are no gaps. Place the solar film gently over the ring, then attach the second cardboard ring on top to sandwich the film.
Step 4: Mount the Film Without Stress
This step is critical. The film must lie completely flat and untensioned between the two rings. Press down evenly around the perimeter, then seal the outer edge with several layers of gaffer tape. The AstroSolar manual calls this the zero-stress method, and it prevents the film from tearing when the temperature changes.
Step 5: Trim the Excess Film
Carefully trim the overhanging film close to the outer tape edge using a sharp craft knife. Do not pull the film while trimming, since pulling can stretch the coating and create pinholes.
Step 6: Finish and Label the Cell
Paint the inside edges of the cardboard cell matte black to reduce internal reflections. Add a label with the words SOLAR FILTER, the optical density, and the date you built it. Future you will appreciate the reminder.
How to Attach Your Solar Filter Safely
The filter must cover the full aperture of the telescope with no gaps. Any stray sunlight entering around the edges can produce enough heat to damage the optics or, worse, your eye.
For refractors and Schmidt-Cassegrains, wrap a strip of double-faced tape around the dew cap or front cell and press the filter cell onto it. For Newtonian reflectors, slide the filter over the front of the tube and secure it with three Velcro straps or rubber bands wrapped around the tube circumference.
Always perform a final visual check by standing in front of the telescope and confirming the filter fully covers the objective with at least a few millimeters of overlap. I also wiggle the filter gently with my hand before every session. If it moves, it is not safe.
Testing and Verifying Your Solar Filter Before Use
A good filter should never be used without inspection. Hold the filter up to a bright lamp and look through it. You should see a dim, even orange glow with no bright pinholes, scratches, or coating damage. Any bright spot is a defect, and the filter must be replaced.
Before every solar session, I also point an unfiltered telescope at the sun to project an image onto a white card behind the eyepiece, then hold my filter in front of the objective and confirm the image dims to a comfortable orange. If the filter darkens the image as expected, it is safe to mount it and observe.
Never look through the telescope to confirm the filter works. The card projection method gives you the same information without any risk to your eyes.
Common DIY Solar Filter Mistakes and How to Avoid Them
Most failed DIY filters fail for the same handful of reasons. Here are the mistakes I have seen on the astronomy forums over the years, and how to steer clear of them.
Mounting the film under tension. Stretched film develops micro-cracks that let unfiltered sunlight through. Always mount the film slack and flat between the cardboard rings.
Using the wrong film. Photo film (OD 3.8) is not safe for visual use. Only OD 5.0 safety film is rated for looking at the sun.
Forgetting the overlap margin. A filter that exactly matches the telescope aperture can let light leak around the edge. Always include a 25 to 50 mm overlap on every side.
Skipping the inspection step. Pinholes can appear from dust, handling, or age. Inspect every filter against a bright lamp before each session.
Storing the filter loosely. Loose filters get scratched or punctured. Store your filter in a rigid plastic container with a foam liner when not in use.
Storage, Maintenance, and When to Replace Your Filter
Solar filter film degrades slowly from UV exposure and humidity. Most manufacturers recommend replacing the film every two to three years for regular use, or sooner if you see scratches, pinholes, or discoloration.
Keep the filter in a sealed plastic bag with a small silica gel packet when not in use. Avoid leaving it on the telescope between sessions, since morning dew and heat cycles accelerate the wear on the adhesive layers.
Replace the entire filter cell if you notice any of the following: small bright spots during inspection, peeling adhesive, or a fuzzy image of the sun that cannot be focused sharply. These are signs that the film has failed.
DIY Solar Filter vs Commercial Filter: Honest Comparison
A homemade filter built from certified OD 5.0 film and a well-made cardboard cell performs identically to most commercial filters costing two or three times more. The main advantage of a commercial filter is the machined metal cell, which is more durable and easier to mount.
For visual observation of sunspots, eclipses, and daily solar activity, a DIY filter is a smart choice if you are comfortable with the construction steps and follow the safety rules carefully. For photography, especially high-magnification planetary imaging of the sun, I prefer a commercial Baader solar filter because of its tighter mounting tolerances.
Whichever route you choose, the rule stays the same: certified OD 5.0 film on the front of the telescope, inspected before every use. That single habit is what keeps your eyes safe for a lifetime of solar observation.
Frequently Asked Questions
What happens if you look at the Sun through a telescope without a solar filter?
Looking at the sun through an unfiltered telescope causes instant and permanent eye damage called solar retinopathy. The telescope concentrates sunlight by thousands of times, burning the retina in under one second. There is no pain, no treatment, and no recovery.
Why are eyepiece-mounted solar filters dangerous?
Eyepiece filters sit where sunlight is already concentrated and focused. The intense heat cracks or shatters them within seconds, exposing your eye to the full beam. Always use an objective filter mounted on the front of the telescope instead.
What optical density do I need for a visual solar filter?
You need OD 5.0 solar filter film for any visual observation of the sun. This rating blocks 99.999 percent of incoming light. OD 3.8 photo film is not safe for visual use.
How long does a DIY solar filter last?
Most OD 5.0 filter films last two to three years with regular use. Replace the film sooner if you see pinholes, scratches, peeling adhesive, or a fuzzy solar image that will not focus sharply.
Can I use the same filter on different telescopes?
Yes, as long as the filter covers the full aperture of each telescope with at least a 25 mm overlap. Many amateur astronomers build a small set of filter cells in different sizes to match their scopes.
How do I test my DIY solar filter before use?
Hold the filter up to a bright lamp and look through it. You should see a dim, even orange glow with no bright spots or pinholes. You can also project the sun onto a white card behind the eyepiece and confirm the filter darkens the projected image as expected.
Final Thoughts on Building Your Own Solar Filter
Learning how to make a DIY solar filter for a telescope safely is one of the best investments you can make as a backyard astronomer. With certified OD 5.0 film, a sturdy cardboard cell, and a habit of inspecting the filter before every session, you will enjoy safe views of sunspots, eclipses, and daily solar activity for years to come.
Pick up a sheet of AstroSolar or Baader film this weekend, follow the steps in this guide, and you will be ready for the next eclipse season in 2026. Clear skies and safe observing.