
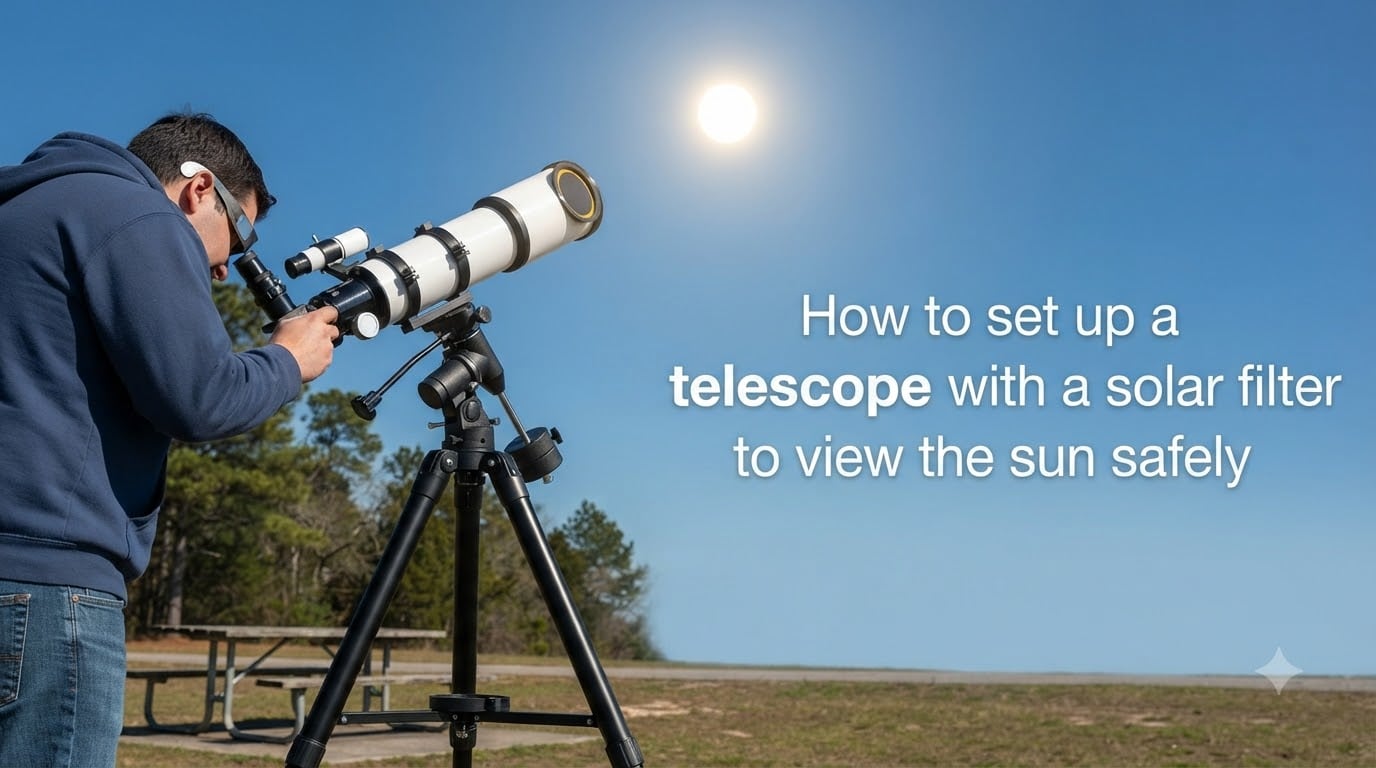
WARNING: Never look at the Sun through a telescope, binoculars, or camera without a properly certified solar filter mounted on the FRONT of the instrument. Doing so can cause permanent blindness in a fraction of a second. This is not a risk. It is a certainty.
If you are here, you want to observe the Sun safely. That instinct is the right one, because solar viewing is one of the most rewarding activities in amateur astronomy, and it is also one of the few that can seriously hurt you if done incorrectly. Learning how to set up a telescope with a solar filter to view the Sun safely is not something to rush through or skip steps on.
Our team has spent years observing the Sun through properly filtered telescopes, and we want to walk you through every step of the process. We will cover which filters are safe, how to inspect them, how to mount them, how to find the Sun once your view is darkened, and what incredible features you can actually see on the solar surface.
The good news is that once you understand the principles, safe solar observation becomes second nature. The Sun is the only astronomical object that changes visibly from hour to hour, and it is accessible during the day. With the right telescope solar filter and proper technique, you are in for a lifetime of discovery.
Throughout this guide, we will repeat the safety warnings because they matter more than anything else we will discuss. Every experienced solar astronomer will tell you the same thing: there is no shortcut, no workaround, and no second chance when it comes to your eyes.
Table of Contents
CRITICAL: Read This Before Pointing Anything at the Sun
Pointing a telescope at the Sun without a filter is not like squinting at the Sun with your naked eyes. It is dramatically more dangerous, and the reason comes down to basic physics.
A telescope is a light-gathering instrument. Its entire purpose is to collect light from a large area and concentrate it into a small beam that enters your eye. When that light comes from a distant star, the result is a beautiful pinpoint of light. When that light comes from the Sun, the result is a beam of concentrated energy hot enough to ignite wood in seconds.
Think about using a magnifying glass to burn a leaf on a sunny day. That is exactly what a telescope does to your retina when pointed at the Sun without filtration. The difference is that your retina cannot feel pain, so you would not even know the damage was happening until it was already permanent.
The concentrated beam from an unfiltered telescope can destroy retinal tissue in less than a second. There is no blinking reflex fast enough, no instinct to pull away in time. Solar retinopathy is painless, immediate, and irreversible. This is why every solar astronomer we have spoken with treats filter safety as an absolute, non-negotiable rule.
Even a brief accidental glimpse through an unfiltered telescope pointed near the Sun is enough to cause permanent damage. If you are setting up near the Sun for any reason, a solar filter belongs on your telescope before it ever leaves its case.
Why Solar Filters Are Essential
A telescope solar filter works by blocking the vast majority of sunlight before it ever enters your optical system. A proper solar filter reduces visible light by a factor of roughly 100,000, and it also blocks harmful ultraviolet and infrared radiation that your eyes cannot detect but that still causes damage.
This light reduction is measured in terms of optical density. A safe solar filter typically provides an optical density of 5.0 or higher, which means it transmits only 0.001% of incoming light. This extreme reduction is necessary because the Sun is roughly 400,000 times brighter than the full Moon.
Solar filters also need to block infrared radiation, which carries heat that can damage the internal structures of your eye. UV radiation is equally dangerous, contributing to cataracts and retinal damage. A certified solar filter addresses all three threats simultaneously: visible light, infrared, and ultraviolet.
The ISO 12312-2 standard is the international certification for solar viewing equipment. Filters that meet this standard have been tested to confirm they block sufficient light across all harmful wavelengths. When you purchase a solar filter, look for the ISO 12312-2 marking. If a filter does not carry this certification, do not trust it with your eyesight.
Common items that people mistakenly believe are safe for solar viewing include sunglasses, smoked glass, exposed photographic film, CDs, and space blankets. None of these provide adequate protection. They may reduce visible light enough to feel comfortable, but they allow dangerous amounts of infrared and ultraviolet radiation through. Comfortable brightness does not equal safe brightness.
Even stacking multiple pairs of sunglasses is not safe. Solar radiation damage is cumulative, and the only protection that works is a filter specifically engineered and certified for solar observation.
Types of Solar Filters Explained
Not all solar filters show you the same thing. The Sun emits light across a wide spectrum, and different filters isolate different wavelengths. Understanding these differences helps you choose the right filter for what you want to see.
White-Light Solar Filters
White-light filters are the most common and affordable type of telescope solar filter. They reduce overall brightness across the visible spectrum, allowing you to see the Sun’s photosphere, which is the bright surface layer that we perceive as the Sun’s disk.
Through a white-light filter, the Sun appears as a bright disk where you can observe sunspots, which are darker regions caused by intense magnetic activity. Sunspots have a dark central region called the umbra and a lighter surrounding region called the penumbra. You can also see faculae, which are brighter patches often found near sunspots, and solar granulation, the mottled texture of the photosphere caused by convection cells.
White-light filters come in two main materials. Glass filters use a coated optical glass element and tend to produce a yellow or orange Sun image. Film filters, such as those made from Baader AstroSolar film or Mylar-type materials, produce a blue-white image and tend to offer slightly better contrast. Both are safe when certified, and the choice often comes down to personal preference and budget.
Hydrogen-Alpha Filters
Hydrogen-alpha, or H-alpha, filters are a completely different category. Instead of reducing all visible light, they isolate a single, extremely narrow wavelength of light at 656.28 nanometers, which is emitted by hydrogen atoms in the Sun’s chromosphere. This is the layer above the photosphere that is invisible through white-light filters.
Through an H-alpha filter, the Sun reveals an entirely new set of features. You can see solar prominences, which are enormous arcs of plasma extending from the Sun’s edge. You can observe filaments, which are the same as prominences but seen against the disk rather than the edge. You can catch solar flares, sudden releases of magnetic energy that can cause bright eruptions. The surface itself shows a textured pattern of spicules and plage.
H-alpha systems are more expensive than white-light filters because they require precise etalons to achieve the narrow bandpass. Dedicated solar telescopes, such as those from Coronado or Lunt, build the H-alpha system into the telescope itself. There are also H-alpha filters that can be added to existing telescopes, though these tend to be costly.
Specialty Filters: Calcium-K and Others
Beyond white-light and H-alpha, there are specialty filters that isolate other wavelengths. Calcium-K (CaK) filters show the Sun at 393.3 nanometers in the near-ultraviolet, revealing a different view of the chromosphere with bright plage regions. These filters are primarily used for astrophotography, as the human eye has low sensitivity at this wavelength.
For most amateur astronomers, a white-light filter is the starting point, and H-alpha is the upgrade path. Both offer a safe and spectacular view when used correctly.
Full Aperture vs Off-Axis Filters
Within the white-light category, you will encounter full-aperture and off-axis filters. Full-aperture filters cover the entire front opening of the telescope, providing the maximum possible resolution and the best image quality. Off-axis filters cover only a smaller circular area offset from the center, which is useful for telescopes with a central obstruction, such as Schmidt-Cassegrains, because it avoids the secondary mirror holder. Both are safe when properly made and mounted.
Proper Filter Placement: Front of Telescope Only
This section covers the single most important rule of solar filter installation, and we want to be absolutely clear about it. A telescope solar filter must always be mounted on the front end of the telescope, over the objective lens or the front aperture. It must never be placed at the eyepiece end.
The reason comes down to where the light gets filtered. When a filter is on the front of the telescope, it blocks the Sun’s energy before that energy enters the optical tube. The telescope never sees full-strength sunlight. Every lens, mirror, and baffle inside the instrument handles only the already-reduced light.
When a filter is placed at the eyepiece, the situation is reversed. Full-strength, unfiltered sunlight enters the front of the telescope and is concentrated through the entire optical system before reaching the filter. The telescope focuses all that solar energy into a tiny, intensely hot beam inside the eyepiece assembly.
That concentrated beam generates enormous heat. Eyepiece-mounted filters, which are typically small glass elements threaded into the bottom of an eyepiece, can crack or shatter from thermal stress without warning. The moment the filter breaks, full concentrated sunlight hits your eye instantly. This is not a hypothetical risk. It is a documented cause of permanent eye injury.
Forum communities dedicated to amateur astronomy are full of warnings about these vintage threaded eyepiece solar filters. Many older telescopes from the 1970s and 1980s shipped with them included. The consensus among experienced solar observers is unanimous: if you have one of these filters, do not use it. Destroy it so that nobody else can find it and be injured by it.
Some people assume that an eyepiece filter combined with a front filter provides extra protection. It does not. The eyepiece filter is unnecessary and adds a point of failure. A single, properly mounted front-aperture filter is all you need, and it is all you should use.
If you remember nothing else from this guide, remember this: the filter goes on the front of the telescope, the side that points at the Sun. Always. No exceptions.
Solar Filter Inspection Checklist Before Every Use
A solar filter is only safe if it is physically intact. Even a tiny pinhole in the filter material can allow concentrated sunlight through, creating a dangerous beam that could enter your eye. This is why you must inspect your filter before every single observing session, without exception.
Here is the inspection process we recommend, based on years of experience and the collective wisdom of the amateur astronomy community:
Step 1: Visual inspection under bright room light. Hold the filter up to a bright indoor light source and look through it from the viewing side. You should see a uniformly dim, even glow. If you see any pinpoints of bright light, tiny holes, or brighter spots, the filter is damaged and must not be used.
Step 2: Check for tears and scratches on film filters. Baader AstroSolar film and similar materials are thin and can develop tears over time. Examine the surface carefully, looking at different angles to catch any light reflecting off a tear or crease. Even a hairline crack in a glass filter is grounds for replacement.
Step 3: Inspect the mounting hardware. The filter cell, ring, or holder must be solid and undamaged. Check that thumbscrews are present and functional. If your filter uses hook-and-loop fasteners, verify they still grip firmly. A filter that can slip off the telescope during observation is as dangerous as a damaged one.
Step 4: Test the fit on your telescope. Before going outside, place the filter on the front of your telescope and confirm it fits snugly. Give it a gentle tug. It should stay firmly in place. If it wobbles, slides, or feels loose, do not proceed until you resolve the fit issue.
Step 5: Check the filter edges and sealing. If your filter has a glass element, look for any separation between the glass and the cell. If you have a film filter, ensure the film is taut and fully sealed around the edges with no gaps where unfiltered light could enter.
If you find any damage during inspection, retire the filter immediately. Do not attempt to repair a solar filter with tape, glue, or patches. The cost of a replacement filter is insignificant compared to the cost of your eyesight. If you are ever in doubt about a filter’s integrity, treat it as unsafe.
One forum insight worth noting: users have reported seeing new damage patterns appear on filters after extended solar viewing sessions. Heat from the Sun can degrade filter materials over time. This is why inspection before every session is essential, not just when the filter is new.
How to Set Up a Telescope with a Solar Filter: Step by Step
Now we will walk through the complete setup process from start to finish. Follow these steps in order every time you observe the Sun.
Step 1: Inspect your solar filter. Complete the full inspection checklist described above. Do this indoors under bright light before you take anything outside. If the filter fails any check, stop here.
Step 2: Set up your telescope mount and tripod. Assemble your telescope on its mount as you normally would, but do not attach the solar filter yet. Make sure the mount is stable and level. If you have a motorized or GoTo mount, initialize it now.
Step 3: Mount the solar filter on the FRONT of the telescope. Slide the filter over the objective lens or front aperture. Tighten the thumbscrews evenly, or secure the hook-and-loop straps depending on your filter type. The filter should be firmly seated with no possibility of sliding off. Give it a deliberate test pull to confirm.
Step 4: Cover or remove your finder scope. This is a step that beginners frequently miss, and it is critically important. Your finder scope is a small telescope with no solar filter, and looking through it at the Sun will cause instant eye damage. Either remove the finder scope entirely, cap both ends of it, or place a dedicated solar filter on it. Never leave an uncovered finder scope on a telescope pointed near the Sun.
Step 5: Keep the dust cap on until you are ready. Some observers like to install the solar filter first, then remove the dust cap that sits over the filter. If your solar filter has its own protective cover, leave it on until you are ready to observe. This prevents accidental exposure if something bumps the telescope.
Step 6: Move the telescope outside and let it equalize. Temperature differences between indoors and outdoors can cause air currents inside the telescope tube that degrade image quality. Give your scope 15 to 20 minutes to reach ambient temperature. While you wait, you can check local weather conditions and sunspot reports.
Step 7: Use the shadow method to locate the Sun. With the filter in place, the view through the eyepiece will be nearly black until the Sun is centered. Do not try to find the Sun by looking through the eyepiece. Instead, use the shadow method described in the next section to align the telescope roughly toward the Sun.
Step 8: Confirm the Sun is in the eyepiece before viewing. Once the telescope is pointed using the shadow method, insert your lowest-power eyepiece. Approach the eyepiece cautiously and look for the solar disk. If you do not see it, refine the telescope position using the shadow method and try again.
Step 9: Begin observing with low magnification. Always start with your longest focal length eyepiece for the widest field of view. You can switch to higher magnification once the Sun is centered and you are comfortable with the setup.
Step 10: At the end of your session, cap and store properly. Place the dust cover back over the solar filter before moving the telescope. Store the filter in its protective case away from heat, moisture, and direct sunlight when not in use.
How to Find the Sun When Your Filter Is Installed?
This is one of the most common challenges that new solar observers face. Once your telescope solar filter is in place, the view through the eyepiece is almost completely dark. You cannot simply look through the eyepiece and scan for the Sun, because the filter blocks so much light that nothing is visible until the Sun is already in the field of view.
You also cannot use your finder scope to locate the Sun, because the finder scope has no solar filter on it and looking through it would be dangerous. Some observers do put a separate small solar filter on the finder scope, but for beginners, the safest and simplest approach is the shadow method.
The shadow method works on a simple principle. When a telescope tube is pointed directly at the Sun, the tube’s shadow on the ground is at its smallest and most circular. When the telescope is pointed away from the Sun, the shadow is elongated and oval-shaped.
Here is how to use it: Stand behind your telescope and watch the shadow of the tube cast on the ground or on a wall. Slowly move the telescope in altitude (up and down) and azimuth (left and right) until the tube’s shadow is as small and round as possible. When the shadow is a tight, solid circle, the telescope is pointing directly at the Sun.
This technique takes a little practice, but it becomes intuitive quickly. A helpful tip is to use a piece of white cardboard or paper behind the telescope to catch the shadow, which makes the shadow shape easier to see, especially on uneven ground.
If your telescope tube has any rings or fittings that create an irregular shadow shape, focus on minimizing the overall shadow rather than trying to interpret every detail. The goal is to get the tube as perfectly aligned with the Sun’s direction as possible.
Once the shadow is minimized, look through the eyepiece with your lowest-power eyepiece installed. The Sun should be visible or very close to the field of view. Make small adjustments to center the solar disk, and you are ready to observe.
For telescopes with GoTo mounts, some models allow solar system tracking with the Sun as a target. Check your mount’s manual for safe solar alignment procedures. However, we still recommend verifying the Sun’s position with the shadow method even when using a GoTo system, because an alignment error could point the telescope at the wrong part of the sky.
What You Can See Through a Telescope Solar Filter?
The Sun is the most dynamic object you can observe from Earth. Unlike distant galaxies and nebulae that look the same year after year, the Sun changes every single day, and sometimes every hour. Once your telescope solar filter is properly set up, here is what you can expect to see.
Sunspots
Sunspots are the most obvious feature visible through a white-light filter. They appear as dark spots on the solar disk and can range from tiny pinpoints to large groups spanning a significant fraction of the Sun’s diameter. Each sunspot has a dark central umbra surrounded by a lighter penumbra, though small sunspots may show only the umbral region.
Sunspots are caused by intense magnetic fields that inhibit convection, making those regions cooler and therefore darker than the surrounding photosphere. They can persist for days or weeks, growing, shrinking, and evolving as you track them across the disk. A large sunspot group is a spectacular sight at moderate magnification.
The Sun follows an approximately 11-year activity cycle. During solar maximum, sunspots are abundant and large groups are common. During solar minimum, the Sun can go days or weeks with no visible spots at all. We are currently in a period of solar activity that makes this an excellent time to begin solar observing.
Solar Granulation
At higher magnifications on a day with steady atmospheric conditions, the Sun’s photosphere reveals a textured, granular pattern. This is solar granulation, caused by convection cells of hot plasma rising from below the surface, cooling, and sinking back down. Each granule is roughly the size of Texas and lasts only a few minutes before being replaced.
Granulation gives the Sun’s surface a living, organic quality that is mesmerizing to watch. It is one of the most underappreciated aspects of solar observing, and many newcomers are surprised by how textured and detailed the surface appears.
Faculae
Faculae are bright patches that are often found near sunspot regions, particularly near the edge of the solar disk where limb darkening makes them stand out. They are slightly hotter regions of the photosphere and can be seen through a quality white-light filter on a clear day. While subtler than sunspots, faculae are worth looking for, especially around active regions.
What H-alpha Filters Reveal
If you are observing through a hydrogen-alpha filter, an entirely different Sun appears. Solar prominences are the headline feature. These are enormous loops and arcs of plasma anchored to the Sun’s surface and extending into the chromosphere. Some prominences are stable and last for days, while others erupt dramatically over the course of hours.
Filaments appear as dark, thread-like structures on the solar disk. They are the same phenomenon as prominences, but seen from above against the bright disk rather than silhouetted against the dark sky at the edge. Solar flares, which are sudden brightenings associated with magnetic reconnection events, can occasionally be caught in real time through an H-alpha filter.
The chromospheric surface itself shows plage, which are bright regions associated with magnetic activity, and a network of spicules that give the edge of the Sun a furry, dynamic appearance. Through H-alpha, the Sun truly looks like a living star, and it is easy to lose track of time watching it change.
Alternative Safe Solar Observation Methods
While this guide focuses on telescope solar filter use, there are other safe ways to observe the Sun that do not require a filter at all. These methods are worth knowing about, especially if you want to share solar viewing with a group or if you are waiting for your filter to arrive.
Solar projection is a classic technique where you project the Sun’s image from the eyepiece of an unfiltered telescope onto a piece of white paper or cardboard held behind it. This works well with refracting telescopes and some reflectors, and it allows multiple people to view the Sun simultaneously. However, it should not be used with certain telescope designs, such as Schmidt-Cassegrains, where internal heat buildup can damage the instrument. The heat concentrated inside the tube during projection can melt or crack components.
Pinhole projection is the simplest method of all. Poke a small hole in a piece of cardboard and hold it so that sunlight passes through the hole and falls on a second piece of white paper or a wall behind it. The result is a small, inverted image of the Sun. This method is completely safe and is a great activity for children, though the image is small and will not show sunspots in detail.
Eclipse glasses are designed for naked-eye solar viewing and meet the ISO 12312-2 safety standard. They are affordable and widely available, especially before eclipses. Eclipse glasses let you see the Sun safely without any telescope, and they are useful for quickly checking the Sun’s position or monitoring large sunspot groups by eye. They cannot be used in combination with a telescope, binoculars, or camera, as the magnifying instrument would concentrate sunlight and melt through the film instantly.
Welder’s glass rated at shade 14 or higher can be used for naked-eye solar viewing. Shade 14 is the minimum acceptable darkness for solar observation. Lighter shades, such as shade 12 or below, do not provide adequate protection. Welder’s glass is inexpensive but produces a green-tinted image and is less convenient than eclipse glasses for casual viewing.
These alternative methods are all safe when used correctly, but none of them replaces the experience of viewing the Sun through a properly filtered telescope. The detail and magnification available through a telescope solar filter make it the preferred choice for serious solar observation.
Frequently Asked Questions
How to safely view the Sun with a telescope?
To safely view the Sun with a telescope, mount a certified solar filter (ISO 12312-2) on the FRONT of the telescope before pointing it anywhere near the Sun. Never use eyepiece-mounted filters. Cover or remove your finder scope. Use the shadow method to locate the Sun, and always begin observing with your lowest-power eyepiece. Inspect your filter for damage before every session.
What does the Sun look like through a solar filter?
Through a white-light solar filter, the Sun appears as a bright disk where you can see dark sunspots with their darker umbra and lighter penumbra, the textured granulation of the photosphere, and bright faculae near active regions. Through a hydrogen-alpha filter, you can additionally see prominences along the edge, filaments across the disk, and the dynamic chromospheric surface.
What happens if you look at the Sun through a telescope without a solar filter?
Looking at the Sun through an unfiltered telescope causes instant, permanent, and irreversible eye damage. A telescope concentrates sunlight like a magnifying glass, focusing enough energy to destroy retinal tissue in less than a second. The retina has no pain receptors, so you would not feel it happening. There is no treatment that can reverse solar retinopathy.
How do I find the Sun when my solar filter is installed?
Use the shadow method. Watch the shadow your telescope tube casts on the ground and slowly move the telescope until the shadow is as small and circular as possible. When the tube shadow is minimized, the telescope is pointing directly at the Sun. Then look through your lowest-power eyepiece to confirm the solar disk is in view. Never use an uncovered finder scope to locate the Sun.
Final Thoughts on Safe Solar Viewing
Setting up a telescope with a solar filter to view the Sun safely is a straightforward process once you know the steps, but it is a process where every single step matters. The filter goes on the front of the telescope, always. You inspect it before every session, always. You cover the finder scope, always. And you use the shadow method to find the Sun rather than scanning blindly.
Solar observing is one of the most rewarding activities in astronomy. The Sun is the only star close enough to study in detail, and it puts on a different show every day. With a quality telescope solar filter and the procedures in this guide, you can enjoy that show safely for the rest of your observing life. The Sun is waiting, and with the right preparation, it is yours to explore.