
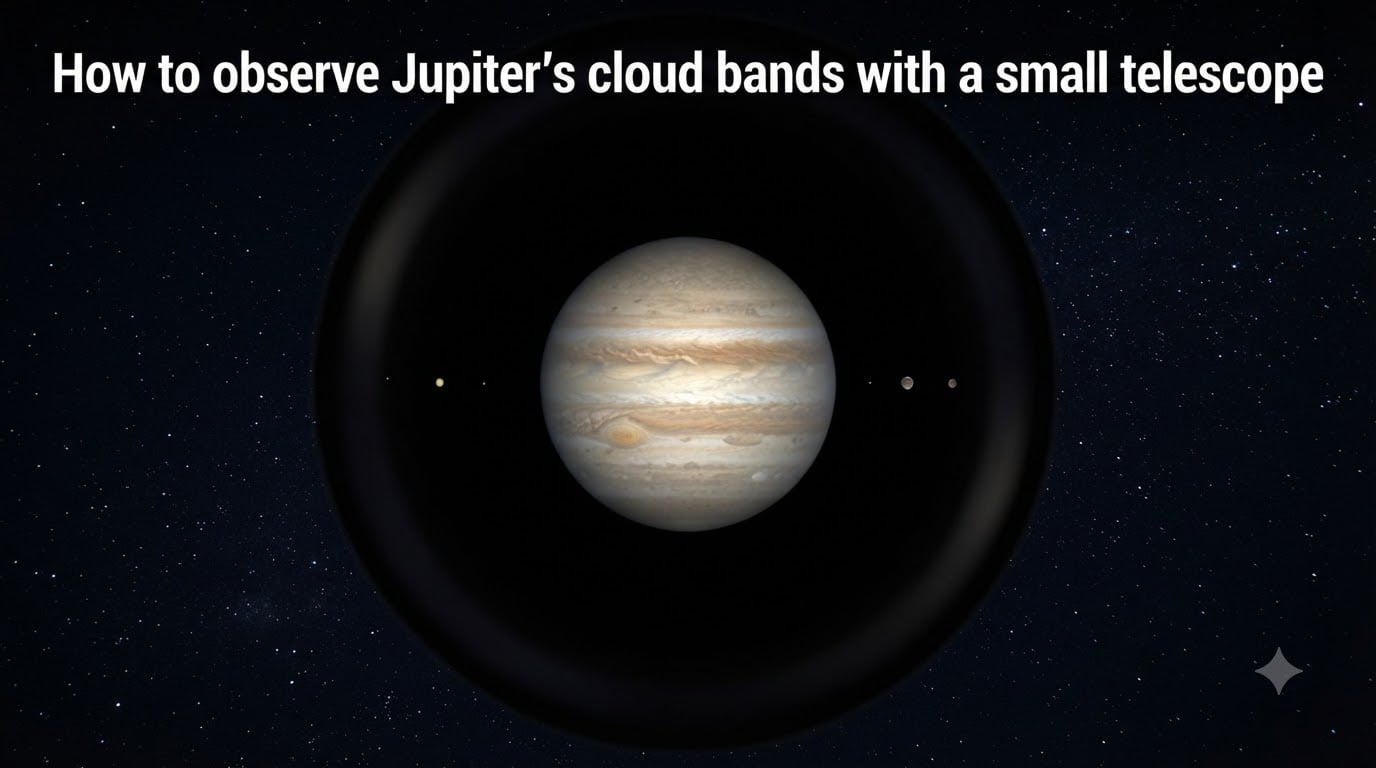
Learning how to observe Jupiter’s cloud bands with a small telescope is one of the most rewarding first steps in planetary astronomy. Even a modest 60mm refractor can reveal the two main equatorial belts of the largest planet in our solar system, along with its four Galilean moons dancing around it like tiny stars.
The challenge is that cloud bands are subtle. Many beginners expect to see the vivid, colorful Jupiter from NASA press releases, then feel disappointed when the planet looks like a bright white disc. I have been there myself, staring at a featureless blob through a department-store telescope on a humid summer night.
This guide walks you through everything you need: timing your session around Jupiter’s opposition, finding the planet in the sky, choosing the right aperture and magnification, setting up your telescope for maximum detail, and troubleshooting the most common problems that leave beginners frustrated. By the end, you will know exactly what to expect from your equipment and how to push it to its limits.
One key truth up front: atmospheric seeing matters far more than magnification. A well-collimated 4-inch telescope on a steady night will show more detail than an 8-inch scope on a turbulent one. Patience and technique beat raw aperture almost every time.
Table of Contents
What Are Jupiter’s Cloud Bands?
Jupiter’s cloud bands are alternating dark stripes and bright zones wrapped around the planet’s equator, created by powerful jet streams in its atmosphere. Jupiter has no solid surface — what we see is the top of a deep, churning atmosphere of hydrogen, helium, ammonia ice crystals, and ammonium hydrosulphide clouds.
The darker bands are called belts, and they sit lower in the atmosphere where warmer air sinks. The lighter bands are called zones, where ammonia ice crystals rise and reflect more sunlight. This constant upwelling and sinking is driven by Jupiter’s rapid rotation — the planet completes a full spin in just under 10 hours.
That fast rotation is your friend as an observer. Features on Jupiter move quickly. If you watch for 20 to 30 minutes, you can actually see the planet’s cloud patterns shift as different longitude sections rotate into view.
The Main Bands You Can See
Through a small telescope, the two most prominent features are the North Equatorial Belt (NEB) and the South Equatorial Belt (SEB). These two dark brownish bands straddle Jupiter’s equator and are visible in telescopes as small as 60mm.
With a 4-inch or larger scope under good conditions, you can start picking up additional details. The Equatorial Zone between the two belts often appears cream-colored or pale tan. Further north and south, you may glimpse the thinner North and South Temperate Belts.
Advanced observers with 6-inch plus telescopes and steady air can spot smaller features: festoons (blue-grey loops hanging from the NEB into the equatorial zone), white ovals (cyclonic storms), and dark barges in the polar regions.
System I and System II Rotation
Jupiter’s atmosphere rotates at different speeds depending on latitude. Observers use two reference systems to track features. System I covers the equatorial region (from about 10 degrees south to 10 degrees north) and rotates in roughly 9 hours 50 minutes. System II covers everything else and rotates in about 9 hours 56 minutes.
This matters for timing the Great Red Spot, which sits in the System II region. If you want to catch it, you need to know when its longitude faces Earth — and that requires checking transit predictions for each night.
When Is the Best Time to Observe Jupiter?
Jupiter is observable for a large portion of each year, but the absolute best time to observe its cloud bands is around opposition, when Earth passes between Jupiter and the Sun. At opposition, Jupiter is closest to Earth, appears largest in apparent diameter, and is visible all night long.
Jupiter reaches opposition roughly every 13 months. The planet appears brightest and largest for a window of about two to three months around this date. Outside that window, Jupiter is still observable but smaller and fainter.
Why Opposition Makes Such a Difference
At opposition, Jupiter can reach an apparent diameter of around 45 to 50 arcseconds. A few months before or after, that shrinks to 35 or even 30 arcseconds. That size difference matters enormously when you are trying to resolve subtle cloud band details.
Opposition also places Jupiter at its highest point in the sky around midnight, which means less atmosphere for its light to pass through. Less atmosphere means less distortion, better contrast, and steadier views.
Seasonal and Nightly Timing
Even during opposition season, not every night is equal. The best observing happens when Jupiter is high above the horizon — ideally above 30 degrees altitude. When the planet is low, you are looking through far more turbulent air near the horizon, which smears detail.
Pick nights with stable air masses. Cold fronts that have passed through and left still, calm, slightly hazy air often produce the steadiest seeing. Conversely, nights after hot, windy days tend to produce turbulent, blurry views.
A smartphone app like Stellarium, SkySafari, or Sky View can show you exactly when Jupiter rises, when it reaches its highest point, and when opposition occurs each year. I use SkySafari to plan every Jupiter session.
How to Find Jupiter in the Night Sky
Jupiter is one of the easiest planets to find because it is extraordinarily bright. It is the fourth-brightest object in the sky after the Sun, Moon, and Venus, shining at magnitude -2.0 or brighter. To the naked eye, it appears as a steady, brilliant white or cream-colored light that does not twinkle the way stars do.
Jupiter always travels along the ecliptic, the same path the Sun and Moon follow across the sky. This means it moves through the zodiac constellations. In any given month, a quick search for “Jupiter position tonight” will tell you which constellation it is currently in.
Step-by-Step: Locating Jupiter
Step 1: Check a planet-tracking app or website to find which constellation Jupiter is currently passing through and what time it rises.
Step 2: Go outside about 30 minutes after Jupiter has risen (or whenever it is above the rooftops) and look toward that part of the sky.
Step 3: Look for the brightest, steadiest “star” in that region. That is almost certainly Jupiter. Stars twinkle; planets shimmer but hold steady.
Step 4: Confirm by looking at it through binoculars. If you see tiny points of light lined up near a bright disc, those are the Galilean moons — you have found Jupiter.
Once you have confirmed it, point your finderscope at the planet and center it. Then switch to your low-power eyepiece in the main telescope to locate it, and work your way up in magnification.
Telescope Equipment You Actually Need
You do not need a massive, expensive telescope to see Jupiter’s cloud bands. A 60mm refractor is genuinely enough to reveal the two main equatorial belts on a steady night. The question is not whether a small telescope can show the bands — it absolutely can — but how much detail you want.
Here is what different aperture sizes typically reveal under good seeing conditions:
60mm to 70mm Refractors
At this size, you will see Jupiter as a small but clearly disc-shaped object, not a point of light. The North and South Equatorial Belts are visible as two darkish stripes crossing the disc. All four Galilean moons are easy to spot. You will not see much color, and the bands will appear as subtle grey-brown lines rather than detailed structures.
As one forum user with a 60mm refractor described it: “I see all the Galilean moons and a sharply defined, very bright but still tiny disc.” That is an honest and accurate description.
90mm to 4.5-inch Telescopes
This is the sweet spot for beginners serious about planetary viewing. A 4-inch refractor, 4.5-inch reflector, or 90mm Makutsov-Cassegrain starts to show real band detail. The equatorial belts show texture and variation. The lighter equatorial zone becomes clearly visible between them. On good nights, you can glimpse the Great Red Spot as a small notch or pale oval.
This aperture range offers the best balance of detail, portability, and cost for most people starting out.
6-inch to 8-inch Telescopes
A 6-inch Dobsonian or an 8-inch Schmidt-Cassegrain opens up significantly more detail. Additional temperate belts appear. Festoons, white ovals, and dark barges become detectable. The Great Red Spot is clearly visible when it faces Earth. Shadow transits of the Galilean moons — tiny black dots crossing Jupiter’s face — become observable events.
The trade-off is that larger apertures are more sensitive to atmospheric seeing. On a turbulent night, an 8-inch scope may actually show less detail than a 4-inch because it is capturing more of the turbulent air column.
What About Eyepieces?
For Jupiter, you want a range of eyepieces that give you approximately 100x to 250x magnification. A good starting combination is a 25mm eyepiece for finding and framing, a 10mm for general viewing, and a 6mm or 7mm for high-power detail work on steady nights.
A 2x Barlow lens can double your existing eyepiece magnifications, but use it carefully. Too much magnification on a blurry night just gives you a larger blurry image. The forum posts are full of beginners who added a Barlow and made their view worse, not better.
How to Observe Jupiter’s Cloud Bands with a Small Telescope
Now for the step-by-step process. This is the core technique for getting the most detail out of whatever telescope you own.
Step 1: Let Your Telescope Cool Down
If you bring a telescope from a warm house into cool night air, the optics will be covered in turbulent thermal currents. This is called thermal disequilibrium, and it is one of the top reasons beginners see blurry views.
Set your telescope outside for 30 to 45 minutes before you plan to observe. For larger reflectors, an hour is better. Let the tube, mirror, and eyepieces reach the same temperature as the surrounding air. This single step dramatically improves image sharpness.
Step 2: Collimate If You Have a Reflector or Catadioptric
Collimation means aligning your telescope’s mirrors so they are perfectly centered. A miscollimated telescope scatters light and kills contrast — exactly what you do not want when trying to see subtle cloud bands.
Newtonian reflectors and Schmidt-Cassegrains need regular collimation check. Refractors generally do not. If you have a reflector and have never collimated it, learning this skill will transform your planetary views overnight.
Step 3: Find Jupiter and Center It
Use your lowest-power eyepiece to locate Jupiter through the finderscope, then center it in the main telescope’s field of view. Once centered, switch to a medium-power eyepiece (around 100x to 150x) to confirm the disc is sharp.
Step 4: Increase Magnification Gradually
Work your way up to higher magnification one eyepiece at a time. After each change, refocus carefully. Stop increasing magnification when the image starts to look soft or when the atmosphere causes the view to shimmer excessively.
A good rule of thumb: the maximum useful magnification for a given telescope is about 50x per inch of aperture. So a 4-inch scope tops out around 200x, and a 6-inch around 300x. On most nights, atmospheric seeing limits you well below these theoretical maximums.
Step 5: Wait for Moments of Steady Seeing
This is the secret that experienced planetary observers know and beginners often miss. Atmospheric seeing is not constant — it comes in waves. Even on a mediocre night, there will be brief windows of 5 to 15 seconds where the air steadies and the view snaps into sharp focus.
When that happens, you may suddenly see band detail that was invisible moments before. The trick is to keep your eye at the eyepiece and wait for those moments rather than giving up after a few seconds of blurry viewing. Patience is the single most important skill in planetary observation.
Step 6: Use Averted Vision for Subtle Details
The center of your retina is optimized for bright detail, but the edges are more sensitive to faint contrast. When you are trying to tease out subtle band variations or a faint Great Red Spot, look slightly to the side of Jupiter rather than directly at it. This technique, called averted vision, lets your peripheral rods detect faint details your central vision misses.
Step 7: Observe Over Multiple Sessions
Jupiter rotates in under 10 hours, so different cloud features face Earth each night. If you observe on multiple evenings over a week or two, you will gradually build a mental map of the planet’s features. Sketching what you see — even badly — forces you to look more carefully and accelerates your learning curve dramatically.
Using Color Filters to Enhance Jupiter’s Bands
Color filters screw into the bottom of your eyepiece and can subtly improve the contrast of Jupiter’s cloud features. They do not add detail that is not there, but they can make existing details stand out more clearly against the bright planetary disc.
The most popular Jupiter filter is the Wratten #80A blue filter. It darkens the reddish-brown belts and lightens the bright zones, increasing the contrast between them. Many observers consider this the single most useful filter for planetary viewing.
Other useful options include:
- #82A light blue — a gentler version of the #80A, good for smaller telescopes where the #80A is too dark.
- #12 yellow or #21 orange — these enhance the bluish festoons that hang from the North Equatorial Belt into the equatorial zone.
- Baader Neodymium Moon and Skyglow filter — a broadband filter that many planetary observers praise for slightly boosting contrast on Jupiter without the heavy light loss of traditional color filters.
A word of caution: every filter reduces the total amount of light reaching your eye. On small telescopes (under 4 inches), filters can darken the image so much that you lose more detail than you gain. Try them on a larger scope first, or experiment with the lighter #82A filter.
Spotting the Great Red Spot and Galilean Moons
Beyond the cloud bands themselves, two categories of features make Jupiter endlessly fascinating: the Great Red Spot and the Galilean moons.
The Great Red Spot
The Great Red Spot (GRS) is a massive anti-cyclonic storm that has been observed for at least 350 years. It sits in Jupiter’s South Tropical Zone, just south of the SEB. In recent decades it has been shrinking, but it remains large enough to swallow Earth.
To see the GRS, you need two things: a telescope of at least 4 inches (90mm may show it as a faint notch under excellent conditions) and the right timing. Because Jupiter rotates in under 10 hours, the GRS is only visible for roughly a two-hour window each rotation when its longitude faces Earth.
Check transit prediction tools — Sky & Telescope publishes monthly GRS transit times, and apps like SkySafari calculate them automatically. Plan your session around a transit time for the best chance of spotting it.
Be prepared for the GRS to look less dramatic than you expect. Forum observers frequently describe it as “not as striking” as anticipated. Through a small telescope, it often appears as a pale salmon or grey oval rather than a bold red mark. The pale coloration is real — the storm has been fading over recent years.
The Galilean Moons
Jupiter’s four largest moons — Io, Europa, Ganymede, and Callisto — are visible in even the smallest telescope as tiny points of light arranged in a rough line near the planet. Galileo Galilei discovered them in 1610 with a telescope inferior to modern beginner scopes.
Each moon orbits Jupiter at a different distance and speed, so their arrangement changes nightly. Sometimes one or more passes behind or in front of the planet. When a moon passes in front of Jupiter, its tiny shadow falls on the cloud tops below — and that shadow is visible in telescopes of 4 inches or larger as a tiny black dot crawling across the disc.
These shadow transits are among the most rewarding events to observe in all of amateur astronomy. Check transit prediction tables for upcoming events and plan a session around one.
Troubleshooting: Why Can’t I See Jupiter’s Cloud Bands?
This is the single most common question in amateur astronomy forums. If you are reading this section, you are in good company — nearly every planetary observer has struggled with this at some point. Here are the most likely causes and how to fix each one.
Problem 1: Jupiter Looks Like a Bright White Disc With No Detail
This is the classic complaint, and it usually has one of three causes. First, you may be using too much magnification. At very high power, the image becomes dim and washed out, and contrast disappears. Try backing off to a lower magnification — sometimes 100x or 120x shows bands that 200x obliterates.
Second, your telescope may not have cooled down. Thermal currents inside the tube act like looking through a heat shimmer. Give your scope at least 30 minutes outside before observing.
Third, the cloud bands are subtle contrast features, not bold colorful stripes. You need to look carefully with dark-adapted eyes. Give your eyes time at the eyepiece and use averted vision.
Problem 2: Jupiter Looks Overexposed or Too Bright
Small telescopes, especially fast refractors, can produce an overwhelmingly bright Jupiter image that washes out detail. The fix is to reduce brightness without losing contrast. A #80A blue filter helps. Alternatively, observe when Jupiter is lower in the sky (though this trades one problem for another with atmospheric distortion).
Some observers use a simple aperture mask — a piece of cardboard with a smaller hole cut in it placed over the front of the telescope. This reduces light intake and can actually improve contrast on bright planets.
Problem 3: The View Is Blurry Even at Moderate Magnification
This is almost always an atmospheric seeing problem, not a telescope problem. Even a perfectly aligned telescope will produce blurry views when the air above you is turbulent. The solution is to wait for a better night and to take advantage of brief moments of steady seeing when they occur.
That said, check your collimation if you have a reflector. A miscollimated scope is a blurry scope, regardless of the atmosphere.
Problem 4: You Added a Barlow Lens and the View Got Worse
This is a very common beginner mistake documented across forums. A Barlow lens doubles (or triples) your magnification, but it also amplifies every flaw in your optics and atmosphere. If your view is already soft at 150x, adding a 2x Barlow to reach 300x just makes it larger and softer.
Use a Barlow only on nights of excellent seeing, and only if your base image at lower power is already sharp and detailed. Otherwise, it actively hurts your view.
Problem 5: You Are Expecting Hubble-Quality Views
Forum posts reveal that the biggest source of disappointment is unrealistic expectations. NASA images are processed composites from spacecraft flying close to Jupiter. No Earth-based telescope in any size will show anything resembling those images.
What you will see through a small telescope is a small, bright disc with two subtle dark bands, possibly some texture on a good night, and four tiny moons. It is modest compared to a glossy magazine photo — but you are seeing it with your own eyes, light that traveled hundreds of millions of miles to reach your retina. That perspective is what makes it extraordinary.
Tips for Better Jupiter Observation
Beyond the basics, a few advanced techniques can meaningfully improve your views of Jupiter’s cloud bands.
Understand Seeing vs. Transparency
Astronomers distinguish between two atmospheric qualities. Transparency is how clear the air is — how faint a star you can see. Seeing is how steady the air is — how much the image shimmers and blurs.
For Jupiter, seeing matters far more than transparency. A slightly hazy night with calm, still air can produce spectacular planetary views, while a crystal-clear night after a windy day may be useless for planets. Learn to recognize good seeing conditions and plan your Jupiter sessions around them.
Observe from Grass, Not Concrete
Hard surfaces like concrete and asphalt radiate heat long after sunset, creating turbulent thermal updrafts that ruin seeing. Grass and dirt cool more evenly. If you have a choice, set up your telescope over a lawn rather than a driveway.
Sketch What You See
Even crude pencil sketches of Jupiter force you to observe carefully and notice details you would otherwise miss. Keep a simple observation log with the date, time, telescope, magnification, and a rough sketch of the band positions and any features visible. Over weeks, you will see your skills improve and your understanding of Jupiter’s atmospheric dynamics deepen.
Sketching also contributes to science. Organizations like the British Astronomical Association accept amateur Jupiter observations and use them to track long-term atmospheric changes on the planet.
Frequently Asked Questions
What telescope do I need to see Jupiter’s cloud bands?
A 60mm to 90mm refractor or a 4.5-inch reflector is enough to see Jupiter’s two main equatorial belts. For more detail like additional bands, festoons, and the Great Red Spot, a 6-inch or 8-inch telescope is ideal. The most important factors are actually steady atmospheric seeing and a well-collimated optic, not raw aperture.
Can you see Jupiter’s bands with a small telescope?
Yes. Even a 60mm department-store refractor can reveal the North and South Equatorial Belts on a steady night. The bands appear as subtle grey-brown stripes rather than dramatic colorful bands. Patience at the eyepiece and dark-adapted eyes make a big difference in what you can detect.
Why can’t I see Jupiter’s cloud bands through my telescope?
The most common causes are using too much magnification, not letting the telescope cool down to outside temperature, poor atmospheric seeing, or expecting bold colors rather than subtle contrast. Try lowering magnification to 100x-120x, let your scope sit outside for 30-45 minutes, collimate if you have a reflector, and observe on calm, stable nights.
What magnification is needed to see Jupiter’s cloud bands?
The two main equatorial belts are visible at around 75x to 100x. For finer band detail, 150x to 200x is ideal on nights of good seeing. Going above 250x rarely adds detail and often makes the view worse due to atmospheric turbulence. Start low and increase magnification only while the image stays sharp.
How do I observe Jupiter’s Great Red Spot?
The Great Red Spot is visible for about a two-hour window each rotation when its longitude faces Earth. Check transit predictions from Sky u0026amp; Telescope or an app like SkySafari for exact timing. You need at least a 4-inch telescope, and the spot appears as a pale salmon or grey oval rather than a bold red mark.
Conclusion
Observing Jupiter’s cloud bands with a small telescope is entirely achievable for beginners — you just need the right expectations, the right technique, and patience. A 60mm scope on a steady night will show you the two main equatorial belts and all four Galilean moons. A 6-inch scope adds texture, festoons, the Great Red Spot, and moon shadow transits.
The keys are simple: observe around opposition when Jupiter is largest and brightest, let your telescope thermally equilibrate, keep magnification reasonable, and wait for moments of steady seeing at the eyepiece. The cloud bands are subtle contrast features, not bold colors, and learning to see them is a skill that improves with every session.
Start with your next clear night. Find Jupiter, settle in at the eyepiece, and give your eyes time to adjust. The largest planet in our solar system is waiting, and its cloud bands are more accessible than you might think.