
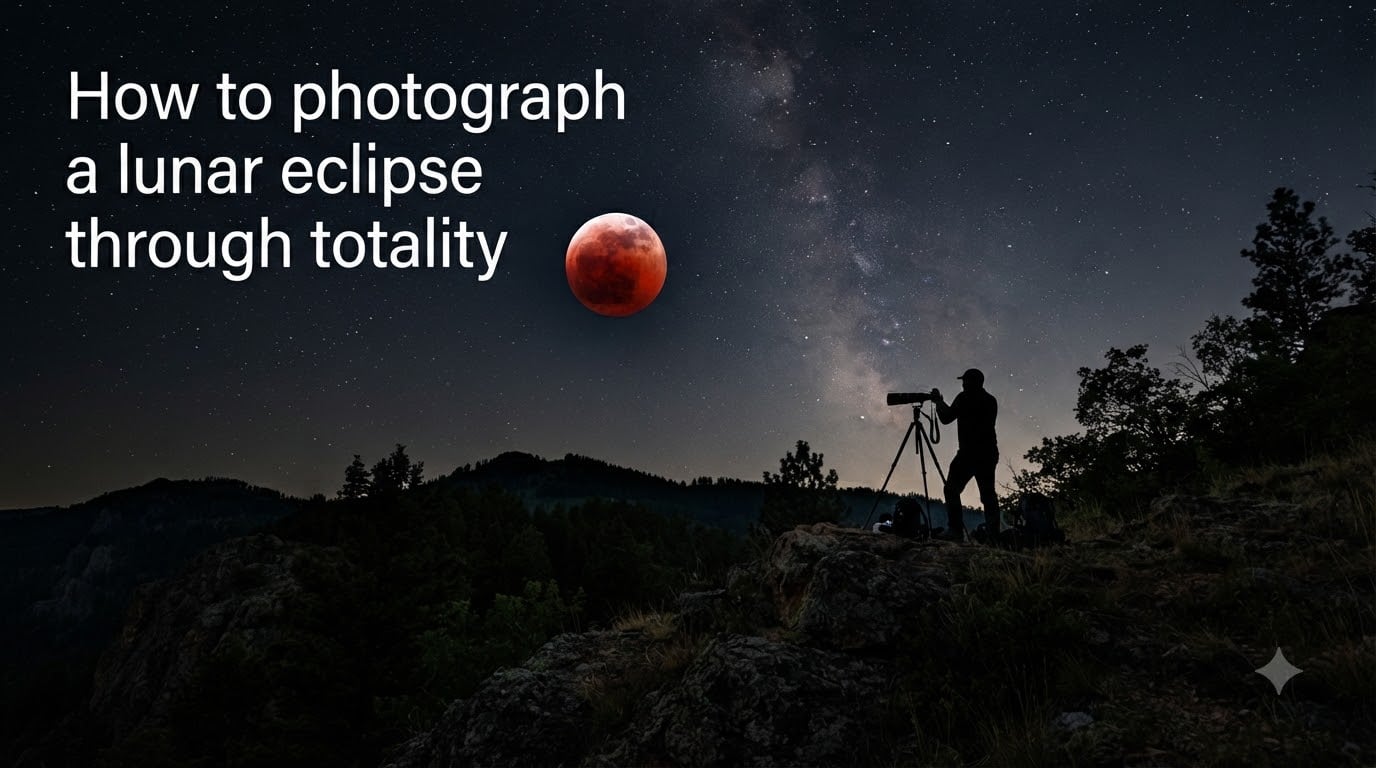
I have chased blood moons from rooftops, deserts, and frozen backyards at 3 a.m. for the better part of a decade. Every time totality arrives, the same thing happens: the bright silver disk dims and transforms into something that looks like a glowing coal suspended in black space. It is one of the most rewarding things a night photographer can capture.
Learning how to photograph a lunar eclipse through totality takes more than just pointing a camera at the sky. The light changes dramatically every few minutes during the event. Settings that worked perfectly during the partial phase will produce a black frame once the moon enters the umbra. Without preparation, you will miss the best moments entirely.
This guide walks through everything I have learned from shooting multiple total lunar eclipses: equipment you need, exact camera settings for each phase, wide-angle and telephoto techniques, smartphone tips, and the mistakes that ruined my early attempts. I will also cover planning apps, timing, and post-processing so you can walk away with a composite image or a single frame you are genuinely proud of.
Whether you are working with a full-frame mirrorless camera and a 600mm lens, or an iPhone on a small tripod, the principles are the same. Stability, exposure adjustment, and timing are what separate a blurry orange smudge from a sharp, detailed blood moon.
Table of Contents
What Is a Total Lunar Eclipse and Why Totality Matters?
A total lunar eclipse occurs when the full Moon passes completely through Earth’s dark umbral shadow. Sunlight bending through Earth’s atmosphere filters out blue wavelengths and projects a deep red and copper glow onto the lunar surface. This is why totality is often called a “blood moon.”
There are three types of lunar eclipses. A penumbral eclipse happens when the Moon only passes through Earth’s faint outer shadow and is barely noticeable in photos. A partial eclipse occurs when only part of the Moon enters the umbra, creating a visible dark “bite” on one edge. A total lunar eclipse is when the entire Moon is immersed in the umbra.
Totality is the phase photographers care about most. It typically lasts 60 to 90 minutes, giving you plenty of time to adjust and experiment. During this window, the Moon dims by roughly 4 to 5 stops compared to a normal full moon. This dramatic drop in brightness is why so many photographers end up with black frames. They keep their fast shutter speeds from the partial phase and underexpose completely.
The color during totality varies depending on atmospheric conditions and volcanic dust in Earth’s stratosphere. Some eclipses produce a bright orange-red Moon. Others are so dark they are barely visible to the naked eye. The Danjon Scale, ranging from L0 (very dark, almost invisible) to L4 (bright copper-orange), is used by astronomers to rate eclipse brightness. I always check this after the event to calibrate my expectations for next time.
Unlike a solar eclipse, a lunar eclipse is safe to view and photograph without any filters. You can shoot it directly. The challenge is entirely about exposure and technique.
Essential Equipment for Lunar Eclipse Photography
You do not need expensive gear to get great results, but a few items will make a significant difference. Here is what I recommend based on years of trial and error in the field.
Camera body: Any DSLR or mirrorless camera with manual controls will work. Full-frame sensors give you cleaner high-ISO results during totality, but crop-sensor cameras are perfectly capable. I have shot publishable blood moon images on an APS-C body.
Lens choice depends on your technique: For telephoto close-ups, anything from 200mm to 600mm is ideal. For wide-angle landscape compositions with the Moon as one element, a 14mm to 35mm lens works well. A mid-range zoom like 70-200mm can serve double duty.
Tripod: This is non-negotiable. During totality, your shutter speeds will range from 1 second to 4 seconds. No human hands can hold a camera steady for that long. Use the sturdiest tripod you own. If it is windy, hang your camera bag from the center column for added stability.
Remote shutter release or intervalometer: Even pressing the shutter button introduces vibration. A cable release, wireless remote, or your camera’s built-in intervalometer eliminates this. If you have none of these, use the 2-second self-timer as a minimum.
Extra batteries: Long exposures and cold nighttime temperatures drain batteries fast. I always carry at least two spares, kept in an inner pocket close to my body for warmth.
Headlamp with red light mode: A red light preserves your night vision and is less likely to ruin your shot or bother other photographers nearby. I learned this the hard way after fumbling with a bright white light during totality.
Planning, Timing, and Location Setup
A successful eclipse shoot starts days or weeks before the event. You need to know exactly when totality begins, where the Moon will be in your sky, and whether the weather will cooperate.
Use planning apps: PhotoPills and The Photographer’s Ephemeris (TPE) are my go-to tools. Both show the Moon’s exact azimuth and altitude at any given time from your location. Stellarium is a free desktop alternative that lets you simulate the entire night sky. I use these to plan my composition days ahead.
Know the eclipse timeline: Total lunar eclipses follow a predictable sequence. First, the Moon enters the penumbra (barely noticeable dimming). Then it enters the umbra and the partial phase begins (a dark bite grows across the disk). Totality starts when the entire Moon is inside the umbra. After totality, the process reverses. NASA’s eclipse page publishes exact times for every eclipse visible from your region.
Scout your location: Look for a clear view of the horizon in the Moon’s direction during the eclipse. Light pollution matters less for the Moon itself than for wide-angle compositions. For telephoto shots, even a city balcony works. For landscape images, I drive to darker skies to get a cleaner foreground.
Check the weather: Cloud cover is the enemy. I monitor forecasts from multiple sources starting a week out and have a backup location in mind 50 to 100 miles away in case the forecast shifts. The NOAA and Clear Outside app are reliable for sky transparency predictions.
Arrive early and set up in daylight: Focusing and composing in the dark is frustrating. I set up my tripod, frame my composition, and even pre-focus on a distant object an hour before the eclipse begins. Once the Moon is high and bright, I fine-tune focus using live view magnification.
Camera Settings by Eclipse Phase (Partial vs Totality)
The single biggest mistake in lunar eclipse photography is keeping the same settings throughout the event. The Moon’s brightness changes by several stops between the partial phase and totality. You must adjust continuously.
Here is the exposure progression I follow, which aligns with the reference data from experienced eclipse photographers including Fred Espenak (Mr. Eclipse) and settings shared in photography communities:
Full Moon (before eclipse): ISO 100-200, f/8, 1/250s to 1/500s
Partial phase (bright portion still large): ISO 100-200, f/8, 1/125s to 1/250s
Partial phase (deep, near totality): ISO 200-400, f/5.6, 1/30s to 1/8s
Totality (bright Danjon rating): ISO 400-800, f/4, 1-2 seconds
Totality (dark eclipse, low Danjon): ISO 800-1600, f/2.8, 2-4 seconds
These are starting points, not rules set in stone. I always check my histogram after each adjustment. The Moon should sit in the middle of the histogram, not clipped at the right edge. During the partial phase, it is very easy to blow out the bright portion of the Moon while trying to expose for the shadowed area.
Shoot in RAW: This is critical. RAW files give you the latitude to recover highlights and pull detail from shadows during post-processing. JPEG files throw away too much data for the demanding dynamic range of an eclipse.
Use manual mode: The changing light during an eclipse confuses even the best automatic metering systems. I set my aperture, ISO, and shutter speed manually. Many photographers on r/photography and r/AskAstrophotography recommend aperture priority as a semi-automatic option, but I prefer full manual for consistency.
Bracket your exposures: During totality, take 3 shots at different shutter speeds (for example, 1 second, 2 seconds, and 4 seconds). This gives you options later and is essential if you plan to create an HDR composite. Some cameras have automatic exposure bracketing that you can pair with an intervalometer.
Enable long exposure noise reduction: For exposures longer than 1 second, turn this on. The camera takes a dark frame after each shot and subtracts sensor noise. It slows you down (every shot takes twice as long) but produces noticeably cleaner images during totality.
Watch for motion blur: The Moon moves across the sky, and Earth’s rotation means even a static Moon drifts. At telephoto focal lengths, exposures longer than 2-3 seconds will show blur. The general rule is the 500-rule: divide 500 by your effective focal length to get your maximum exposure before star trailing. At 500mm on a full-frame camera, that gives you 1 second.
Wide-Angle Technique: Capturing the Eclipse with Landscape
The wide-angle approach is my personal favorite because it tells a story. Instead of a close-up disk of the Moon floating in black space, you capture the blood moon in context with the landscape below. Buildings, mountains, trees, or city skylines become silhouettes against the eclipsed Moon.
Lens and framing: Use a focal length between 14mm and 35mm. Frame your composition so the Moon’s path during the eclipse crosses through an interesting part of your scene. This is where PhotoPills is invaluable. Its Night AR feature overlays the Moon’s trajectory on your phone screen in real time so you can position foreground elements precisely.
Exposure: During totality, the Moon is dim enough that you can expose for it and still get some foreground detail in a single shot. Try ISO 800-1600, f/2.8 to f/4, and 4-8 seconds. If your foreground is too dark, take a separate longer exposure for it and blend the two images later in post-processing.
Star trails option: If you leave your camera fixed on a tripod and take continuous exposures throughout the entire eclipse, you can create a composite showing the Moon’s path as a trail of disks transitioning from white to deep red. This is the technique Nikon highlights in their eclipse guide. You need an intervalometer set to take a photo every 3-5 minutes, and you combine the images in Photoshop or StarStax.
Composition tips: Position the Moon near the rule-of-thirds intersections rather than dead center. Include leading lines from the landscape that draw the eye upward. Water reflections can double the visual impact if you are near a lake or ocean. My best wide-angle eclipse shot was taken from a hillside with city lights below, and the Moon sitting just above the horizon in totality.
Telephoto Technique: Close-Up Moon Shots
Telephoto photography fills the frame with the Moon and shows surface detail during the color transition of totality. This is the approach that produces the dramatic, detailed blood moon images you see online and in publications.
Focal length: 200mm is the minimum for a reasonably sized Moon in frame. 400mm to 600mm is ideal for getting the Moon to fill a significant portion of the frame. If you do not own a long lens, a 1.4x or 2x teleconverter can extend your reach at the cost of 1-2 stops of light. During totality, every stop matters, so be aware of this trade-off.
Focusing: Autofocus will struggle during the dim partial and totality phases. Switch to manual focus and use live view at maximum magnification to focus on the Moon’s edge or a prominent crater. Once focused, tape the focus ring or lock it to prevent accidental shifts. A community member on r/AskAstrophotography shared a great tip: set up and achieve perfect focus while the Moon is still bright, before the eclipse begins.
Preventing vibration: At long focal lengths, any movement is magnified. Use mirror lockup (on DSLRs), a 2-second shutter delay, and a sturdy tripod. One photographer shared their reliable setup on a forum: “f/8, 1/125th or 1/250th to get good clear shots, use a super stable tripod with mirror lockup.” This is sound advice for the partial phase. During totality, you will need longer exposures, so stability becomes even more critical.
Tracking mounts: If you have a star tracker or an equatorial mount, polar align it before the eclipse and use the lunar tracking rate. This allows longer exposures during totality without motion blur, which means lower ISO and cleaner images. This is advanced technique but produces the highest quality close-ups. Tracking is not required, but it makes a measurable difference at focal lengths above 400mm.
Capture the color shift: The transition from silver to red is gradual. Take shots every 5-10 minutes throughout the event. You can later create a composite showing the Moon’s color progression from partial through totality and back. This composite is one of the most satisfying images to produce from an eclipse shoot.
How to Photograph a Lunar Eclipse with a Smartphone?
Smartphones have become remarkably capable for night photography, and many eclipse searches specifically include “iPhone” and “Android.” You will not get the same detail as a DSLR with a 600mm lens, but you can absolutely capture a memorable blood moon image with the right approach.
Use Night Mode: On iPhone (iPhone 11 and later), Night Mode activates automatically in low light and allows exposures up to 30 seconds when the phone is held still. On Android, Google Pixel phones have Night Sight, and Samsung Galaxy phones have a similar mode. During totality, enable Night Mode and let the phone do its multi-frame processing.
Mount your phone on a tripod: Night Mode and long exposures require absolute stability. A smartphone tripod adapter is inexpensive and transforms your results. Handheld shots during totality will almost always be blurry.
Lock exposure and focus: Tap and hold on the Moon in your camera app to lock focus (AE/AF lock). Then drag the exposure slider down slightly to prevent the Moon from blowing out to a white disk. This manual control is essential because the phone’s automatic metering will be confused by the brightness difference between the partial and total phases.
Consider a telephoto lens attachment: Some smartphones have built-in telephoto lenses (3x on many iPhone Pro models). Use the longest focal length your phone offers. Clip-on telephoto lens attachments from brands like Moment or Sandmarc can extend your reach further, though quality varies.
Use a pro camera app: Apps like Lightroom Mobile (free), ProCamera, or Halide give you manual control over ISO and shutter speed on iPhone. On Android, Open Camera or the built-in Pro mode on Samsung phones offer the same. Manual control lets you match the exposure progression described in the camera settings section above.
Shoot in RAW: If your phone supports RAW capture (iPhone 12 Pro and later via third-party apps, many Android flagships natively), enable it. RAW files preserve far more detail for the post-processing you will need to bring out the red tones of totality.
Step-by-Step Eclipse Shooting Process
Here is the exact sequence I follow during a total lunar eclipse. This process works whether you are shooting telephoto or wide-angle.
1. Set up 60-90 minutes before first contact. Mount your camera, level the tripod, and frame your composition while there is still enough light to see.
2. Achieve perfect focus on the bright Moon. Use live view at maximum magnification. Focus on the Moon’s edge or a crater. Lock or tape the focus ring.
3. Set initial exposure for the uneclipsed Moon. ISO 100, f/8, 1/250s is a good starting point. Verify the histogram shows detail across the Moon’s surface.
4. Take a test shot every 10 minutes during the partial phase. As the umbra covers more of the Moon, gradually increase ISO, open the aperture, and lengthen the shutter speed.
5. Switch to totality settings as the Moon nears full immersion. Move to ISO 400-800, f/4 or wider, and 1-4 second exposures. Check your histogram after the first totality shot and adjust.
6. Set an intervalometer during totality (optional). Program it to take a bracketed set every 5 minutes throughout totality. This lets you capture the full color progression hands-free.
7. Reverse the settings as totality ends. The Moon brightens quickly as it exits the umbra. Increase shutter speed and lower ISO to match.
8. Keep shooting through the end of the partial phase. The second partial phase is just as photogenic as the first, and many photographers pack up too early.
Common Mistakes and How to Avoid Them
Every mistake listed below is one I have personally made, or one that comes up repeatedly in photography forums. Avoiding these will save you from the disappointment of reviewing your photos the next morning and finding nothing usable.
Mistake: Keeping the same settings through totality. This is the number one error. The Moon drops several stops in brightness during totality. If you keep your partial phase settings, you get a black frame. Solution: monitor your histogram and adjust every few minutes as the eclipse progresses.
Mistake: Overexposing the bright portion during the partial phase. The sunlit part of the Moon is extremely bright. If you expose for the dark umbra-covered area, the bright side clips to white with no recoverable detail. Solution: expose for the bright portion and let the shadowed area go dark, or bracket and blend later.
Mistake: Camera shake during long exposures. Even at 2-4 seconds, the slightest vibration ruins a telephoto shot. Forum photographers consistently recommend using mirror lockup, a cable release, and a 2-second delay. I also turn off image stabilization when on a tripod, as it can actually introduce movement when the camera is already stable.
Mistake: Out of focus. Autofocus fails in low light during deep partial and totality phases. If you let the camera refocus between shots, you will get inconsistent results. Solution: focus manually while the Moon is bright, lock it, and do not touch it for the rest of the event.
Mistake: Motion blur from Earth’s rotation. At long focal lengths, even a 2-second exposure shows the Moon as a streak instead of a disk. Solution: follow the 500-rule to determine your maximum exposure time for your focal length, or use a tracking mount.
Mistake: Dead batteries in the cold. Night shoots in cold weather can drain a battery in under an hour. I keep spare batteries in inner pockets against my body. If your camera has a USB power option, consider an external power bank kept warm in your jacket.
Mistake: Not shooting in RAW. JPEG files lack the dynamic range for the dramatic light changes of an eclipse. RAW files let you recover blown highlights and lift shadow detail during post-processing. Always shoot RAW for eclipses.
Post-Processing and Composite Tips
Post-processing is where a good eclipse shoot becomes a great one. The RAW files straight out of the camera during totality often look flat and muddy. A few targeted adjustments bring out the rich reds and coppers that your eyes saw but the sensor struggled to capture.
Single image processing: In Lightroom or Capture One, start by setting the white balance. Auto white balance during totality often produces a muddy brown image. I manually set the temperature warmer (around 5000-6500K) to bring out the red tones. Then adjust exposure, lift shadows, and increase vibrance and clarity to enhance surface detail.
Creating a progression composite: Select your best shot from every 10-minute interval throughout the eclipse. In Photoshop, place them on a single canvas and arrange them in a curve or grid showing the Moon’s color transition from silver to deep red and back. This is one of the most popular and shareable eclipse image formats.
HDR blending for the partial phase: The brightness difference between the sunlit and shadowed portions of the Moon during partial phases is extreme. Take 2-3 bracketed exposures and blend them as an HDR image in Lightroom or Aurora HDR. This preserves detail in both the bright and dark areas.
Foreground blending for wide-angle: If your foreground is too dark during totality, take a separate longer exposure for it (10-30 seconds at a low ISO) and blend it with your properly exposed Moon shot. This technique produces a single image with both a detailed blood moon and a visible landscape.
Frequently Asked Questions
How do you photograph a lunar eclipse through totality with a smartphone?
Mount your phone on a tripod, enable Night Mode, tap and hold to lock focus on the Moon, then drag the exposure slider down slightly to prevent blowout. Use a pro camera app for manual ISO and shutter speed control, and shoot in RAW if your phone supports it. During totality, let Night Mode extend the exposure to capture the dim red Moon.
What camera settings should I use for lunar eclipse totality?
Start with ISO 400-800, aperture f/4 or wider, and shutter speed 1-4 seconds. For a bright totality (high Danjon rating), ISO 400 at f/4 for 1-2 seconds works well. For a dark totality, push to ISO 800-1600 at f/2.8 for 2-4 seconds. Always check your histogram and adjust. Shoot in RAW and use manual mode.
Can you capture a lunar eclipse with a phone?
Yes, modern smartphones with Night Mode can capture a total lunar eclipse, especially during totality when the Moon is dim enough for multi-frame processing. Use a tripod, lock focus and exposure manually, and consider a telephoto lens attachment. Results will not match a DSLR with a 600mm lens, but you can get a recognizable blood moon image.
What is the best exposure for blood moon photography?
The best exposure during totality depends on the Moon’s brightness. For a typical blood moon, ISO 800 at f/4 for 2 seconds is a reliable starting point. For very dark eclipses, push to ISO 1600 at f/2.8 for 4 seconds. Bracket your exposures by taking shots at 1, 2, and 4 seconds to ensure you capture the right balance of detail and color.
What lens is best for lunar eclipse photography?
For close-up Moon shots, use 200mm to 600mm. For wide-angle compositions with landscape context, use 14mm to 35mm. A 70-200mm zoom offers flexibility for both approaches. If using a telephoto during totality, be aware that longer focal lengths require shorter exposures to avoid motion blur from Earth’s rotation.
Final Thoughts: Photographing Totality with Confidence
Photographing a lunar eclipse through totality is one of those experiences that gets better every time you do it. Your first eclipse will teach you what to fix. Your second will be noticeably better. By your third, you will have a workflow that feels automatic.
The key takeaways are simple: plan ahead with apps like PhotoPills, adjust your exposure settings continuously through each phase, keep your camera rock-solid on a sturdy tripod, and always shoot in RAW. Whether you are using a mirrorless camera with a 600mm lens or a smartphone on a tripod, the blood moon is within reach.
The next total lunar eclipse visible from your area might be months away or just around the corner. Use the time to practice focusing on the regular full Moon, test your intervalometer, and nail down your settings. When totality arrives, you will be ready to capture the moment the Moon turns red.