
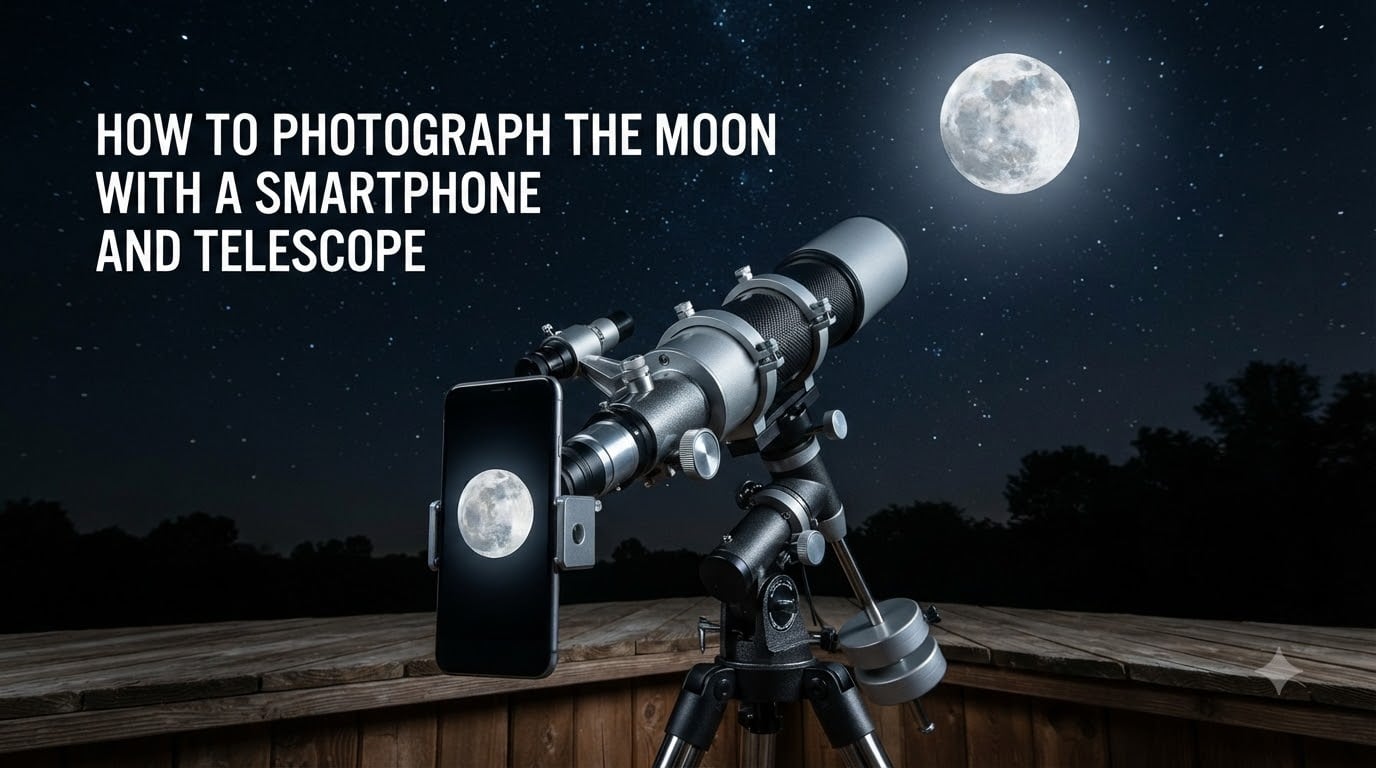
You point your phone at the Moon, snap a photo, and instead of craters and shadows you get a glowing white blob. Every smartphone owner who has tried lunar photography knows this frustration. The good news is that once you understand why your phone’s camera fails at this task, the fix becomes surprisingly straightforward.
In this guide, I will walk you through exactly how to photograph the Moon with a smartphone and telescope, covering both handheld techniques and telescope coupling. You will learn the specific camera settings, adapter choices, and common mistakes that separate a washed-out dot from a detailed lunar portrait.
Whether you are working with just your phone or pairing it with a backyard telescope, the methods below will help you capture the Moon’s craters, maria, and terminator shadows with gear you already own.
Table of Contents
Why the Moon Is Difficult to Photograph with a Smartphone?
The Moon is one of the trickiest subjects for a smartphone camera. Your phone’s auto-exposure reads the dark surrounding sky and decides the scene needs more light, which overexposes the Moon into a bright disc. This is the single most common reason moon photos fail, and it is why the white blob problem appears so universally across phone models.
The Moon also appears much smaller in photos than it does to your eyes. This phenomenon, called the Moon illusion, happens because your brain exaggerates the Moon when it is near the horizon. A phone camera captures the Moon at its true angular size, which is roughly the width of your thumbnail held at arm’s length, about half a degree across the sky.
Atmospheric turbulence adds another layer of difficulty. Heat shimmer, humidity, and air currents between you and the Moon distort light waves and blur fine details. This is why photos taken on cold, still nights tend to look sharper than those captured on warm, hazy evenings.
Finally, autofocus systems on most phones struggle with the Moon. The camera hunts for contrast and texture, but the Moon is small and surrounded by featureless black sky. Without manual focus, the lens often locks onto nearby clouds, tree branches, or thin air instead of the lunar surface.
Smartphone Camera Settings for Moon Photography
The fastest way to improve your moon photos is to take control away from the camera’s auto mode. Almost every modern smartphone has a pro mode or manual controls that let you override the settings that cause overexposure.
Switch to Pro Mode or Manual Controls
Pro mode gives you direct access to ISO, shutter speed, exposure compensation, and manual focus. On Samsung phones, open the Camera app and select Pro from the mode ribbon. On Pixel devices, look for Pro or use a third-party app. iPhone users can access these controls through apps like Halide or ProCamera, since the default Camera app keeps them hidden.
ISO
ISO controls how sensitive your camera sensor is to light. For moon photography, you want a low ISO, typically between 50 and 200, to keep noise low and prevent overexposure. A higher ISO amplifies everything, including sensor noise, which turns a clean moon photo into a grainy mess.
Shutter Speed
Shutter speed determines how long the sensor collects light. Start around 1/250 to 1/1000 of a second for a full Moon. Faster shutter speeds freeze fine details and reduce the chance of blur from camera shake. If you are shooting a crescent Moon or a lunar eclipse, you will need slower shutter speeds, sometimes 1/15 or longer, to capture enough light.
Exposure Compensation (EV)
If your phone does not offer full manual controls, exposure compensation is your best tool. Tap the screen to set focus on the Moon, then slide the exposure slider that appears next to the focus square downward. Lower the brightness until the Moon’s surface details become visible instead of a blown-out glow. This single adjustment solves the white blob problem for most casual shooters.
Manual Focus
Set focus to infinity, or as close to it as your phone allows. In pro mode, drag the focus slider all the way to the far end. If your phone lacks a manual focus slider, tapping the Moon repeatedly can sometimes force the autofocus to lock, but manual focus is far more reliable for lunar work.
Turn Off Night Mode
This surprises many people, but night mode actively harms moon photography. Night mode works by taking long exposures and stacking multiple frames to brighten dark scenes. For the Moon, this means it captures too much light and turns the lunar surface into a featureless white disc. Some phones, like the iPhone, automatically engage night mode in dark conditions, so check for the yellow night mode icon and manually switch it off before shooting.
Self-Timer and Burst Mode
Even pressing the shutter button introduces camera shake. Set a 2- or 3-second self-timer so the phone stops vibrating before the shot is captured. Alternatively, use a wired headphone volume button as a remote shutter. Burst mode is useful for shooting through a telescope, where atmospheric turbulence means only some frames in a burst will be sharp.
How to Photograph the Moon with a Smartphone and Telescope (Handheld Step-by-Step)
If you do not have a telescope, you can still get a respectable moon photo with just your phone. The key is using optical zoom, controlling exposure, and choosing the right phase of the Moon. Here is the step-by-step process I recommend.
Step 1: Wait for a clear, still night. Atmospheric turbulence is the enemy of sharp lunar details, so avoid humid or windy conditions if possible.
Step 2: Open your camera app and switch to pro mode or a manual control app. Set ISO to 100, shutter speed to 1/500, and focus to infinity.
Step 3: Use only optical zoom. If your phone has a dedicated telephoto lens (3x or 5x), switch to it. Never use digital zoom for moon photography, because it crops and enlarges the image without adding any real detail. Digital zoom produces grainy, pixelated results that cannot be fixed in editing.
Step 4: Tap the Moon on your screen to set focus, then drag the exposure slider down until the lunar surface shows texture and shadow detail instead of a bright glow.
Step 5: Brace your phone against a solid surface like a wall, fence, or railing. Even better, use a tripod with a phone mount. Any movement at high zoom magnifies blur.
Step 6: Set a 2-second timer and take the shot. Review the photo, adjust your exposure if needed, and repeat. Take multiple shots, since minor atmospheric shifts change the sharpness from frame to frame.
Choose the Right Moon Phase
A full Moon might seem like the obvious target, but it is actually the least photogenic phase. Direct sunlight from straight overhead washes out surface detail. The quarter and crescent phases are far more dramatic because the terminator line, the boundary between light and shadow, runs across the Moon’s surface. Shadows from craters and mountains along the terminator create stunning contrast and depth that a full Moon simply cannot match.
Optical vs Digital Zoom
Optical zoom uses physical lens elements to magnify the image, preserving detail and quality. Digital zoom simply crops the center of the sensor and enlarges the pixels, which degrades quality rapidly. For moon photography, optical zoom is essential. If your phone has a 5x optical telephoto lens, use it. If your phone only has a single wide lens, consider afocal imaging with a telescope or binoculars to get closer.
Using a Telescope with Your Smartphone (Afocal Imaging)
Pairing your smartphone with a telescope opens up a completely different level of detail. Instead of a small disc, you can capture individual craters, mountain ranges, and dark lunar maria. The technique is called afocal imaging, and it is the most accessible form of astrophotography for beginners.
What Is Afocal Imaging?
Afocal imaging means you hold or mount a camera lens directly against a telescope eyepiece and photograph what the eye would see. The telescope acts as a powerful magnifying lens, and the phone camera captures that magnified image. No special connections to the telescope’s optics are needed, which is why this method works with virtually any telescope and any phone.
Smartphone Telescope Adapters
You can hold your phone by hand over the eyepiece, and many beginners start this way. But aligning a phone camera with a small eyepiece by hand is frustrating and produces inconsistent results. A smartphone telescope adapter solves this by clamping your phone securely over the eyepiece, keeping the camera lens centered and steady.
Basic adapters cost between $15 and $30 and work with most eyepiece sizes. They typically feature an adjustable clamp that grips the eyepiece and a spring-loaded phone holder that keeps your device in place. More advanced models allow fine adjustments to center the phone camera lens precisely over the eyepiece exit pupil.
Look for an adapter that fits your specific eyepiece diameter (commonly 1.25 inches) and accommodates your phone’s camera module placement. Some modern phones with multiple lens arrays require adapters with larger cutouts to avoid vignetting, where dark edges appear around the image.
Step-by-Step Afocal Imaging Process
Step 1: Set up your telescope and point it at the Moon. Use a low to medium power eyepiece (25mm or 10mm) to start, since higher magnification makes alignment harder and amplifies atmospheric distortion.
Step 2: Focus the telescope visually until the Moon looks sharp through the eyepiece with your eye. Do this before attaching your phone.
Step 3: Attach the smartphone adapter to the eyepiece, then mount your phone in the adapter. Make sure the phone’s main camera lens is centered over the eyepiece opening.
Step 4: Open your camera app and tap the screen where the Moon appears. You should see a bright circular image of the Moon filling most of the frame.
Step 5: Lower the exposure using the EV slider until the Moon’s surface details become visible. Start with ISO 100 and a shutter speed around 1/125, then adjust based on what you see on screen.
Step 6: Set a 2- or 3-second timer to avoid shake from tapping the shutter. Take several shots in burst mode, since atmospheric turbulence varies from frame to frame.
Step 7: Review your shots and pick the sharpest one. Small adjustments to telescope focus and phone exposure between bursts will improve results significantly.
Avoiding Vignetting and Alignment Issues
If your photos show dark rounded corners or a partially blocked image, the phone camera is not centered over the eyepiece. Adjust the adapter position until the Moon fills the frame evenly. Some vignetting at the edges is normal and can be cropped out later, but severe vignetting means the camera lens and eyepiece are misaligned.
Another common issue is a dark circle instead of the Moon. This usually means the phone camera is too far from the eyepiece or the telescope is out of focus. Move the phone closer to the eyepiece glass and refocus the telescope.
Common Mistakes to Avoid
After helping many beginners troubleshoot their moon photos, the same handful of mistakes come up repeatedly. Avoiding these will immediately improve your results.
Mistake 1: Leaving Auto Exposure On
Auto exposure is the number one cause of the white blob. Your phone meters the entire frame, sees mostly dark sky, and brightens the exposure until the Moon is completely blown out. Always override auto exposure by dragging the brightness slider down or using pro mode to set ISO and shutter speed manually.
Mistake 2: Using Digital Zoom
Digital zoom does not add detail. It crops the sensor and stretches the remaining pixels, producing soft, noisy images. Stick to optical zoom only, or use a telescope for real magnification.
Mistake 3: Hand-Holding at High Magnification
Any wobble in your hands becomes amplified at high zoom or through a telescope. Use a tripod, brace against a solid object, or use a telescope adapter that locks the phone in place. Even gentle wind can vibrate a phone enough to blur the shot.
Mistake 4: Relying on Night Mode
Night mode is designed for dark landscapes, not for bright objects in a dark sky. It lengthens exposure and stacks frames, which overexposes the Moon. Turn night mode off before shooting the Moon, even if your phone recommends it.
Mistake 5: Shooting Only Full Moons
Full Moons look bright and round, but the lack of shadows means craters and surface texture disappear. The terminator line during quarter and crescent phases casts long shadows that reveal the Moon’s rugged topography. Plan your shoots around these intermediate phases for the most dramatic images.
Mistake 6: Ignoring Atmospheric Conditions
Hot, humid, or turbulent air blurs lunar details. The best seeing conditions occur on cold, stable nights when the air is still. If stars are twinkling wildly, the atmosphere is unstable and your moon photos will suffer.
Best Apps and Software for Moon Photography
The right software can make a bigger difference than the phone you own. These apps give you the manual controls, computational features, and editing tools needed for great lunar photos.
Camera Apps with Manual Controls
Halide (iOS): A favorite among iPhone astrophotographers, Halide provides full manual control over focus, ISO, shutter speed, and exposure. Its intuitive interface makes it easy to dial in the exact settings the Moon demands.
ProCamera (iOS): Another excellent iOS option with pro controls, low-light modes, and a dedicated night photography suite. The exposure compensation slider is particularly well suited for lunar work.
Camera FV-5 (Android): A professional-grade Android camera app with DSLR-like manual controls. It offers true manual focus, programmable ISO, and exposure bracketing.
Open Camera (Android): A free, open-source alternative with extensive manual controls. It supports exposure lock, manual focus, and a self-timer, covering the essentials for moon photography without any cost.
AI Moon Modes and Computational Photography
Modern flagship phones use computational photography to enhance moon shots automatically. Samsung’s Space Zoom on the Galaxy S series combines optical and digital zoom with AI scene recognition to produce detailed moon images. The phone identifies the Moon as a subject and applies specialized processing to enhance craters and surface features.
Google Pixel phones take a different approach, using Super Res Zoom to merge multiple frames and extract detail beyond what the optical lens alone can capture. Pixel’s Astrophotography mode is better suited for star fields than for the Moon, but Night Sight can produce decent results if you manually reduce exposure.
Be aware that some AI moon modes have drawn controversy for essentially overlaying pre-stored texture data onto moon images. The results look impressive on social media, but they are not pure photographs. For authentic lunar images you can be proud of, manual settings and afocal telescope imaging remain the gold standard.
Post-Processing Apps
No competitor guide covers editing, yet this is where your raw moon photo transforms into a striking image. Post-processing is the step that separates a decent shot from one worth sharing.
Snapseed (iOS and Android): Google’s free photo editor is perfect for quick moon photo adjustments. Use the Tune Image tool to lower brightness and boost contrast, then apply selective sharpening to bring out crater edges. The Structure slider adds micro-contrast that makes lunar features pop.
Adobe Lightroom Mobile (iOS and Android): The free version offers powerful RAW editing, exposure curves, and detail enhancement. If your phone shoots RAW, always edit in Lightroom for maximum control over highlights and shadows.
When editing moon photos, the most effective adjustments are reducing exposure slightly, increasing contrast, boosting clarity or texture, and applying modest sharpening. Avoid over-processing, which introduces halos around the Moon’s edge and unnatural-looking noise.
Video Frame Extraction and Lucky Imaging
One of the most effective techniques for telescope-based moon photography is recording a short video and extracting the sharpest frames. This is the core of lucky imaging, a method professional astronomers use to beat atmospheric turbulence. Record a 10- to 30-second video of the Moon through your telescope, then use a free frame extraction tool to pull out the clearest individual frames. Stack those frames in software like RegiStax or DeepSkyStacker to produce a single, exceptionally sharp composite image.
On a phone, you can approximate this by recording 4K video through the telescope eyepiece, then scrubbing through the footage frame by frame to find the sharpest still. Screenshot or export that frame for editing. It is a low-tech approach, but it consistently produces better results than single shots on turbulent nights.
Best Times and Conditions for Moon Photography
Timing matters as much as technique. The Moon’s phase, its position in the sky, and the weather all affect how your photos will turn out.
Moon Phases and the Terminator
The terminator is the line dividing the sunlit and shadowed portions of the Moon. Along this line, sunlight hits craters and mountains at a low angle, casting long shadows that reveal the Moon’s three-dimensional surface. First quarter and last quarter Moons are ideal for photography because the terminator runs straight down the middle of the visible disc. Crescent phases place the terminator near the edge, creating dramatic slivers of light and shadow.
Daylight and Twilight Shooting
You do not need darkness to photograph the Moon. In fact, shooting during daylight or twilight offers a major advantage: the sky brightness is closer to the Moon’s brightness, which reduces the contrast problem that plagues night shots. A gibbous Moon visible in a blue afternoon sky is one of the easiest lunar subjects to capture well on a smartphone, because the auto-exposure system handles the more balanced lighting conditions naturally.
Special Events: Supermoons, Eclipses, and Blood Moons
Supermoons occur when a full Moon coincides with the Moon’s closest approach to Earth, making it appear about 14% larger than average. They are photogenic and generate excitement, but the same exposure rules apply: override auto settings and lower brightness to preserve surface detail.
During a total lunar eclipse, the Moon darkens and takes on a reddish hue known as a blood Moon. Exposure requirements change dramatically during an eclipse, since the Moon becomes much dimmer. You will need longer shutter speeds (1 to 4 seconds) and higher ISO (400 to 800) to capture the coppery color. A tripod is essential during eclipses, since these slow shutter speeds make hand-holding impossible.
Weather and Atmospheric Conditions
Clear skies are obviously required, but clarity is not the whole story. Atmospheric stability, or seeing, determines how much detail you can resolve. Cold winter nights with still air tend to offer the best seeing. Avoid nights with high humidity, thin clouds, or strong temperature gradients, which create the shimmering effect that blurs fine lunar details.
If stars are twinkling noticeably, the atmosphere is unstable. If stars shine with a steady, unwavering light, conditions are excellent for lunar photography.
Frequently Asked Questions
How do I photograph the moon with my cell phone?
Open your camera app, switch to pro mode if available, set ISO to 100, shutter speed to 1/500, and focus to infinity. Tap the Moon on screen, then drag the exposure slider down until surface details appear. Use optical zoom only, brace your phone against a solid surface, and set a 2-second timer to avoid shake. Turn off night mode, since it overexposes the Moon.
Can I take a picture with my phone through a telescope?
Yes. This technique is called afocal imaging. You position your phone camera lens over the telescope eyepiece and photograph the magnified image. A smartphone telescope adapter (around $15 to $30) clamps your phone securely over the eyepiece for consistent alignment. Focus the telescope visually first, then attach the phone and adjust exposure until the Moon’s surface detail is visible on your screen.
Which phone can click a moon photo?
Any modern smartphone can capture a moon photo, but phones with optical telephoto lenses produce the best results. Samsung Galaxy S series phones with Space Zoom, Google Pixel phones with Super Res Zoom, and iPhone Pro models with 5x optical zoom are popular choices among astrophotography enthusiasts. Even budget phones can produce good results when paired with a telescope using afocal imaging.
Why is it so hard to take a good photo of the moon with my phone?
The main problem is auto-exposure. Your phone meters the dark sky around the Moon and brightens the entire image, which overexposes the Moon into a white blob. Other challenges include the Moon’s small apparent size, autofocus struggling to lock onto the Moon against a featureless sky, atmospheric turbulence blurring details, and digital zoom degrading image quality.
Conclusion
Learning how to photograph the Moon with a smartphone and telescope comes down to a few core principles: take control of your exposure, use optical magnification, stabilize your phone, and shoot during the right lunar phase. The white blob that frustrates every beginner is simply your camera’s auto-exposure doing the wrong thing, and fixing it is as easy as dragging the brightness slider down.
If you want to go beyond handheld shots, afocal imaging with a telescope and an inexpensive adapter opens up an entirely new world of lunar detail. Individual craters, mountain ranges, and dark maria become visible and photographable with gear you may already own. Combine that with lucky imaging through video frame extraction and you can rival results that once required dedicated astrophotography cameras.
The best way to improve is to practice. Head outside on the next clear night, try the settings in this guide, and adjust from there. Every Moon phase offers a different photographic challenge, and each session will teach you something new about your phone’s capabilities and the sky above.