
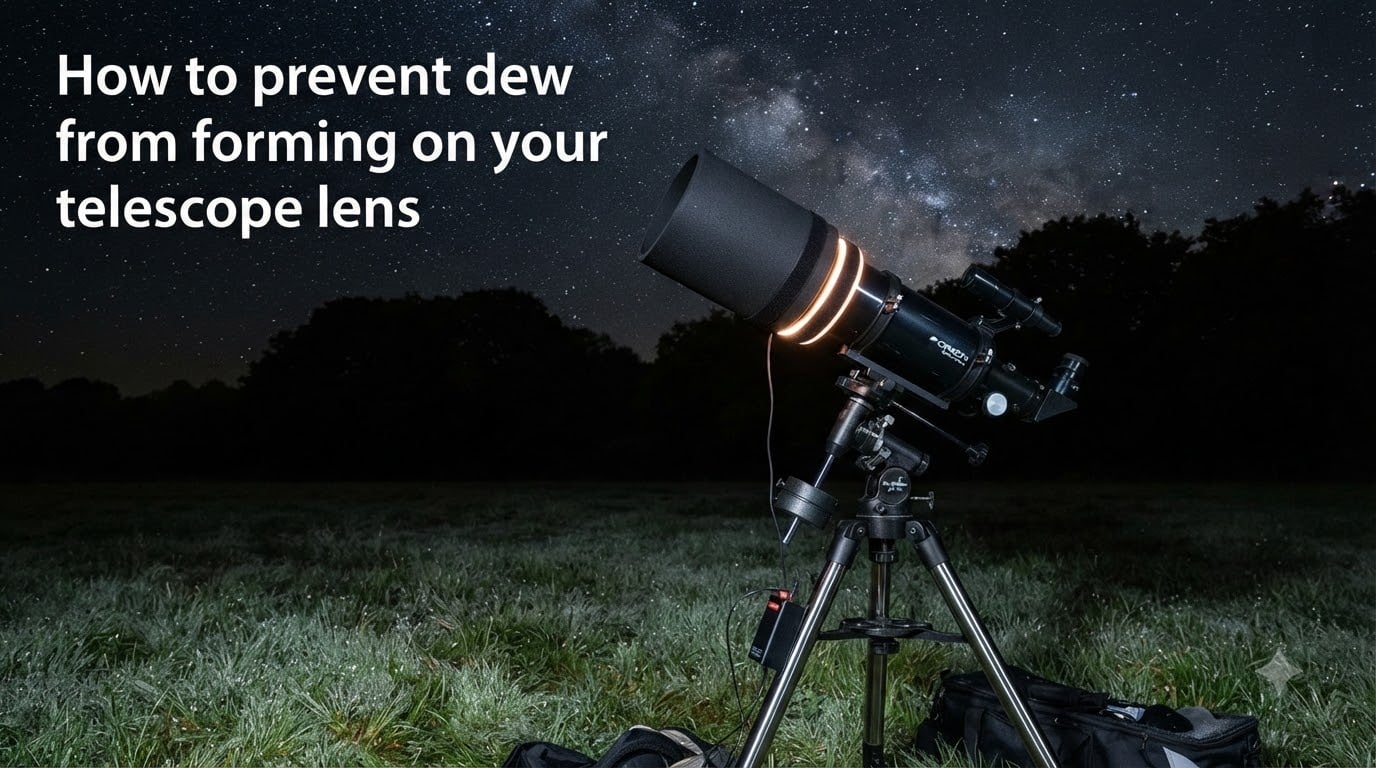
Learning how to prevent dew from forming on your telescope lens saves observing sessions and protects expensive optics. I have lost count of how many nights ended early because water pooled on my corrector plate or objective, so I want to share what actually works.
Dew forms when telescope optics cool below the air’s dew point temperature, causing water vapor to condense on the glass. The good news: you can stop it with the right combination of equipment, technique, and smart site selection.
This guide covers the physics of dew formation, every prevention method ranked by effectiveness, a step-by-step DIY dew shield tutorial, budget alternatives, and storage tips to prevent condensation damage. Everything here is based on real equipment testing and community advice from r/telescopes, Cloudynights, and Stargazerslounge.
Table of Contents
Why Dew Forms on Telescope Optics?
Dew forms on telescope lenses because glass cools faster than the surrounding air on clear nights, dropping below the local dew point. Once the optic hits that temperature, water vapor in the air condenses directly onto the surface, just like a cold drink “sweating” on a summer day.
The dew point is the temperature at which air becomes saturated and can no longer hold its moisture. If your telescope’s front lens is colder than that number, dew is guaranteed. Humidity plays a role, but temperature differential is what actually drives condensation.
Telescope optics are especially vulnerable because of the chilling effect. Glass facing an open sky radiates heat outward into space faster than the surrounding air can replace it. This radiational cooling can drop the lens 5 to 10 degrees below ambient air temperature, even when humidity feels moderate.
Refractors and Schmidt-Cassegrain telescopes are the most affected because their front lenses are exposed directly to the sky. Newtonian reflectors usually only dew up on the secondary mirror and eyepiece. Finder scopes and eyepieces are common secondary victims, often forgotten until they fog mid-observation.
How to Prevent Dew on a Telescope: Main Methods
To prevent dew on a telescope, you need to either keep optics warmer than the dew point or block the sky-facing surface from radiating heat. Both approaches work, and combining them is the most reliable strategy in humid locations.
Use a dew shield to extend the tube and block radiational cooling
Install a heated dew strap to actively warm the optic just above dew point
Choose a sheltered observing site under trees or an umbrella
Apply budget fixes like chemical hand warmers, silica gel, or a hair dryer
Store the telescope properly before and after sessions to avoid internal condensation
For mild dew conditions, a dew shield alone is often enough. For heavy dew, persistent frost, or astrophotography sessions longer than an hour, you will need a powered heater. Most experienced observers end up owning both.
Dew Shields: The First Line of Defense
A dew shield is a simple tube that extends past the front of your telescope, blocking the open sky from “seeing” the front lens. By cutting off the radiational cooling path, it keeps the optic closer to ambient air temperature and usually above the dew point.
Dew shields are inexpensive, passive, and require no power. They work best for refractors and Schmidt-Cassegrains because those designs put the corrector plate or objective right at the sky. For a Newtonian, an extended tube or aftermarket shroud serves the same purpose.
A proper dew shield should extend at least 1.5 to 2 times the diameter of your front lens beyond the optic. For a 4-inch refractor, that means a shield at least 6 to 8 inches long. It should fit snugly but not touch the lens, and the interior should be matte black or lined with velvet to kill internal reflections.
You can buy commercial dew shields from Astrozap, Tele Vue, or Baader, but most observers build their own from EVA foam, flocking material, or radiator insulation foil. The DIY route costs a fraction of the price and lets you customize the length and fit perfectly.
How to Make Your Own Dew Shield
Making your own dew shield takes about 30 minutes and costs less than ten dollars in materials. This is the project I recommend to every beginner because it pays for itself the first time you observe in humid weather.
Measure your telescope’s tube diameter just behind the objective cell or corrector plate. Add about 2 inches for overlap, then cut a strip of closed-cell EVA foam (typically 6 to 12 mm thick) to that length.
Cut the foam length to about 1.5 to 2 times your telescope’s aperture. So for a 4-inch (100 mm) refractor, cut the foam 6 to 8 inches long.
Roll the foam into a cylinder and check the fit around the tube. It should slide on with light friction and stay put without slipping.
Wrap the outside with black duct tape for durability and a clean look. Leave the inside matte black or line it with self-adhesive black velvet or felt to prevent stray light.
Add a Velcro strip along one edge so you can open the shield to store it flat. This is optional but makes transport painless.
Test fit on your telescope and trim any areas that catch on focuser knobs or finder mounts. You are done.
A homemade EVA foam dew shield works just as well as a commercial unit for most conditions. If you want extra performance, line the inner wall with low-emissivity aluminum foil tape to reflect heat back at the optic. This trick comes from the Sky at Night Magazine DIY guide and measurably extends dew-free time.
Dew Heaters: The Most Reliable Solution
A dew heater is a resistive heating strap that wraps around the telescope tube near the front optic, gently warming it just above the dew point. It is the single most effective dew prevention tool for any telescope with a corrector plate or exposed objective lens.
Heated dew straps typically run on 12 V DC, drawing about 1 to 2 amps depending on size. Most observers power them from a small rechargeable battery pack or a USB-C PD bank. Brands like Dew-Not, Kendrick, and Astrozap dominate the market and come in sizes for 2-inch eyepieces up to 16-inch Dobsonian primary heaters.
Use a dew heater any time ambient humidity is above 70 percent, when frost is possible, or when you are doing long-exposure astrophotography. I run mine at low setting most nights and only crank it to high when I see the first hint of fog on the secondary mirror.
Do not overheat the optic. Just enough warmth to stay 1 to 2 degrees above dew point is fine. Too much heat causes tube currents that blur the view, especially on refractors. Variable controllers are worth the extra cost because they let you tune output through the night.
In the heaviest dew, use a dew shield plus a heater. The shield cuts the radiation load so the heater uses less power and runs cooler. This combination is what high-end astrophotographers rely on for all-night imaging runs.
Site Selection and Observing Strategies
Your observing site matters as much as your equipment for controlling dew. A poor location can swamp even the best dew heater, while a smart spot can keep you dry with no electronics at all.
Set up under a tree canopy whenever it is safe. Leaves act as a natural radiant barrier, blocking the cold sky from cooling your telescope. Just make sure branches are well above the tube so you do not hit them when slewing.
Use an observing umbrella. A simple rain umbrella mounted on your tripod or a photographer’s umbrella clipped to a stand shades the entire scope from the open sky. This single trick has given me extra hours of clear optics on dewy mountain nights.
Avoid low-lying ground where cold air pools. Dew forms first in valleys, near ponds, and along grass. Setting up on a deck, patio, or gravel pad a few feet higher can drop dew formation noticeably. I learned this the hard way observing from my backyard lawn before switching to a raised wooden platform.
Wind helps because it disrupts the saturated air layer right at the lens surface. Calm, clear nights are the worst for dew. A light breeze from any direction is your friend.
Budget Dew Prevention Solutions
You do not need a $150 heated strap to stay dew-free. Several budget tricks work surprisingly well for casual visual observers.
Chemical hand warmers taped to the tube near the optic work as crude heaters. They put out gentle warmth for 5 to 8 hours and cost about a dollar per pair. Wrap them in a thin cloth so you do not overheat the glass in one spot.
A hair dryer is the classic emergency fix. A 30-second blast clears any dew that has formed, and the residual heat buys you another 30 to 60 minutes. The downside is you have to keep doing it. Two or three times per hour is common on bad nights, based on community reports from r/telescopes.
Silica gel packs stored inside the telescope case absorb moisture and slow internal condensation. They do not directly stop dew on the lens but they reduce humidity inside the optical tube assembly, which protects against fungus growth on coated surfaces during long-term storage.
A homemade “radiator shield” lined with aluminum foil reflects heat back at the optic instead of letting it radiate away. Combined with a basic foam dew shield, it can match the performance of a commercial setup for a few dollars in parts.
Storage Tips to Prevent Condensation Damage
The most overlooked dew hazard is internal condensation when you bring a cold telescope into a warm, humid room. Warm air contacting cold glass inside a sealed tube can fog the inside of your optics, where you cannot wipe it off.
Let the telescope acclimate before sealing the case. After an observing session, leave the tube capped loosely and the case open for 30 to 60 minutes so temperatures equalize gradually. This avoids the worst of the temperature shock.
Store with silica gel inside the case. A few large desiccant packs keep the enclosed air dry enough to prevent moisture damage on coated optics. Replace or recharge the silica gel every few months by baking it in the oven at 250 degrees F for two hours.
Cap both ends of the tube before bringing it indoors. Even with a loose dust cap, leaving the tube open invites warm humid air straight onto the cold mirror or lens. Caps restrict airflow enough that the air has time to warm before reaching the glass.
Keep the telescope in a climate-stable room. Garages and attics see temperature swings that encourage condensation on stored optics. A closet inside the living space is the safest long-term storage spot.
Common Myths About Dew on Telescopes
Dew caps solve everything, so I never need a heater. False. A dew shield delays dew dramatically but does not stop it once humidity hits 90 percent or the session runs past midnight. Plan for both.
Newtonians do not dew up because the mirror is at the bottom. Also false. The secondary mirror, eyepiece, and finder are all vulnerable. The primary mirror does stay drier because of its shielded position, which is one Newtonian advantage.
Hair dryers are just as good as heated straps. Not quite. A hair dryer clears dew but adds warmth only briefly. A heated strap maintains warmth continuously and does not require you to step away from the eyepiece every 20 minutes, the exact frustration shared by users in the Reddit r/telescopes thread I read while researching this.
Dew does not damage optics, it just blocks the view. Partly true. Light dew wipes off with no harm. Prolonged moisture exposure can etch coatings, stain multi-element objectives, and encourage fungal growth on bare aluminum. Prevention matters even if the immediate effect feels minor.
Frequently Asked Questions
How to stop dew on a telescope?
To stop dew on a telescope, use a dew shield to block sky radiation, add a heated dew strap to warm the optic just above dew point, choose a sheltered observing site, and store the scope properly to avoid internal condensation. Combining a shield and heater is the most reliable method for humid nights.
How to prevent dew from forming?
Prevent dew by keeping surfaces warmer than the dew point temperature. For telescopes, this means blocking radiational cooling with a dew shield and applying gentle, controlled heat with a dew heater strap powered by a 12 V battery.
Why does condensation form on my telescope lens?
Condensation forms on a telescope lens because the glass cools below the air’s dew point by radiating heat into the clear night sky. Once the optic drops below that threshold, water vapor condenses on the surface exactly like a cold glass of water on a humid day.
How to make your own dew shield?
Make a DIY dew shield by cutting a strip of closed-cell EVA foam to 1.5 to 2 times your telescope’s aperture, rolling it into a cylinder slightly larger than the tube, wrapping the outside with duct tape, and lining the interior with black felt or flocking material. Add Velcro for easy storage.
Are dew shields necessary for Newtonian telescopes?
Dew shields are not strictly necessary for Newtonian primary mirrors because the primary sits at the bottom of the tube. However, a shroud between the secondary and primary plus a heated strap on the secondary mirror and eyepiece is still recommended in heavy dew.
Final Verdict
Learning how to prevent dew from forming on your telescope lens comes down to understanding one rule: keep the optic warmer than the dew point. Every method covered here is a different path to that single goal.
Start with a DIY foam dew shield. It is cheap, fast, and covers 80 percent of common situations. Add a heated strap when you upgrade to long astrophotography sessions or live in a humid climate. Supplement with smart site selection and proper storage habits to prevent internal condensation damage.
The complete strategy combines a dew shield, a heater on the front optic, a sheltered location when possible, and slow temperature acclimation when going indoors. That toolkit handles everything from clear autumn nights to tropical summer observing.
Build the foam shield first, see how your local conditions behave, and you will quickly know which other investments are worth making. Within a few sessions you will read the dew forming before you see it, and that is when you stop losing nights to fogged optics.