
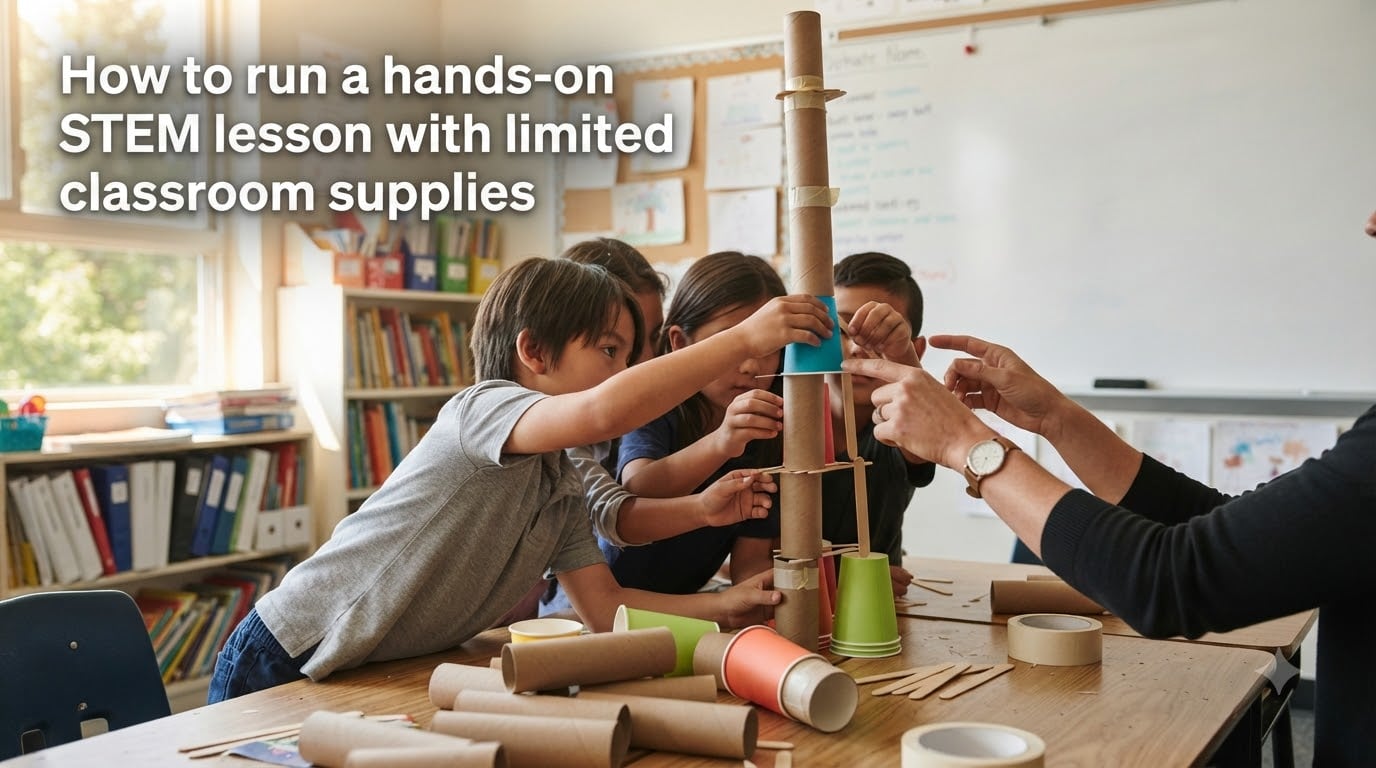
I have walked into classrooms where the science budget was a single line item labeled “miscellaneous,” and I have watched those same classrooms produce the loudest, most engaged engineering I have ever seen. The truth is that you do not need a robotics kit or a chemistry set to run a hands-on STEM lesson with limited classroom supplies. You need a clear plan, a few everyday items, and a structure that turns constraints into the lesson itself.
This guide is for elementary, middle, and high school teachers who want to bring real hands-on learning to their students without waiting for a grant cycle or a district purchase order. I will walk you through the principles behind budget-friendly STEM, five tested activities you can run this week, the step-by-step pacing for a single lesson, and where to find more supplies when your classroom runs out.
Table of Contents
What Makes a STEM Lesson “Hands-On” When You Have Few Supplies?
A hands-on STEM lesson is one where students physically build, test, or manipulate something to learn a concept. With limited supplies, the lesson still qualifies as hands-on if students are touching, constructing, or iterating with the materials you have. The supplies are the vehicle, not the destination.
Every strong STEM lesson, no matter the budget, leans on the four C’s of STEM education: Collaboration, Communication, Creativity, and Critical Thinking. These four skills are free, and they are exactly what employers, colleges, and science careers look for. If your lesson gets students talking, building, problem-solving, and explaining their thinking, you have hit the target even with cardboard, paper, and tape.
NASA’s Jet Propulsion Laboratory runs remote lessons with paper helicopters and balloons. Project Learning Tree builds engineering challenges around sticks gathered from a schoolyard. The lesson is in the doing, not the equipment list.
Gathering Low-Cost and Free Materials Before the Lesson
The best STEM materials are already in your classroom or in your students’ recycling bins. Before you buy anything, take an inventory of what you have. I have built an entire engineering unit out of office supplies and packing materials from a single delivery that arrived at the front office.
Materials teachers already have on hand:
- Copy paper, construction paper, and cardstock
- Popsicle sticks, craft sticks, and tongue depressors
- Masking tape, scotch tape, and a few rolls of painter’s tape
- Marbles, paper clips, rubber bands, and binder clips
- Plastic spoons, paper cups, and drinking straws
- Empty cereal boxes, paper towel tubes, and milk cartons
- String, yarn, and pipe cleaners
Free materials I ask for in a single class email or newsletter:
- Clean cardboard boxes from parents who work in retail or shipping
- Empty plastic bottles and bottle caps
- Old newspapers for papier-mâché or crumple tests
- Unwanted gift wrap tubes and tissue paper
- Plastic containers from the cafeteria (yogurt cups, takeout trays)
Send a short note home explaining that you are building a STEM supply library and that you will accept any of the items above. Most parents will drop off a bag within a week. This single habit has saved my team more than a thousand dollars over a school year.
5 Hands-On STEM Activities You Can Run with Limited Classroom Supplies
Each of these activities has been tested in real classrooms with thirty students and a shared set of supplies. None of them requires prep beyond printing a short challenge card. Materials lists are intentionally short, and substitutions are easy.
Activity 1: Paper Tower Challenge (Grades K-2)
Students build the tallest free-standing tower they can using only one sheet of paper and six inches of tape. This lesson teaches balance, base width, and the engineering design process in its simplest form.
Materials per group: 1 sheet of paper, 6 inches of tape, scissors (optional), ruler for measuring. Time: 25 minutes.
Activity 2: Stick Bridge Build (Grades 3-5)
Groups design a bridge from craft sticks and masking tape that spans a 12-inch gap and holds the weight of a small object (a pencil box works). Introduce the concepts of compression and tension as students test and rebuild.
Materials per group: 25 craft sticks, 18 inches of masking tape, a pencil box or canned good for load testing. Time: 40 minutes.
Activity 3: Balloon Rocket Race (Grades 6-8)
Students tape a balloon to a straw threaded on a string, then experiment with balloon size, air volume, and payload to win a class race. The lesson covers Newton’s third law, thrust, and variables.
Materials per group: 1 balloon, 1 drinking straw, 2 meters of string, tape, paper clips (for the payload). Time: 30 minutes.
Activity 4: Spaghetti Tower Engineering (Grades 6-8)
Teams build a tower using only dry spaghetti and mini marshmallows. The tower must support a marshmallow on top for ten seconds. This is the classic marshmallow challenge and a strong first lesson on iteration.
Materials per group: 20 strands of uncooked spaghetti, 20 mini marshmallows, ruler, timer. Time: 45 minutes.
Activity 5: Water Filtration Challenge (Grades 9-12)
Students design and build a water filter using only gravel, sand, cotton balls, coffee filters, and a cut-off plastic bottle. They test dirty water (a teaspoon of soil mixed into a cup) and measure clarity. The lesson introduces water treatment, engineering trade-offs, and experimental design.
Materials per group: 1 plastic bottle (cut in half), gravel, sand, cotton balls, coffee filters, one cup of “dirty water.” Time: 50 minutes.
How to Run the Lesson Step-by-Step
Low-supply STEM lessons fail when the pacing is loose. I use a five-step framework that fits any grade level and any of the activities above. Run this same structure all year and your students will know exactly what to expect.
Step 1 – Hook (5 minutes): Show a short video clip, an image, or ask a surprising question. For the paper tower, ask: “How tall can you make one sheet of paper?” Students predict in writing. This activates prior knowledge and primes curiosity.
Step 2 – Mini-Lesson (5 to 8 minutes): Teach the single concept behind the activity. For the spaghetti tower, explain the difference between compression and tension. For the water filter, explain how particles of different sizes get trapped. Keep it tight. One idea, one example, one question back to the class.
Step 3 – Build Time (20 to 35 minutes): Students work in groups of three to four. Walk the room. Ask probing questions: “What did you try first? What did not work? What will you change?” Avoid rescuing teams. The struggle is the lesson.
Step 4 – Share and Test (5 to 10 minutes): Each group demonstrates their final design. For tower challenges, measure the height. For filters, pour the water through and compare results. Make the testing visible and measurable.
Step 5 – Reflect (5 minutes): Students write or share one sentence answering: “What worked, what did not, and what would you try next?” This step builds critical thinking and primes the next lesson. Growth mindset is built through reflection, not praise.
Free and Low-Cost Ways to Get More Supplies
Even the best budget-friendly STEM teachers run out of materials. The difference between a program that survives and one that thrives is the supply pipeline. Here are five ways I have built long-term partnerships with no budget allocated.
Ask local businesses for donations. Hardware stores, lumber yards, and shipping companies throw away small offcuts, sample tiles, and foam packing peanuts every week. Call the manager, explain that you teach STEM, and ask if you can stop by with a bin once a month. Most will say yes. I have collected hundreds of dollars of materials this way.
Use a classroom wishlist on parent signup platforms. Sites like SignUpGenius let families claim specific low-cost items. Break your needs into small, dollar-store-priced pieces. A box of 100 straws, a pack of 50 foam cups, a roll of twine. Each family takes one item and the total cost disappears.
Apply for small teacher grants. DonorsChoose, the NEA Foundation, and local education foundations fund classroom projects under $500. The applications are short. I have been funded three times in four years by writing one paragraph about the activity, one paragraph about the students, and one itemized list.
Partner with a local university or engineering society. College engineering clubs, SWE sections, and ASCE student chapters often run outreach events. Invite them to your classroom for a single afternoon. They bring materials, run a station, and your students meet real engineers. The university gets outreach credit. Everybody wins.
Build a classroom recycling loop. Set a labeled bin in the back of the room. Add a second bin in the teachers’ lounge. Every week, take a quick walk to collect cardboard tubes, bottle caps, and clean plastic containers. Within a month you will have a free, restocked library of STEM materials.
Setting Growth Mindset Expectations Before You Begin
The single most important line I say on the first day of a STEM unit is this: “Your first design will fail, and that is the most important part of the lesson.” Students who believe failure is part of learning will attempt harder problems, take longer to give up, and produce better work than students who think smart is fixed.
Set three explicit expectations before any build:
- You will test your design at least once.
- You will change at least one thing after the test.
- You will explain one thing that did not work.
These three rules remove the social risk of failure. When students know they are required to iterate, the first failed tower is no longer embarrassing. It is the assignment. I have watched quiet, hesitant students open up inside five minutes of a build once this language is in place.
Frequently Asked Questions
What are the 4 C’s of STEM education?
The 4 C’s are Collaboration, Communication, Creativity, and Critical Thinking. Together they describe the core skills a strong STEM lesson develops, and they are the learning outcomes you should design around when supplies are limited.
What are examples of easy STEM projects?
Easy STEM projects use common classroom supplies and run in under an hour. Examples include a paper tower challenge, a craft stick bridge, a balloon rocket race, a spaghetti-and-marshmallow tower, and a water filtration build using a plastic bottle.
How do you integrate STEM into the classroom with limited supplies?
Start with what you already have, run short low-prep activities, and reuse the same structure (hook, mini-lesson, build, share, reflect) across grade levels. Pair the lesson with a clear materials list and a small classroom supply pipeline so the activities can repeat.
What are the top 5 strategies for teaching STEM to learners?
The five strategies I use most are: anchor every lesson in a real-world question, run a short mini-lesson on one concept, give students plenty of build time, require at least one iteration after testing, and close with a written reflection. Add a low-cost supply pipeline and STEM stations become sustainable.
Bringing It All Together
Running a hands-on STEM lesson with limited classroom supplies is not a compromise. It is the original form of the discipline. Engineers prototype with cardboard. Scientists test with household items. The lesson is the thinking, not the gear.
Pick one activity from this guide, gather what you have on Monday, and run it with your students by Friday. Once you see what happens when students are allowed to build, fail, and rebuild, you will not need a new kit to fall in love with teaching STEM. You will just need a recycling bin and a clear plan.