
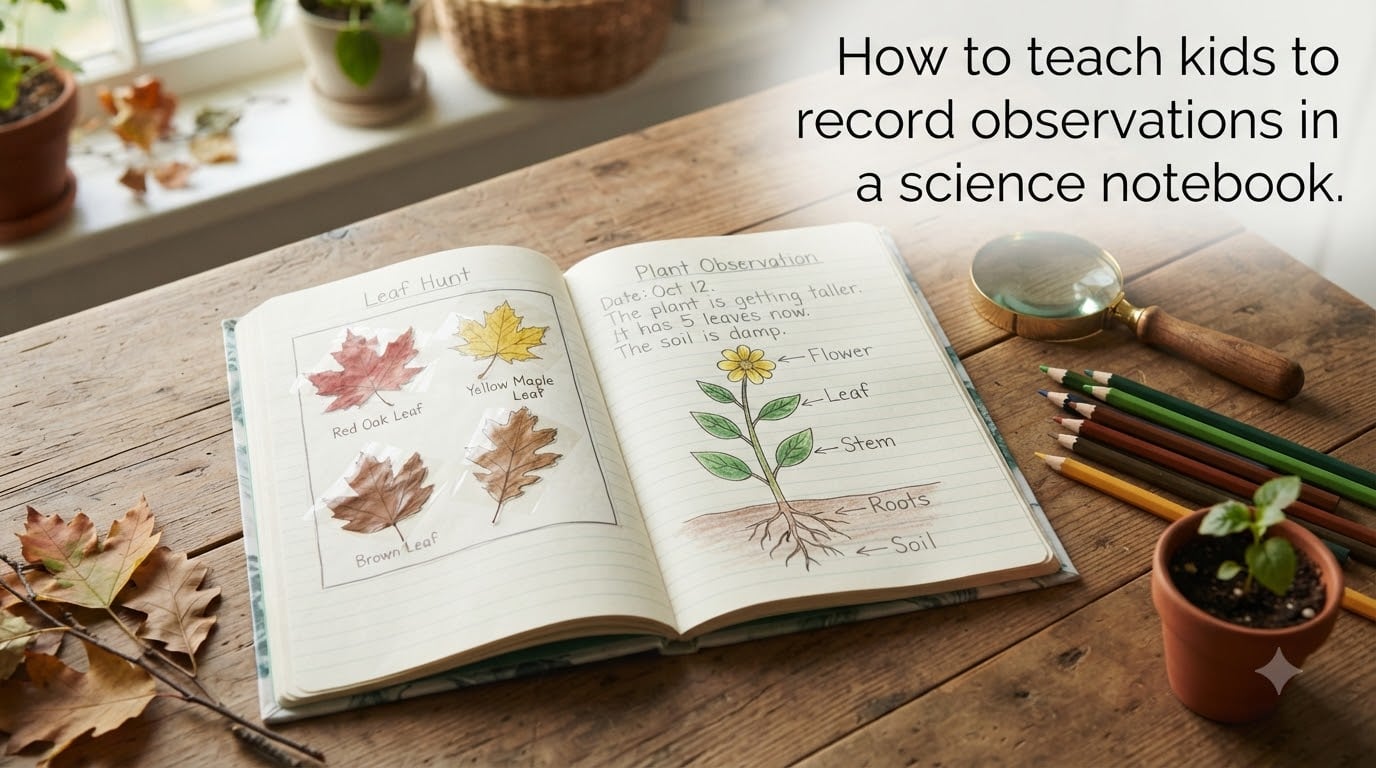
How to teach kids to record observations in a science notebook is one of the most common questions I hear from elementary teachers and homeschool parents. The good news is that with the right setup, modeling, and a few simple routines, almost any child can learn to document their scientific work with confidence.
I’ve spent years watching classrooms where science notebooks became a child’s favorite part of the day, and others where notebooks sat forgotten in a backpack. The difference almost always comes down to how the teacher or parent introduces the practice and how consistently they maintain it.
In this guide, I’ll walk you through what a science notebook really is, how to set one up from scratch, how to teach observation skills step by step, and how to handle the common challenges that come up. The advice draws from real classroom experience and what teachers share on forums like r/ScienceTeachers and Charlotte Mason communities.
Whether you teach 25 third-graders or homeschool a single curious 8-year-old, these strategies work. I’ll flag specific adaptations as we go.
Table of Contents
What Is a Science Notebook?
A science notebook is a personal record where students document their scientific observations, questions, hypotheses, experiments, and reflections. It’s modeled after the field notebooks used by working scientists and has been a staple of inquiry-based learning for decades.
An interactive science notebook takes that idea one step further. It combines handwritten notes, labeled drawings, data tables, and reflective prompts on facing pages so children can see both their thinking and their evidence side by side. The Smithsonian’s National Museum of Natural History uses this exact format in its field book program, and it’s the version I recommend most often.
You’ll often hear these notebooks called science journals, nature journals, or field notes. The names are interchangeable for our purposes, though “field notes” usually implies outdoor observation, while “science journal” leans indoor and experimental.
Why Science Notebooks Matter
Three reasons stand out from research and teacher feedback. First, observation skills developed through notebooks transfer to math, reading, and writing. A child who notices fine details on a leaf will also notice patterns in a math problem or specific word choices in a story.
Second, a notebook creates a personal record of growth a child can revisit and feel proud of. Watching a January entry show sloppy scribbles and a May entry show careful labeled diagrams gives a powerful sense of progress.
Third, it turns abstract science concepts into concrete, dated evidence kids can point to. When a child says “I saw this change with my own eyes,” the notebook is the proof.
How to Teach Kids to Record Observations in a Science Notebook?
The most effective way to teach this skill is to break it into teachable steps and model each one yourself. Here’s the framework I use when I introduce a science notebook to a new group of students.
Step 1: Model the Practice With Your Own Notebook
Before asking a child to record an observation, record one yourself. Teachers on r/Teachers consistently say this is the single most useful strategy. When kids see an adult drawing a leaf, writing a question, and circling details they find interesting, they understand what the practice looks like.
For younger children, narrate while you draw. “I notice the edge of this leaf has little teeth. I’m going to draw those teeth so I remember.” This think-aloud approach demystifies what a “good” observation is and gives children a script to copy.
Step 2: Start With the Five Senses
Teach kids that observations are facts collected with their senses, not opinions. Use this simple prompt framework:
See – colors, shapes, sizes, patterns, movement
Hear – sounds, silence, rhythm, pitch
Smell – sweet, sharp, earthy, rotten, none
Touch – smooth, rough, sticky, warm, cold
Taste – only when safe and approved, otherwise “not tasted”
For an early activity, hand each child a single object – a pinecone, a rock, a pomelo – and ask them to spend two minutes filling out all five senses. This builds the habit of looking carefully before writing.
Step 3: Teach the See-Think-Wonder Routine
The See-Think-Wonder routine, developed by Harvard’s Project Zero, is a powerful way to teach scientific observation. Children divide a page into three columns:
See – I notice the ant has three body parts and six legs.
Think – I think it might be a worker ant because it’s small.
Wonder – I wonder how it knows where to find food.
This structure separates observation from interpretation, which is a core scientific skill. It also gives hesitant writers a clear starting point.
Step 4: Pair Drawings With Labels and Words
A science notebook is not a coloring book. Teach kids that every drawing should include labels, a date, and at least one sentence describing what they saw. Younger students can dictate their sentence to a parent or teacher.
A simple rule I share: “If you drew it, you can label three parts. If you labeled it, you can write one sentence about it.” This scaffolding gradually builds writing stamina without overwhelming early writers.
Encourage children to use arrows, circles, and magnifying-glass sketches to draw attention to specific details. A close-up inset showing tiny seeds or a veined pattern often reveals more than a single overview drawing.
Step 5: Use Prompts to Guide Daily Entries
Open-ended prompts work better than blank pages. Rotate these starters throughout the week:
“Today I observed ________________. I noticed that ________________.”
“One question I have is ________________.”
“This reminds me of ________________.”
“If I changed one thing, I would ________________.”
“The most surprising thing was ________________.”
Sentence starters lower the barrier to writing while still requiring original thinking. After a few weeks, most kids start composing their own openings.
Step 6: Build in Time to Share and Reflect
Notebooks become meaningful when children get to share them. Set aside 5 minutes at the end of an activity for a “notebook share” where two partners compare entries. This accountability loop dramatically increases the quality of observations, based on what teachers report on r/ScienceTeachers.
Sharing also normalizes that different children notice different things. One student’s observation of color can complement another’s attention to texture. This diversity of perspective mirrors how real research teams work.
How to Set Up a Science Notebook?
A well-organized science notebook sets kids up for success. Here’s a setup that works for grades K-8, with variations noted below.
Step-by-Step Setup
Choose the right notebook. A composition book or spiral-bound notebook with at least 70 pages is ideal. Unlined or gridded pages give more freedom for drawings; lined pages help writers. For younger kids, a half-blank, half-lined notebook is a great compromise.
Create a title page. Include the child’s name, grade, school year, and an inspiring cover design. This gives the notebook immediate ownership.
Reserve the first three pages for a table of contents. Each entry will be added with a date and a one-line title.
Set up template sections on the inside cover. Include a “My Observation Tools” reference page (ruler, hand lens, colored pencils) and a “Science Words I Know” glossary.
Number the pages. Number every page in the bottom corner. This makes it easy to reference past entries and helps build a sense of progression.
Use a consistent entry format. Each entry should have a date, a title, a drawing or data section, observations, and a reflection or question.
Leave a few pages for “wonder questions.” A running list of questions kids want to investigate keeps curiosity alive between lessons.
Teachers who use this setup consistently report that students can find their past work, reference earlier observations, and feel ownership over a notebook that becomes more valuable with each entry.
A Simple Entry Template You Can Use Today
Draw this template lightly in pencil on each notebook page, or print a label version for younger kids:
Date and title at the top. Example: “October 14 – Bean Plant Growth”
Drawing or data section on the left half of the page. Sketches, diagrams, charts.
Observation sentences on the right half. What did I notice using my senses?
Question or prediction at the bottom. What do I wonder? What do I think will happen next?
Reusing this layout every day builds muscle memory. Within a few weeks, students fill it in without prompting.
Teaching the Five Senses for Scientific Observation
Observation is the foundation of every other scientific skill. Without accurate observations, hypotheses, experiments, and conclusions all fall apart. The five senses framework gives children a concrete tool they can use anywhere.
Five Examples of Observations Kids Can Record
Visual: “The frog had green and brown spots on its back and bright orange eyes. Its body was about as long as my thumb.”
Auditory: “I heard a high-pitched chirp every 4 seconds coming from the bushes. It stopped when I walked closer.”
Olfactory: “The soil smelled damp and earthy, like the forest after rain. There was no other strong smell.”
Tactile: “The bark was rough and crusted. Some pieces flaked off easily when I scraped them with my fingernail.”
Sensory comparison: “The younger leaf felt soft and flexible. The older leaf felt stiff and cracked when I bent it.”
Encourage kids to record observations even when nothing is happening. “I watched the feeder for 10 minutes. No birds came. The wind was blowing from the west.” Negative observations are powerful scientific evidence.
One habit worth teaching: write numbers whenever possible. “About as long as my thumb” becomes “approximately 5 cm” as kids learn to measure. “Lots of spots” becomes “I counted 14 spots.” Quantifying observations is a skill that grows over years.
Connecting Science Notebooks to the Scientific Method
A science notebook is where the scientific method lives for kids. Each entry can follow the same arc professional scientists use. Teach this five-step sequence explicitly so children understand how each piece of their notebook fits together.
Question: Start with something the child notices and wants to understand. Write it at the top of the entry.
Hypothesis: Ask, “What do you think will happen, and why?” Even a one-sentence prediction is enough for younger kids.
Observation and data: Use the five senses and simple measurements. Record what happened, not what was expected.
Conclusion: Did the results match the prediction? What does the child think now?
New question: Every good investigation generates new questions. Add these to the running “wonder” list.
Once kids internalize this cycle, their notebooks become a chain of connected inquiries rather than isolated entries. That chain is what real scientific thinking looks like.
Age-Appropriate Modifications for Science Notebooks
The core skill is the same at every grade, but the expectations and scaffolding should change. Here’s how to adapt your approach by age group.
Kindergarten Through Second Grade (Ages 5-7)
At this stage, drawings carry most of the information. Children should be expected to draw what they see, label 2-3 parts with adult help, and dictate one sentence. Use a journal with half drawing pages and half writing lines. Keep entries short – 10 minutes is plenty.
For ELL students or reluctant writers, accept oral observations recorded by the teacher on a sticky note glued into the notebook. This validates the observation without forcing a skill the child hasn’t developed yet.
Third Through Fifth Grade (Ages 8-10)
Students should write full sentences, create labeled diagrams with arrows, and start using simple data tables. Introduce the scientific method explicitly: question, hypothesis, observation, reflection. Entries can run 15-20 minutes.
This is a great age for nature journals because children can write independently and start forming their own research questions. Encourage “I wonder” pages at the back of the notebook.
Sixth Through Eighth Grade (Ages 11-14)
Middle schoolers should be writing structured entries with clear sections for hypothesis, materials, procedure, observations, data tables, and conclusions. Graphs and measurement data become important. Many students at this age can also keep a digital companion notebook using tools like Google Docs or a science-specific app.
Push for metacognition: “Why did you record this? What does it mean?” This reflection step is what separates middle school notebooking from earlier grades.
How to Draw and Label Observations?
Drawing is where many kids freeze. They worry their sketches won’t look “right.” Reframe the goal: a science notebook drawing is not art. It’s a record of what was observed, and accuracy matters more than beauty.
Use these four tips to help children draw useful observations:
Draw what you actually see, not what you think should be there. If a leaf has a hole, draw the hole. If a flower has bent petals, draw the bend.
Use a hand lens or magnifier. Slowing down to look closely at one small detail often produces the most interesting drawings.
Label with arrows and lines. A neat label pointing to a specific part is more useful than a long caption.
Add a size reference. A small drawing of a coin or a hand next to the object helps the reader understand scale.
Encourage multiple drawings of the same object from different angles. A front view, a top view, and a close-up of one section together give a more complete record than a single sketch.
Simple Assessment Strategies for Science Notebooks
Teachers often ask how to evaluate notebooks without turning them into a graded chore. The goal is feedback that improves observation quality, not a score that punishes handwriting.
Use a simple three-criteria rubric:
Detail: Does the entry include specific observations using senses and measurements, not vague generalizations?
Accuracy: Do the labels, drawings, and descriptions match what was actually observed?
Reflection: Does the entry include at least one question, prediction, or connection to past learning?
Grade each criterion with a simple check, check-plus, or “next step” note. Avoid letter grades on individual entries. Instead, collect notebooks every two weeks and give written feedback on two specific things the child did well and one suggestion for growth.
Many teachers also include a self-assessment step. Ask the child to circle their best entry of the month and write one sentence about why it stands out. This metacognition is where the deepest learning happens.
Troubleshooting: When Kids Resist Notebook Writing
Forum research is clear: notebooks can become “busywork” if not set up correctly. Here are the most common problems and how to fix them.
Problem: “Notebooks Feel Like Busywork”
The fix is to make the notebook immediately useful. Connect entries to a real investigation the child cares about. A student who tracks the growth of a class pet turtle will naturally keep returning to the notebook because the data matters.
Another powerful tactic: have students use their notebooks to answer a question they generated themselves. When the question is theirs, the writing isn’t busywork.
Problem: Students Forget or Lose Their Notebooks
Designate a specific spot in the classroom or home for “the science notebook lives here.” Some teachers keep a numbered bin and have students turn in notebooks at the end of every class period. This eliminates the lost-notebook problem entirely.
Avoid making the notebook the only place anything is recorded. Digital backups of key entries (a photo of the drawing, a typed summary) give you a safety net without undermining the practice.
Problem: Students Write Too Little
Set a minimum entry requirement – “one drawing with three labels and one sentence” – instead of asking for “a detailed observation.” Lower the bar to a clear, achievable floor, then watch accuracy and length grow over time.
You can also use the “two stars and a wish” feedback model: two specific things they did well, one suggestion for next time. This makes feedback feel supportive rather than critical.
Problem: Students Don’t See the Point
Periodically revisit an old entry and ask, “What did we find out three weeks ago? How does that connect to what we did today?” When children see their notebook is a record of real discoveries, the practice starts to feel valuable.
Problem: Time Constraints in Class
If you only have 30 minutes for science, a 15-minute notebook entry feels impossible. Try micro-entries: one focused observation in 5 minutes. A single labeled sketch with a one-sentence caption still builds the habit.
Alternate longer entries with these quick observation sprints. Over a week, you’ll accumulate meaningful data without sacrificing instructional time.
Tips to Keep Kids Using Their Science Notebooks Consistently
Consistency is what separates a successful science notebook from a forgotten one. These strategies are drawn from the most effective teachers I know.
Use the notebook almost daily. Even 5 minutes for a quick observation keeps the habit alive. Teachers on r/ScienceTeachers report that daily use, even in tiny doses, is the single biggest predictor of student buy-in.
Keep your own notebook alongside the kids. When you model the practice, students see it as a real scientific tool, not a school assignment.
Reference past entries during new lessons. “Remember when we measured the bean plant last week? Let’s check.” This makes the notebook a living document.
Celebrate growth, not perfection. Display a few pages anonymously each month to highlight good observation technique. Avoid turning the notebook into a graded test of neatness.
Allow for digital and physical notebooks together. Some kids photograph their drawings and write reflections in a Google Doc. Others love the texture of paper. Both work.
End the year with a “notebook walk.” Students flip through their own notebooks and choose three entries that show their best thinking. This reflection ritual builds metacognition and gives a sense of accomplishment.
For homeschool families, schedule notebook time right after outdoor play or a nature walk. The transition from physical activity to quiet observation feels natural and gives kids fresh material to record.
Frequently Asked Questions
What are 5 examples of observations in science for kids?
Five clear examples kids can record include: visual (the beetle had six legs and a shiny black shell), auditory (the thunder rumbled for about 10 seconds after the flash), olfactory (the leaves smelled sharp and minty when crushed), tactile (the ice felt smooth and slippery and made my fingers cold quickly), and a comparison (the new leaf was bright green while the old one was dark green and curled). Encourage children to record observations even when nothing is happening, since negative observations are useful scientific evidence.
What are the 5 steps of the scientific method for kids?
The five steps most often taught in elementary and middle school are: 1) Ask a question about something you observe, 2) Form a hypothesis (a testable prediction), 3) Conduct an experiment or systematic observation, 4) Record your observations and data in your science notebook, and 5) Draw a conclusion and share what you learned. Some teachers add a sixth step: reflect on what you would do differently next time. The science notebook is the tool that holds steps 3, 4, and 5 together.
How do you set up a scientific notebook?
To set up a scientific notebook, start with a composition or spiral notebook with at least 70 pages. Create a title page with the student’s name, grade, and school year. Reserve the first three pages for a table of contents. Number every page in the bottom corner. Set up an inside cover reference page with observation tools and a glossary. Use a consistent entry format with a date, title, drawing or data section, observations, and a reflection or question.
What is an interactive science notebook?
An interactive science notebook is a structured science journal that combines handwritten notes, labeled drawings, data tables, and reflective prompts on facing pages. The left page typically holds input – notes, diagrams, vocabulary, and questions. The right page holds output – the student’s own observations, drawings, experiments, and reflections. This layout lets students see both the information they received and their personal response side by side, which deepens understanding and retention.
Final Thoughts on Teaching Kids to Record Observations
Learning how to teach kids to record observations in a science notebook is really about building a habit of careful looking and honest documenting. The notebook is the tool, but the skill – noticing details, separating what you see from what you think, and recording both – is what will serve children for the rest of their lives.
Start small. Pick one of the strategies above and try it for a week. Model the practice. Use sentence starters. Share entries. Revisit old work. Within a month, you’ll have a child who reaches for the notebook without being asked, and that is the moment everything clicks.
If you want to go deeper, explore printable science notebook templates, the Project Zero See-Think-Wonder routine, and the Smithsonian’s free field book resources. Each one will give you more structure to layer onto the foundation we’ve built here.