
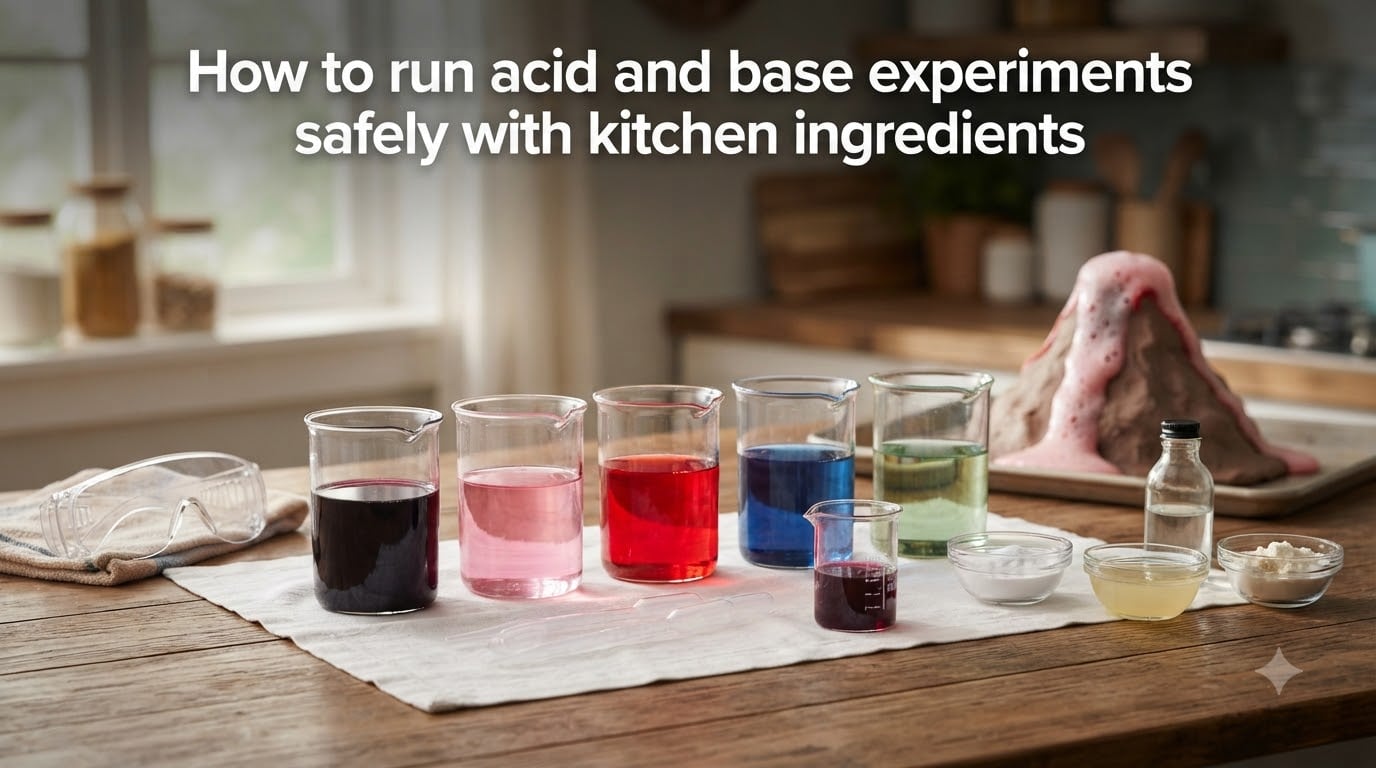
Yes, you can run acid and base experiments safely with kitchen ingredients like vinegar, baking soda, lemon juice, and red cabbage. The key is using mild household chemicals, wearing safety glasses, supervising children closely, and working in a well-ventilated area away from food preparation surfaces.
If you are a parent, homeschool educator, or classroom teacher looking for engaging science activities, this guide walks you through everything you need. We cover what acids and bases actually are, which kitchen items work best, four step-by-step experiments, troubleshooting tips that no other guide covers, and proper cleanup procedures.
Our team has drawn from CDC safety guidance, chemistry educator resources, and real parent experiences from homeschool and science education communities. Every experiment here uses items you likely already have in your pantry, and we include age recommendations so you can pick the right activity for your kids.
Learning how to run acid and base experiments safely with kitchen ingredients opens up a world of hands-on chemistry without specialty equipment or dangerous chemicals.
Table of Contents
Understanding Acids, Bases, and pH
Acids and bases are two categories of substances that have opposite chemical properties. An acid is a substance that donates hydrogen ions (protons) when dissolved in water, giving it a sour taste and the ability to react with metals and carbonates. A base does the opposite, accepting hydrogen ions and typically feeling slippery or soapy.
The pH scale measures how acidic or basic a solution is, running from 0 to 14. A pH of 7 is neutral, meaning the substance is neither acidic nor basic. Pure water sits right at 7.
Numbers below 7 indicate acidity, with lower numbers being stronger acids. Numbers above 7 indicate alkalinity, with higher numbers being stronger bases. For context, lemon juice lands around pH 2, while baking soda solutions sit around pH 9.
When an acid and a base combine, they undergo a neutralization reaction. This reaction produces water and a salt, and often releases carbon dioxide gas, which is what causes the visible fizzing and bubbling in classic kitchen experiments.
Understanding these basics helps you explain the science to kids while staying in control of safety. You do not need strong laboratory chemicals to demonstrate these principles. Mild kitchen acids and bases produce plenty of visible, exciting reactions.
Common Kitchen Acids and Bases
Your kitchen is already stocked with safe acids and bases. Here is a quick reference list with approximate pH values so you know what you are working with.
Common kitchen acids (pH below 7):
Lemon juice (pH 2.0) and lime juice (pH 2.0) are strong enough for visible reactions but completely safe to handle. Vinegar (pH 2.5 to 3.0) is the most popular kitchen acid for experiments because it produces reliable fizzing with baking soda. Orange juice (pH 3.5) and tomato juice (pH 4.0) are milder options for younger children.
Citric acid powder, found in the canning aisle, dissolves in water to create a moderately acidic solution. Black coffee (pH 5.0) and buttermilk (pH 4.5) round out the everyday acidic options.
Common kitchen bases (pH above 7):
Baking soda (pH 8.5 to 9.0) is the go-to kitchen base and pairs perfectly with vinegar for dramatic reactions. Milk of magnesia (pH 10.5) provides a stronger base option if you want to demonstrate wider pH ranges.
Soap solutions, ammonia-based cleaners, and egg whites (pH 7.6 to 9.0) are also basic, but we recommend sticking with food-grade items for kid-friendly experiments.
Neutral substances (pH near 7): Pure water, table salt dissolved in water, and sugar water all register near neutral on the pH scale. These make excellent control samples when testing with pH indicators.
Essential Safety Precautions
Safety comes first, every single time. Here are the precautions you need to take before running any acid and base experiment at home.
1. Wear safety glasses for every experiment, even with mild kitchen chemicals. Vinegar can splash and irritate eyes.
2. Work in a well-ventilated area. Open a window or work outdoors. Even mild acids release fumes during reactions.
3. Supervise children at all times. No experiment is hands-off. An adult should be present and actively watching, especially for children under 10.
4. Keep food and experiment areas separate. Do not use the same bowls, spoons, or surfaces for experiments and food preparation. Wash everything thoroughly afterward.
5. Never mix household cleaners with your experiment ingredients. Bleach and ammonia combined with acids can produce toxic gases. Stick to food-grade items only.
6. Have paper towels and a trash bag ready before you start. Quick cleanup prevents spills from spreading.
7. Wash hands thoroughly after every experiment, even if you wore gloves. Skin irritation from acidic solutions can develop over repeated exposure.
8. Avoid touching your face or eyes during experiments. Acidic residues on fingers transfer easily.
9. Use plastic containers instead of glass when possible. If glass breaks during an excited reaction, you create a safety hazard.
10. Start with small quantities. A tablespoon of baking soda and a quarter cup of vinegar produce plenty of reaction. Larger amounts increase splash risk.
The CDC recommends treating all household chemicals with respect, even familiar kitchen items. Following these precautions keeps experiments fun and safe.
How to Run Acid and Base Experiments Safely With Kitchen Ingredients
Now we get to the hands-on portion. Each experiment below includes a materials list, step-by-step instructions, an age recommendation, and a simple science explanation you can share with kids.
Set up a designated experiment station before starting. Cover your table with newspaper or a plastic tablecloth, gather all materials, and put on safety glasses.
Experiment 1: Red Cabbage pH Indicator
This is our team’s favorite experiment because it produces dramatic color changes across the entire pH spectrum. The red cabbage juice indicator turns bright pink in acids and blue-green in bases.
Age recommendation: 5 and up with supervision. Great for elementary and middle school students.
Materials needed: Half a head of red cabbage, boiling water, a large bowl, a strainer, several clear cups or glasses, and various test liquids (vinegar, lemon juice, baking soda dissolved in water, soapy water, milk).
Step 1: Chop the red cabbage into small pieces and place them in the large bowl.
Step 2: Pour enough boiling water over the cabbage to cover it completely. Let it steep for 10 to 15 minutes.
Step 3: Strain the liquid into a pitcher. The dark purple liquid is your pH indicator. Discard the cabbage pieces.
Step 4: Pour a small amount of each test liquid into separate clear cups.
Step 5: Add a few tablespoons of cabbage indicator to each cup and observe the color changes. Acids turn the solution pink or red. Bases turn it blue, green, or yellow.
The science: Red cabbage contains a pigment called anthocyanin that changes structure depending on pH. This structural change shifts the color we see, making it a natural pH indicator.
Experiment 2: Baking Soda and Vinegar Volcano
This classic reaction never fails to excite kids. The fizzing eruption demonstrates an acid-base neutralization in real time.
Age recommendation: 4 and up with supervision. The most accessible experiment for preschoolers.
Materials needed: Baking soda, white vinegar, a plastic bottle or tall cup, a tray to catch overflow, liquid food coloring (optional), and dish soap (optional for extra foam).
Step 1: Place the plastic bottle on the tray. Add two tablespoons of baking soda inside.
Step 2: Add a few drops of food coloring and a squirt of dish soap if you want thicker, longer-lasting foam.
Step 3: Pour about half a cup of vinegar into the bottle and step back. Watch the eruption.
Step 4: For a repeat reaction, add more baking soda and vinegar once the first eruption settles.
The science: The acetic acid in vinegar reacts with sodium bicarbonate (baking soda) to produce carbon dioxide gas, water, and sodium acetate. The escaping gas creates the bubbles and foam.
Experiment 3: Invisible Ink With Lemon Juice
This experiment uses acid oxidation to create hidden messages that appear with heat. It feels like magic but is pure chemistry.
Age recommendation: 6 and up. Best for ages 7 to 12 who can write and handle a heat source carefully.
Materials needed: Lemon juice, a cotton swab or small paintbrush, white paper, and a heat source (iron, light bulb, or oven set to low).
Step 1: Dip the cotton swab in lemon juice and write a message on white paper. Let it dry completely. The message becomes invisible.
Step 2: To reveal the message, hold the paper near a heat source. An iron on low heat works well. The writing turns brown and becomes visible.
Step 3: Adult handles the heat source at all times. Never put paper directly on a hot surface.
The science: Lemon juice is acidic and dilutes the paper’s coating. When heated, the acid-soaked areas oxidize and turn brown at a lower temperature than the rest of the paper, revealing the message.
Experiment 4: Dancing Raisins
This experiment visualizes gas production in a way that captivates younger children. Raisins appear to dance up and down in a glass.
Age recommendation: 3 and up. Perfect for preschoolers and early elementary.
Materials needed: A clear tall glass, carbonated water (or baking soda and vinegar combination), and a handful of raisins.
Step 1: Fill the glass three-quarters full with carbonated water.
Step 2: Drop in five to ten raisins.
Step 3: Watch the raisins. Bubbles of carbon dioxide attach to the wrinkled surface of the raisins, lifting them to the top. The bubbles pop at the surface, and the raisins sink again.
Step 4: For a stronger acid-base version, use still water with a tablespoon of baking soda, then add vinegar gradually.
The science: Carbon dioxide gas bubbles from the carbonated water (carbonic acid) attach to the rough raisin surface. The combined density of raisin plus bubbles becomes less than water, causing them to float. When bubbles release at the surface, the raisin sinks again.
Troubleshooting Common Experiment Problems
Experiments do not always go as planned. Here are the most common issues and how to fix them, based on real feedback from parents and educators.
Problem: The volcano barely fizzes. Your vinegar may be diluted or old. Fresh white vinegar at 5 percent acidity works best. Also check that your baking soda is fresh, not expired. Old baking soda loses potency over time.
Problem: The cabbage indicator shows no color change. The indicator may be too diluted. Try using less water when steeping the cabbage, or add more indicator to each test cup. Also make sure your test liquids are concentrated enough, not overly diluted.
Problem: The invisible ink does not appear. The heat source may be too low. Increase the iron temperature slightly or hold the paper closer to the heat. Be patient, as development can take 30 seconds or more. Avoid scorching the paper.
Problem: Raisins are not dancing. The carbonated water may have gone flat. Open a fresh bottle right before the experiment. Alternatively, the raisins may be too heavy or sticky. Try fresh, lighter raisins.
Problem: Colors look muddy instead of distinct. You may be mixing test liquids or using dirty cups. Always use clean, separate containers for each test liquid. Rinse cups thoroughly between uses.
Problem: Reaction is too small to see well. Scale up slightly. Try three tablespoons of baking soda instead of two, or use a taller, narrower container to make the eruption more visible.
Cleanup and Disposal
Cleanup matters as much as the experiment itself. Here is how to handle the aftermath safely and responsibly.
All experiment byproducts from these kitchen activities are non-toxic and safe to pour down a household drain with running water. The baking soda and vinegar reaction produces sodium acetate, which is harmless in household quantities.
Rinse all containers with warm soapy water before returning them to kitchen use. If you used dedicated experiment containers, store them separately from food preparation items.
Wipe down all surfaces with a damp cloth and mild dish soap. Red cabbage indicator can stain, so clean spills immediately before they set. Avoid getting cabbage juice on light-colored fabrics or countertops.
Dispose of leftover cabbage indicator in the sink. Compost the used cabbage pieces if you have a compost bin, or discard them in regular trash.
Wash your hands thoroughly with soap and warm water after cleanup. Remove and launder any clothing that came into contact with experiment materials.
Age-by-Age Experiment Guide
Choosing the right experiment for your child’s age keeps things safe and engaging. Here is our team’s recommended progression.
Ages 3 to 5 (preschool): Stick with the dancing raisins experiment and the baking soda volcano. Both produce immediate, dramatic visual results that hold short attention spans. Keep explanations simple. Focus on observation and wonder.
Ages 6 to 8 (early elementary): Introduce the red cabbage indicator and invisible ink experiments. Children at this age can follow multi-step instructions and start understanding the concept of pH. Ask them to predict color changes before testing each liquid.
Ages 9 to 12 (upper elementary and middle school): Encourage independent setup and hypothesis formation. Have them record results in a notebook and compare pH predictions with actual outcomes. Challenge them to test additional household liquids and create a pH chart.
Ages 13 and up (high school): Move beyond demonstrations into inquiry. Have them design their own variations, research the chemical equations, and present findings. The neutralization reaction between vinegar and baking soda offers a great entry point into stoichiometry.
Frequently Asked Questions
Can I do an acid and base experiment at home?
Yes, you can safely run acid and base experiments at home using mild kitchen ingredients like vinegar, baking soda, lemon juice, and red cabbage. Avoid strong laboratory acids or bases, and always supervise children while wearing safety glasses.
What are the safety precautions when using acids and bases?
Wear safety glasses, work in a well-ventilated area, supervise children at all times, keep experiment and food areas separate, never mix household cleaners with experiment ingredients, use plastic instead of glass containers, start with small quantities, and wash hands thoroughly after every experiment.
What are some examples of acids and bases in your kitchen?
Common kitchen acids include lemon juice (pH 2.0), vinegar (pH 2.5 to 3.0), orange juice (pH 3.5), and citric acid powder. Common kitchen bases include baking soda (pH 8.5 to 9.0), egg whites (pH 7.6 to 9.0), and milk of magnesia (pH 10.5).
What are some science experiments I can do with kitchen items?
Four popular kitchen chemistry experiments include the red cabbage pH indicator test, the baking soda and vinegar volcano, invisible ink with lemon juice, and the dancing raisins demonstration using carbonated water. All use common household ingredients and produce visible reactions.
Why does vinegar and baking soda fizz?
The acetic acid in vinegar reacts with sodium bicarbonate in baking soda to produce carbon dioxide gas, water, and sodium acetate. The rapidly escaping carbon dioxide gas creates the visible fizzing and bubbling.
Conclusion
Running acid and base experiments safely with kitchen ingredients is one of the most rewarding ways to introduce kids to real chemistry. With items like vinegar, baking soda, lemon juice, and red cabbage, you can demonstrate pH changes, neutralization reactions, and gas production without any specialty equipment or dangerous chemicals.
Follow the safety precautions every time, choose age-appropriate experiments, and use the troubleshooting tips when reactions do not go as expected. Start with the baking soda volcano for younger kids and progress to the red cabbage indicator for older students ready to explore the full pH spectrum.
Pick one experiment from this guide, gather your materials, and set up your station this week. Hands-on science is where curiosity turns into understanding.