
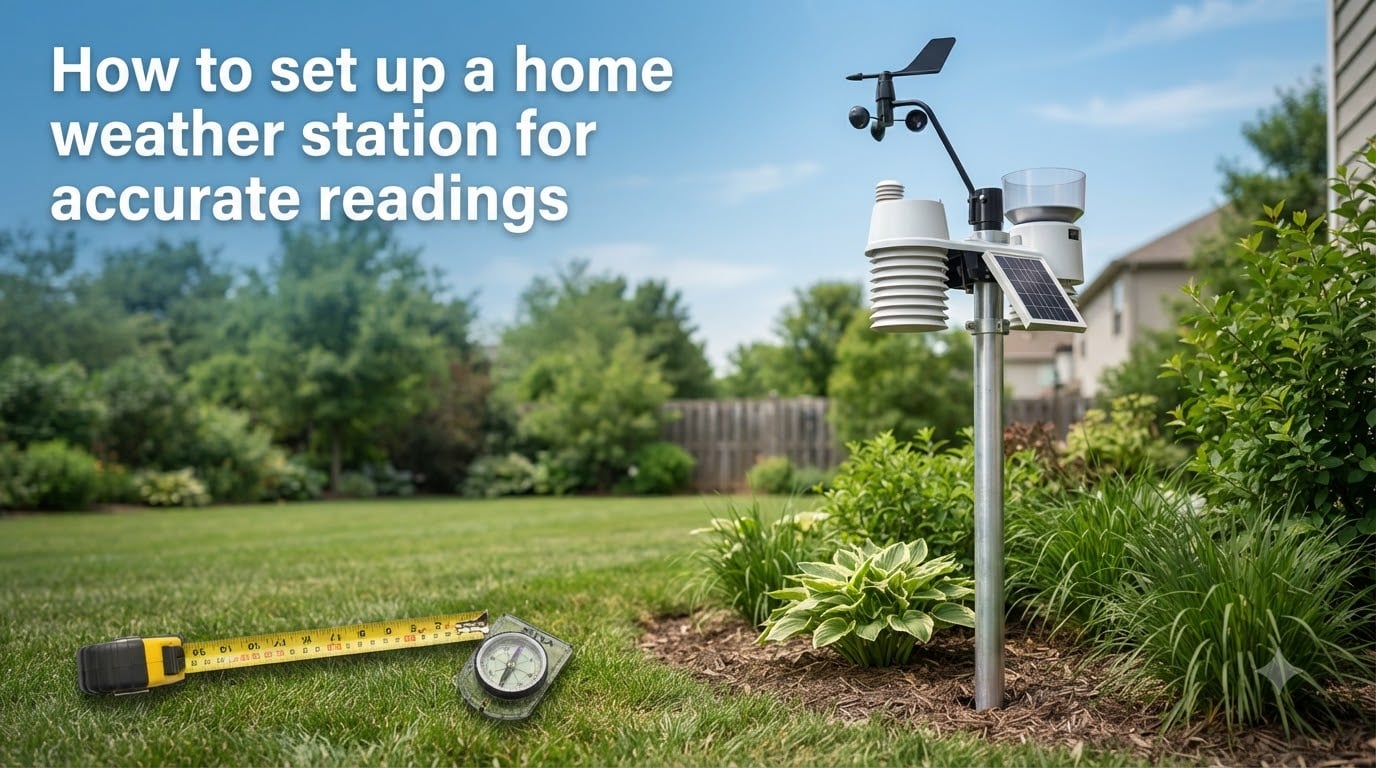
Setting up a home weather station for accurate readings is one of the most rewarding projects you can take on this year. I installed my first station in 2019 and spent three months figuring out why my temperature readings were off by 7 degrees. Spoiler: it was the asphalt driveway 15 feet away. This guide covers everything I learned so you can get it right the first time.
A proper home weather station setup means choosing the right location, mounting sensors at the correct heights, calibrating each instrument, and avoiding the placement mistakes that wreck data quality. Most people focus on which station to buy. The truth is, where and how you install it matters far more than the brand.
Weather apps and phone sensors give you generic regional data. A well-placed personal weather station gives you hyper-local readings for your exact microclimate. That matters for gardeners tracking frost, homeowners monitoring severe weather, and anyone who wants real numbers instead of estimates.
By the end of this guide, you will know exactly how to set up a home weather station for accurate readings. I will walk through every sensor type, every measurement standard, and every common mistake I have seen in forums and in my own testing.
Table of Contents
Why Siting Is the Single Most Important Factor for Accurate Readings?
Siting is the single most important factor in getting accurate weather station readings. Siting simply means where and how you position your weather station on your property. Even the most expensive station will produce garbage data if it sits next to an AC unit, on a sunny roof, or in a wind-blocking corner.
World Meteorological Organization (WMO) and National Weather Service standards define specific rules for sensor placement. These rules exist because atmospheric science has proven that placement affects accuracy more than sensor quality. A $200 station placed correctly will outperform a $1,000 station placed poorly.
The main principle is called “fetch.” Fetch refers to the distance air travels over open ground before reaching your sensors. You want at least 50 feet of open, natural ground (grass or soil) between your station and any obstacle. This gives your sensors air that represents the actual local atmosphere, not the microclimate of your patio.
Every compromise you make on siting introduces error. A station mounted on a fence near a brick wall will read high on temperature. A rain gauge under a tree will under-collect. An anemometer below the roofline will read low on wind. These errors compound, and no amount of calibration can fix bad placement.
Tools and Components You’ll Need Before Installation
Before you start your home weather station setup, gather everything you need so you can complete the installation in one session. I recommend assembling your kit a few days before mounting day.
Here is what a complete weather station system typically includes:
Integrated sensor suite or individual sensors: thermometer, hygrometer (humidity), anemometer (wind speed), wind vane (wind direction), tipping-bucket rain gauge, and barometer
Radiation shield: either passive (uses natural airflow) or aspirated (uses a small fan) to protect the temperature sensor from direct solar radiation
Display console or data logger: receives data wirelessly from sensors and stores or forwards it
Mounting hardware: pole, tripod, mounting brackets, U-bolts, stainless steel screws, and a level
Power source: batteries, AC adapter, or solar panel depending on your station model
Tools: cordless drill, screwdrivers, adjustable wrench, compass (for true north alignment), tape measure (50-foot minimum), and a smartphone with a level app
Optional but useful items include a weatherproof cable, a Wi-Fi extender if your station is far from your router, and a UV/solar radiation sensor if your station supports expansion.
How to Choose the Right Location for Your Weather Station?
Choosing the right location is the decision that determines whether your data is trustworthy. The ideal spot balances conflicting requirements because different sensors need different conditions. Temperature wants shade at 5 feet, wind wants open sky at 33 feet, and rain wants a flat, open area.
Start by walking your property at different times of day. Notice where the sun hits, where wind channels between buildings, and where rain naturally pools. Take notes on what you observe over a week if possible.
Suburban Backyard Placement
A typical suburban backyard with at least 50 feet of open grass is workable. Mount your temperature and humidity sensors on a post in the middle of the yard, 5 feet above ground, in a shaded area with good airflow. Place the rain gauge at least 5 feet away from any obstruction and ideally in the most open part of the yard.
The wind sensors are the tricky part. Ideally they go 33 feet up, but most backyards do not have a tower that tall. A rooftop pole or a dedicated pole raised 10 to 15 feet above the roofline is the practical compromise most people use. Accept that your wind data will be somewhat compromised and document it.
Urban and Small Yard Placement
Urban placement is harder. If you have a balcony, small courtyard, or roof access, expect compromises. A balcony station will not meet WMO standards, but you can still get useful data by maximizing distance from heat sources and choosing the side with the best airflow.
For apartment dwellers, a roof-mounted station is often the best option. Roof placement helps with wind height but creates temperature problems because roofs absorb and radiate heat. Use an aspirated radiation shield and mount the temperature sensor at least 5 feet above the roof surface to minimize this effect.
HOA and Rental Restrictions
If your HOA or landlord restricts permanent mounting, look for portable pole options. A freestanding pole secured with a weighted base or ground sleeve can be removed without damage. Some users build a pole inside a planter filled with concrete for stability. Check your restrictions before drilling into anything.
Temperature Sensor Placement: The 5-Foot Rule and Beyond
Temperature sensors belong 4 to 5 feet (1.25 to 1.5 meters) above ground level over a natural surface like grass. The WMO standard is 1.25 to 2.0 meters. This height represents the temperature humans actually experience and avoids ground-level cold pooling and surface heating effects.
The surface under your sensor matters enormously. I learned this the hard way when my station sat near asphalt. Asphalt and concrete absorb solar radiation and re-radiate it as heat, inflating your readings by 3 to 10 degrees. Grass or bare soil is the standard because it reflects and absorbs heat more naturally.
Keep the temperature sensor at least 50 feet from paved surfaces, brick walls, air conditioning units, dryer vents, and any other heat source. Even a south-facing brick wall can raise nearby air temperature significantly on a sunny afternoon.
Radiation Shields: Why You Need One
A radiation shield is essential for accurate temperature readings. Without one, direct sunlight will heat the sensor housing and produce readings 5 to 15 degrees above the actual air temperature. The shield blocks solar radiation while allowing air to flow through to the sensor.
There are two main types of radiation shields:
Passive shields: Use stacked plates (often white plastic) that create shade while allowing natural wind to ventilate the sensor. They work well in breezy locations but lose accuracy on calm, hot days.
Aspirated shields: Use a small fan to force air through the shield, providing consistent ventilation even when there is no wind. These are more accurate but require power and add moving parts that can fail.
DIY Radiation Shield Options
If your station did not include a radiation shield, you can build one. A common DIY approach uses inverted white plastic bowls or saucers stacked with spacers around the sensor. PVC pipe sections, painted white, also work. The goal is to block direct sun while letting air circulate. Keep in mind that DIY shields will not match the accuracy of a commercial aspirated shield, but they are dramatically better than an exposed sensor.
Wind Measurement Height and Sensor Placement Standards
Wind speed and direction should be measured at 10 meters (33 feet) above ground according to WMO standards. This height places the anemometer above the friction layer where buildings, trees, and terrain slow the wind near the surface.
In practice, very few homeowners have a 33-foot pole in their yard. The realistic compromise is mounting wind sensors on a roof, with the anemometer at least 5 to 7 feet above the highest point of the roof. This reduces the roof’s blocking effect and gets you closer to true wind conditions.
Aligning Your Wind Vane to True North
Wind direction readings are useless if your wind vane is not aligned to true north. This is one of the most commonly skipped steps in home weather station setup, and it is why so many personal weather stations report wind from the wrong direction.
Here is how to align properly:
Find your magnetic declination for your location using the NOAA calculator (search “NOAA magnetic declination”). This tells you the difference between magnetic north (what your compass shows) and true north.
Use a compass to find magnetic north at your station location, away from metal objects.
Add or subtract the declination to find true north.
Point the wind vane’s north marker at true north and tighten it down.
Verify by checking your station’s direction reading matches the actual wind you observe.
Recheck alignment annually. Vibrations and weather can shift the vane over time. A vane off by 15 degrees will report a north wind as northeast, which compounds the error in your daily data.
Rain Gauge Placement: Clearance Rules for Accurate Totals
Place your rain gauge on level ground in an open area with adequate clearance from obstructions. The standard rule is a minimum of 5 feet horizontal clearance from any nearby object, and ideally the nearest obstruction should be no closer than 2 to 4 times its own height away.
A more practical version of this rule is the 10:1 ratio. If an object is 30 feet tall, it should be at least 30 to 60 feet from your rain gauge. Trees, buildings, and even your house create “rain shadows” where less rain reaches the ground because the structure intercepts falling precipitation.
The rain gauge must be perfectly level. Even a small tilt will affect the tipping-bucket mechanism inside, causing under-reporting. Use a bubble level on the gauge base before securing it, and check the level again after any storm that might have shifted things.
Avoid placing the gauge on a roof. Wind acceleration over roof edges causes under-catch because falling rain is pushed horizontally past the opening. Ground level, with proper clearance, gives the most accurate rainfall totals.
Humidity and Barometric Pressure Sensor Positioning
Humidity sensors share the same housing as your temperature sensor in most integrated suites, so the 5-foot height and radiation shield rules apply. Keep the combined sensor at least 50 feet from bodies of water, dense vegetation, or anything that artificially raises local humidity.
If you live near a pond, stream, or swampy area, understand that your humidity readings will reflect that microclimate. This is not necessarily wrong, but it means your data will not match the broader regional humidity reported by weather services.
Barometric pressure sensors are typically inside the indoor console or data logger, so placement is less critical. They measure atmospheric pressure, which does not change significantly over short distances. However, you must set the correct elevation in your station software. Pressure decreases with altitude, and getting your elevation wrong by even 50 feet will throw off your pressure readings and any derived forecasts.
Mounting Options: Tripod, Pole, Fence, and Roof Compared
Choosing the right mounting hardware depends on your property layout, station type, and what gives you the best sensor positions. Each option has trade-offs.
Ground Pole Mount
A galvanized steel or aluminum pole sunk 2 to 3 feet into the ground with concrete is the most stable option for temperature, humidity, and rain sensors. Use a 1.25-inch to 2-inch diameter pole depending on your station’s mounting hardware. This setup avoids roof heat issues and gives you full control over height and distance from obstacles.
Roof Tripod Mount
A tripod mount sits on your roof and raises sensors above the roofline. This is the most popular choice for wind sensors because it gets the anemometer closest to the 33-foot standard. The trade-off is that temperature sensors on a roof need extra height (at least 5 feet above the surface) and an aspirated shield to counter roof heating.
Use a weatherproof sealant on any roof penetrations. Lag bolts into rafters (not just decking) hold better and reduce leak risk. I recommend stainless steel hardware to prevent rust over years of exposure.
Fence Post Mount
Mounting on a sturdy fence post works well for temperature, humidity, and rain sensors in smaller yards. The fence must be solid (6×6 wood posts or metal), not a chain-link or vinyl fence that flexes in wind. This is a good option when you cannot install a pole in the ground.
Eave and Wall Mount
Eave mounts work for consoles and some sensor suites, but north-facing walls only. A south-facing wall will bake your sensors. Eave mounting is a compromise when nothing else is available, but expect some accuracy loss on hot, sunny days.
Step-by-Step Installation: From Unboxing to First Readings
Once you have your location and hardware sorted, the actual installation follows a clear sequence. Plan for a half-day if this is your first station.
Assemble and test indoors first. Put batteries in, connect the console to your Wi-Fi, and verify every sensor is reporting. This catches dead sensors and pairing issues before you are on a ladder.
Install the mounting pole or tripod. Use a level on the pole before setting concrete. Let concrete cure for 24 hours before mounting sensors if using a ground pole.
Mount the sensor suite. Attach the integrated sensor suite to the pole at the correct height (5 feet for temp/humidity, higher for wind if separate). Tighten all bolts and recheck level.
Install the rain gauge separately if it is a standalone unit. Position it on level ground with proper clearance. Check the internal tipping-bucket mechanism moves freely.
Align the wind vane to true north using the compass and declination method described earlier.
Run cables for any wired connections, using weatherproof routing and drip loops to prevent water tracking into connectors.
Power up and verify. Check that the console receives data from all sensors. Compare your readings to a nearby official station for a sanity check.
Configure software on the console or app. Set your elevation, time zone, and any calibration offsets needed.
Let it run for 48 hours before trusting the data. This burn-in period catches intermittent issues and lets you compare trends with nearby stations.
Calibration Basics: Fine-Tuning Your Sensors for Maximum Accuracy
Calibration is the process of comparing your station’s readings against a known reference and adjusting if needed. Even a well-sited station benefits from periodic calibration checks.
Temperature Calibration
Compare your station’s temperature reading with a nearby official NWS station on a calm, overcast day when local microclimate differences are minimal. If your station reads consistently high by the same amount, apply a negative offset in your software. A consistent 2-degree offset is normal for budget stations.
Never calibrate temperature on a sunny or breezy day, as solar radiation and ventilation differences will give false comparisons.
Humidity Calibration
Humidity sensors are the least accurate component in most consumer weather stations. Use a salt-test calibration kit (a sealed container with table salt at 75% relative humidity) to check accuracy. Place your sensor in the sealed container with the salt solution for 24 hours and verify it reads 75%. Apply an offset if needed.
Rain Gauge Calibration
Pour a measured amount of water slowly into the rain gauge (1 inch of water over 30 minutes is a standard test). Compare what the station reports to the known amount. Tipping-bucket gauges can lose accuracy in heavy rain, so this slow-pour test checks the mechanism without overwhelming it.
Barometer Calibration
Set your station to the current sea-level pressure reported by a nearby airport or NWS station. Barometric pressure is the most reliable sensor to calibrate because pressure is uniform over a wide area. Recheck monthly, as barometric sensors can drift.
Sharing Your Data: Weather Underground and Citizen Science Networks
One of the best parts of owning a personal weather station is contributing your data to citizen science networks. Your readings help improve forecasts and fill gaps between official stations.
Weather Underground is the largest personal weather station network. Most consumer stations connect directly through their built-in software or app. Once registered, your data appears on the Weather Underground map and contributes to their forecasting models.
CWOP (Citizen Weather Observer Program) feeds data to the National Weather Service and other government agencies. This is a more technical setup but makes your data available for official forecasting and research.
mADIS and AWEKAS are additional networks that aggregate personal weather data for researchers and weather enthusiasts.
Sharing your data adds a purpose beyond personal interest. Your station becomes part of a network that improves local forecasts for everyone in your area.
Common Siting Mistakes and How to Avoid Them
After reading forum posts from hundreds of weather station owners and testing placements myself, here are the mistakes I see most often.
Mistake 1: Mounting on a Sunny South-Facing Wall
This is the number one cause of inflated temperature readings. South-facing walls absorb sun all day and radiate heat long after sunset. Mount on a north-facing surface, or better yet, on a pole away from any wall.
Mistake 2: Placing the Rain Gauge on a Roof
Roof placement causes under-catch due to wind acceleration. Your rainfall totals will read 10 to 30% low compared to a ground-level gauge with proper clearance. Put the gauge on the ground.
Mistake 3: Skipping True North Alignment
An unaligned wind vane reports directions that are consistently rotated from reality. If your station says the wind is from the southwest but you can see flags pointing southeast, you have an alignment problem. Fix it once and document the process.
Mistake 4: Mounting Too Close to the House
A station mounted 5 feet from your house wall is measuring the house’s microclimate, not the local atmosphere. Heat radiating from walls, AC exhausts, and dryer vents all corrupt readings. Get at least 50 feet away if possible.
Mistake 5: Ignoring Seasonal Changes
A spot that is shaded in summer by deciduous trees may be fully exposed in winter when leaves drop. Recheck your temperature sensor’s sun exposure in both seasons and adjust if needed.
Frequently Asked Questions
How do I set up a home weather station?
To set up a home weather station, choose an open location with at least 50 feet of clearance from obstacles, mount the temperature sensor 5 feet above grass in a radiation shield, place wind sensors as high as possible (ideally 33 feet), install the rain gauge on level ground with 5-foot clearance, align the wind vane to true north, and connect the console to your Wi-Fi for data logging.
How high off the ground should a home weather station be?
Temperature and humidity sensors should be 4 to 5 feet (1.25 to 1.5 meters) above ground over a natural surface like grass. Wind sensors should be 10 meters (33 feet) high per WMO standards, though most homeowners mount them 5 to 7 feet above the roofline as a practical compromise.
How do I calibrate my weather station?
Calibrate temperature by comparing to a nearby NWS station on a calm overcast day and applying an offset. Calibrate humidity using a salt test (75% reference). Test the rain gauge with a slow measured water pour. Set barometric pressure to match a nearby airport’s sea-level pressure reading.
How accurate are home weather stations?
A well-sited home weather station can be accurate within 1 degree for temperature, 5% for humidity, and 2% to 5% for rainfall. Accuracy depends more on placement than on sensor quality. A poorly sited premium station can be off by 5 to 10 degrees while a budget station placed correctly reads within 1 to 2 degrees.
Which home weather station is the most accurate?
Davis Instruments stations (Vantage Vue and Vantage Pro2) are consistently recommended by weather enthusiasts and forums for accuracy and long-term reliability. They use research-grade sensors and are the most common brand used by CWOP contributors. Budget alternatives from Ambient Weather and AcuRite offer good value for casual users.
What is the lifespan of a home weather station?
A quality home weather station lasts 5 to 15 years depending on build quality and maintenance. Premium stations like Davis Vantage Pro2 commonly last 10 to 15 years with occasional sensor replacements. Budget stations typically last 2 to 5 years before sensors drift or electronics fail from weather exposure.
Conclusion
Learning how to set up a home weather station for accurate readings comes down to respecting one principle above all others: siting matters more than hardware. Get the location right, follow the measurement standards for each sensor type, and calibrate periodically.
The key rules to remember: temperature sensors at 5 feet over grass in a radiation shield, wind sensors as high as you can manage with true north alignment, rain gauges on level ground with generous clearance, and at least 50 feet of fetch between your station and any obstacle.
Your next step is to walk your property with a tape measure and compass, identify the best compromise location for all your sensors, and order any mounting hardware you need. Once installed, connect to Weather Underground or CWOP to share your data and compare readings with nearby stations to verify your accuracy.
Accurate local weather data is genuinely useful and surprisingly addictive. Once your station is running correctly, you will never trust a generic weather app the same way again.