
I still remember the first time I mixed acetone and nitric acid in my garage with the door cracked open. The fumes hit the back of my throat before I even finished pouring. That was the day I stopped treating ventilation as optional and started treating it as the most important piece of equipment in my home lab.
Home chemistry ventilation is the system that removes hazardous fumes and vapors from your workspace. It typically uses fume hoods or local exhaust to capture contaminants at the source before you breathe them. If you do any chemistry at home that involves volatile solvents, acids, or reactions that produce vapor, ventilation is not a luxury. It is the difference between a hobby and a hospital visit.
In this guide, I will walk you through exactly how to set up a ventilated space for home chemistry, from the airflow math to the equipment choices to the mistakes that cost me a week of headaches. Whether you are converting a garage, basement, or spare room, you will have a clear plan by the end.
Table of Contents
Why Proper Ventilation Matters for Home Chemistry?
Every experienced home chemist I have spoken with on Reddit and home chemistry forums has the same story. They thought they were careful enough until they were not. Ventilation failures do not announce themselves with alarms. They announce themselves with headaches, dizziness, and chemical burns on lung tissue you cannot see.
The health risks are real. Solvents like acetone, methanol, and toluene attack your nervous system with repeated exposure. Acid mists scar lung tissue. Even “safe” chemicals like ammonia produce vapors that trigger asthma attacks in sensitive people. Reddit’s r/chemistry community is consistent on one point: kitchen chemistry is dangerous because kitchens were never designed for fume control.
Beyond health, ventilation controls fire and explosion risk. Many organic solvents produce vapors heavier than air. These vapors pool on the floor, travel to your water heater pilot light, and ignite. I have read three separate forum threads where amateur chemists described near-misses from exactly this scenario.
Finally, ventilation protects everyone else in your home. Your partner, your kids, your pets. They did not sign up to breathe your chemistry. A properly ventilated space keeps fumes where they belong: outside.
Understanding Airflow Basics: Key Terms You Need to Know
Before you buy a fan or build a fume hood, you need to understand five airflow terms. These are the numbers that separate a working ventilation system from an expensive box that moves air in circles.
Face Velocity
Face velocity is the speed of air moving through the opening of your fume hood, measured in feet per minute (FPM). For most chemistry work, you want 80 to 120 FPM at the hood face. Below 80 FPM and fumes escape around you. Above 150 FPM and you create turbulence that also pushes fumes out.
Capture Velocity
Capture velocity is the speed of air needed at the source of contamination to pull vapors into the exhaust. It is usually 50 to 100 FPM, depending on how toxic the chemical is and how fast it evaporates. A gentle puff of hydrochloric acid needs less capture velocity than a beaker of boiling ether.
Air Changes Per Hour (ACH)
Air changes per hour tells you how many times the entire room volume of air is replaced in 60 minutes. For general lab ventilation, 4 to 12 ACH is standard. For setups involving volatile chemicals, aim higher. A 12 by 12 room with 8 foot ceilings needs roughly 800 CFM (cubic feet per minute) of exhaust to hit 12 ACH.
Makeup Air
Makeup air is the replacement air that enters when exhaust air leaves. If you pull 800 CFM out of a room, 800 CFM has to come in somewhere. Cracking a window helps. A dedicated makeup air vent is better. Ignore this and your room goes negative pressure, which fights your exhaust fan and pulls fumes through wall gaps.
Negative Pressure
Negative pressure means your lab room is at lower air pressure than surrounding rooms. This is good for containment. Fumes stay in the lab rather than migrating to your living room. You achieve it by having more exhaust than supply. You can verify it with a simple smoke pencil or a cheap differential pressure gauge.
Types of Ventilation Systems for Home Labs
You have six realistic options for home chemistry ventilation. Each has tradeoffs in cost, effectiveness, and practicality.
Ducted Fume Hoods
A ducted fume hood connects to a fan that pushes fumes through ductwork and outside the building. This is the gold standard. Properly installed, a ducted hood gives you real face velocity and exhausts contaminants away from people. The downsides are cost ($500 to $3000 for a hobby-scale unit) and the need to cut a hole through an exterior wall.
Ductless Fume Hoods
A ductless fume hood recirculates air through carbon and HEPA filters, then back into the room. They are cheaper and easier to install. The problem is filters. Each chemical class needs specific filter media. Carbon absorbs organics but not acids. You will replace filters often, and a saturated filter is worse than no filter at all because it lets fumes pass through under the illusion of safety.
Snorkel Exhaust Arms
A snorkel exhaust is a flexible duct with an extraction nozzle you position near the work. They are great for spot ventilation on specific apparatus. A snorkel costs less than a full hood and works well for resin work, soldering, or small reactions. They do not protect you if you forget to position them correctly.
Canopy Hoods
Canopy hoods mount above the work and pull fumes up. They work for heat-generated fumes that rise naturally. They do not work well for heavier-than-air vapors because those vapors fall before they reach the canopy. For most home chemistry, a canopy is a supplement, not a solution.
Downdraft Tables
Downdraft ventilation pulls fumes down through a perforated work surface. These are common in nail salons and woodworking. They struggle with hot reactions and buoyant vapors. Skip them for chemistry.
Box Fan and Window Solutions
A 20 inch box fan in a window with a cross-breeze is the budget baseline. It can deliver 4 to 6 ACH in a small room. It will not capture fumes at the source but it does dilute room air. For very low-hazard work like dissolving sugar in water, it is enough. For anything with solvents, it is not.
Comparison: Ventilation Options at a Glance
Here is how the main options compare for a hobbyist budget.
Ducted fume hood: Best overall protection. High cost ($500-$3000). Requires exterior wall penetration. Low ongoing maintenance.
Ductless fume hood: Portable and affordable ($200-$800). Filter replacement is expensive and risky. Best for light, intermittent use.
Snorkel exhaust: Flexible spot ventilation ($100-$400). Position-sensitive. Good supplement to general room ventilation.
Box fan in window: Cheap ($20-$50). No source capture. Better than nothing for low-hazard work or as supplementary dilution.
How to Set Up a Ventilated Space for Home Chemistry: Step by Step
This is the process I use when I set up a new home chemistry space. It takes a weekend if you already have a space, longer if you need to build one.
Step 1: Choose the Right Room
Pick a room with at least one exterior wall and one window. A garage is ideal because you can vent through the wall and isolate chemistry from living areas. A basement works but fights you on makeup air because the space is below grade. A spare bedroom is the worst choice because fumes migrate through the rest of the house.
The room should have a door you can close. Negative pressure requires sealing the room from the rest of the house. Weather stripping around the door and a draft stopper at the bottom help.
Step 2: Assess Existing Airflow
Before buying anything, measure the room. Multiply length by width by height in feet to get volume. Then count your ACH goal (start with 6 for general work, 10 for solvent work). The formula:
Required CFM = (Volume in cubic feet x ACH) / 60
For a 12 by 12 room with 8 foot ceilings (1152 cubic feet), 6 ACH needs 115 CFM. 10 ACH needs 192 CFM. Most 8 inch inline fans move 200 to 400 CFM, so one fan covers most small rooms.
Step 3: Select Your Ventilation Method
Match the method to your chemistry. If you only do aqueous reactions and salt recrystallizations, a box fan and cracked window is acceptable. If you do any solvent extraction, distillation, or acid work, invest in a ducted hood or snorkel exhaust. If you do both, combine general room ventilation with a local exhaust device.
Step 4: Install the Exhaust System
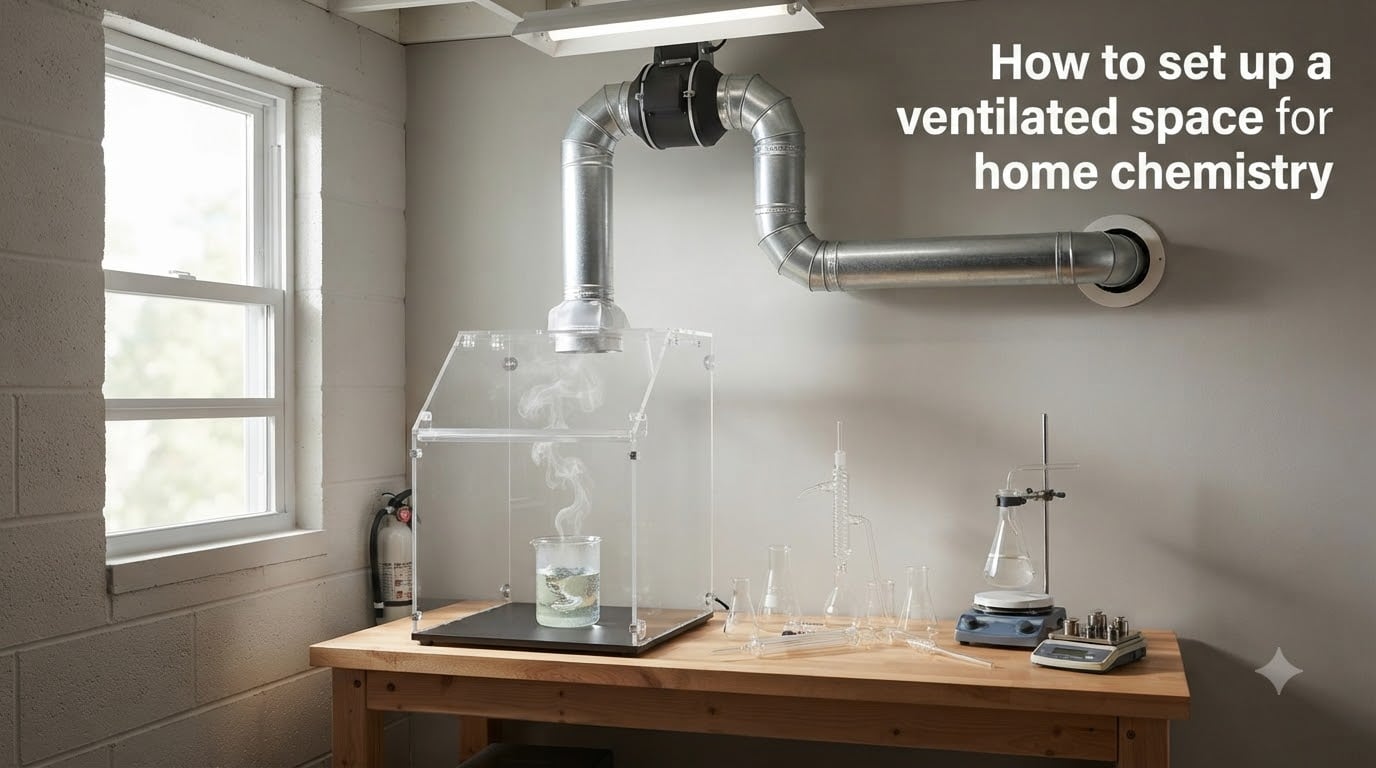
For a ducted system, mount a 4 to 8 inch inline fan on the wall or in the attic. Run rigid metal ducting (not flexible dryer hose, which restricts flow) to a vent cap on the exterior wall. The vent should point away from windows and neighbors. Seal all joints with foil tape, not duct tape. Duct tape degrades in heat and fumes.
For a snorkel, mount a high-CFM centrifugal fan and run flexible duct to the outside. The fan needs to overcome the duct length and bends. Add 1 CFM of capacity for every foot of duct run as a rough rule.
Step 5: Ensure Makeup Air
Cut a second hole in the wall for makeup air, or crack a window on the opposite side of the room. Without makeup air, your exhaust fan stalls. Think of it like trying to drink through a straw with your finger plugging the other end. Air cannot flow if it has nowhere to come from.
Step 6: Test and Verify
Test with a smoke pencil, incense stick, or piece of tissue. The smoke should move smoothly toward the hood or exhaust, not toward your face. For fume hoods, do a face velocity test with an anemometer ($30 to $60). Anything in the 80 to 120 FPM range is good for general chemistry.
Chemical-Specific Ventilation Needs
Different chemicals produce different hazards and need different ventilation strategies. Here is the practical breakdown.
Acids and Corrosives
Concentrated acids release corrosive mists when heated or mixed. Hydrochloric acid, nitric acid, and sulfuric acid all need a ducted fume hood. Acid vapors destroy ductless filters quickly and corrode ductwork if you use the wrong material. Use PVC or stainless steel ducting for acid work.
Solvents and Flammables
Volatile solvents like acetone, ethanol, hexane, and ether are the highest hazard. They are flammable and their vapors are often heavier than air. Ducted ventilation is mandatory. Explosion-proof fans are ideal for large volumes but a sealed brushless DC fan works for hobby scale.
Particulates and Powders
Fine powders spread through the air and contaminate everything. A box fan with a MERV 13 filter on the intake side, plus local exhaust at the bench, handles most cases. For toxic powders, a ducted enclosure with HEPA filtration on the exhaust is required.
Resin and Epoxy Work
Epoxy resins release low levels of fumes during curing. Sensitivity varies by person. A snorkel exhaust positioned 6 inches from the work area captures most vapors. Sensitive users should use a ducted hood or work outdoors.
DIY vs Commercial Ventilation: Budget Considerations
Reddit’s r/homechemistry community makes the cost concern clear. Commercial fume hoods are expensive. Many hobbyists build their own.
The DIY Approach
A homemade fume hood can be built from a kitchen cabinet, a piece of acrylic, a 4 or 6 inch inline fan, and some ducting. Total cost runs $150 to $400. The design is straightforward: an enclosed box with a sloped front, a fan pulling air through the back, and ducting running outside.
Key requirements for a DIY hood: smooth airflow (no sharp 90 degree bends), a baffle at the back to distribute suction evenly, and a face velocity test before you trust it. Reddit users have shared successful builds, but the consensus is to test rigorously before pouring any solvents.
Commercial Options
New commercial fume hoods run $1000 to $5000. Used lab equipment auctions offer working units for $200 to $800. The advantage is certified performance. You know the face velocity is correct. The disadvantage is you still need to install it, which often costs more than the hood itself.
Chinese-made hobbyist hoods surfaced in forum discussions as a budget option. Reviews are mixed. Some work fine, others arrive with undersized fans or poor seals. Buyer beware.
When to Upgrade
Start with general room ventilation and a snorkel exhaust. Upgrade to a ducted hood when you start working with solvents routinely, when you scale up reactions, or when you notice chemical smell in adjacent rooms. Your nose is a reasonable detector, but a low-cost VOC sensor gives you objective data.
Common Mistakes to Avoid
These are the errors I have made and watched others make.
Recirculating Fumes
Never vent a fume hood into your attic, basement, or crawl space. Fumes accumulate in hidden spaces and cause damage years later. Always vent to the outside.
Ignoring Makeup Air
An exhaust fan without makeup air stalls. The pressure differential fights the fan. You end up with low airflow and a false sense of safety. Always provide an inlet.
Exhausting Toward Neighbors
Point your exhaust away from windows, doors, and property lines. Venting solvents into your neighbor’s yard is a quick way to make enemies and possibly violate local ordinances.
Skipping Filter Replacement
If you use a ductless hood, replace filters on schedule. Mark them with the install date. A saturated carbon filter is worse than no filter because the smell seems to fade as you adapt to it, even though the breakthrough is real.
Using a Kitchen Exhaust Fan
Range hoods move air but are not designed for chemical vapors. They recirculate filtered air back into the room, and the filters are grease filters, not chemical filters. Use a kitchen hood for cooking only.
Maintenance and Safety Checklist
Once installed, your ventilation system needs regular attention. Use this checklist to keep it working.
Monthly
Wipe down the hood interior with a damp cloth. Check the fan for unusual noise. Test face velocity with an anemometer or smoke test. Inspect ductwork outside for blockages (bird nests, leaves, snow).
Quarterly
Replace pre-filters on ductless hoods. Inspect duct seals for cracks. Verify the makeup air inlet is clear. Test your smoke alarm and CO detector.
Annually
Replace carbon filters in ductless hoods based on usage. Inspect the fan motor and bearings. Recalibrate any sensors. Review your chemical inventory and adjust ventilation to match the work you actually do.
Warning Signs
If you smell chemicals during work, your ventilation is failing. If your fan sounds louder than usual, bearings may be going. If the room feels stuffy, makeup air is restricted. If you develop headaches, dizziness, or eye irritation, stop work and check the system before continuing.
Frequently Asked Questions
How to make ventilation in a house?
Open windows on opposite sides of the room to create cross-ventilation. Add a box fan in one window blowing out and a second fan in the opposite window blowing in. For stronger ventilation, install an inline exhaust fan connected to ductwork that vents outside. Always provide makeup air so the exhaust fan has something to pull.
What chemicals need ventilation?
Any volatile solvent (acetone, ethanol, methanol, hexane, ether), any concentrated acid (hydrochloric, nitric, sulfuric), any reaction that produces vapor or gas, and any fine powder that can become airborne. Even relatively safe chemicals like ammonia produce irritating vapors that require ventilation at high concentrations.
How to ventilate a room for epoxy?
Position a snorkel exhaust 6 to 12 inches from the work surface to capture vapors at the source. Open a window for cross-ventilation. Work at room temperature to reduce vapor release. Sensitive users should use a ducted fume hood or work outdoors. Always wear nitrile gloves and avoid skin contact with uncured resin.
How do you ventilate an enclosed space?
Install an exhaust fan that vents to the outside through ductwork. Provide a separate makeup air inlet so the fan has air to pull. Aim for 6 to 12 air changes per hour depending on the chemicals you use. Test with a smoke pencil to confirm airflow direction. Seal doors and gaps to contain fumes in the work area.
Can I do chemistry at home without a fume hood?
Yes, for low-hazard work like aqueous reactions, salt recrystallizations, and electrochemistry with non-volatile products. For any work involving volatile solvents, acids, or toxic gases, a fume hood or local exhaust is essential. Use a snorkel exhaust or open window as a minimum for solvent work, and always prioritize source capture over general room ventilation.
Is window ventilation enough for chemistry?
Window ventilation alone is sufficient for low-hazard work like dissolving salts in water or simple titration with dilute acids. For solvent work, acid mists, or any reaction producing vapors, window ventilation is not enough. You need source capture (a fume hood or snorkel) to remove contaminants before they enter your breathing zone. Combine window ventilation with local exhaust for best results.
Conclusion
Setting up a ventilated space for home chemistry is not complicated once you understand the core principles. Calculate your required CFM, choose a ventilation method that matches your chemistry, ensure makeup air, and verify airflow with a test. Whether you build a DIY fume hood for a few hundred dollars or invest in a commercial unit, the goal is the same: remove fumes before they reach your lungs.
Start with this priority list. Pick a room with an exterior wall. Install an inline fan with ducted exhaust. Provide makeup air. Test with a smoke pencil. Once that works, add a snorkel or build a hood for source capture. Your future self will thank you, and your chemistry will be better for it.