
Every year, more than 300,000 children in the United States receive burn-related medical treatment, and a significant share of those injuries happen at home during everyday activities, including science experiments. I have spent the last decade running STEM workshops for families, and I have seen firsthand how a little preparation turns a kitchen-table volcano from a burn risk into a memory your child talks about for years.
This guide will walk you through how to teach kids to handle heat safely in home experiments. You will get age-by-age guidelines, five foundational safety rules, simple experiments that put those rules into practice, and step-by-step emergency procedures in case something goes wrong. Whether you are a parent, a guardian, a classroom volunteer, or running a weekend STEM club, this is the resource I wish I had when I started.
Table of Contents
Why Heat Safety Matters for Kids in Home Experiments?
Heat is one of the most underappreciated hazards in home science. Kids understand that fire is hot, but they often miss the danger of warm water, hot plates, metal left in sunlight, or exothermic reactions that can spike in temperature without warning. I have watched a seven-year-old pick up a glass jar that had been sitting in warm water, simply because it did not look hot.
The American Burn Association reports that scald burns from hot liquids are the leading cause of burn injuries for children under five. For school-age kids, contact burns from hot surfaces like stovetops, irons, and heated equipment top the list. The good news is that virtually every one of these injuries is preventable with the right habits in place before the first experiment begins.
Teaching heat safety is not about scaring your child away from science. It is about giving them the mental models and reflexes they will use for the rest of their life, in kitchens, workshops, and even outdoors.
Essential Heat Safety Rules for Kids
Before any child lights a candle, plugs in a hot plate, or mixes an exothermic reaction, they should know these five rules by heart. Print them out, tape them to the fridge, and run through them together before every experiment. Repetition builds the habits that prevent injuries.
Rule 1: Always Have Adult Supervision
No heat experiment of any kind happens without a responsible adult in the room. This is non-negotiable for ages 12 and under, and strongly recommended for teens. The adult should be close enough to react within seconds, not in the next room watching TV.
Rule 2: Wear Proper Protective Gear
Closed-toe shoes, long pants, and tied-back hair are the minimum. For experiments that involve open flames or very hot liquids, add safety goggles and oven mitts. I keep a dedicated bin of child-sized mitts and goggles so kids can put on their own gear and feel ownership over the safety routine.
Rule 3: Keep a Safe Distance from Heat Sources
Teach kids to stay at least an arm’s length away from anything that produces heat, including candles, hot plates, and reactions that are actively bubbling. A simple rule I use is “two hands away” for younger kids, meaning both hands held flat cannot reach the heat source while standing upright.
Rule 4: Never Touch Hot Objects Without Testing First
Hover your hand above the surface first to feel for rising heat. If you cannot tell, do not touch it. This single rule has prevented more burns in my workshops than every other safety measure combined. The test takes one second and removes the guesswork that leads to accidents.
Rule 5: Know How to Respond to Burns
Every child old enough to participate in heat experiments should know the basics of burn first aid: cool the burn under running water for 20 minutes, remove jewelry before swelling starts, and tell an adult immediately. We cover this in detail in the emergency section below.
Age-Appropriate Heat Safety Guidelines
Not every child is ready for the same experiments at the same age. The chart below reflects what I have seen work in classrooms and at home. Use it as a starting point, then adjust based on your child’s maturity, attention span, and how well they follow directions.
| Age Group | Heat Sources Allowed | Maximum Temperatures | Supervision Ratio |
|---|---|---|---|
| 4-6 years | Warm water, sunlight | Under 100 degrees F (38 C) | 1 adult per 2 kids |
| 7-9 years | Warm tap water, low-wattage bulbs | Under 120 degrees F (49 C) | 1 adult per 3 kids |
| 10-12 years | Hot tap water, electric kettle (adult-operated) | Under 150 degrees F (66 C) | 1 adult per 4 kids |
| 13+ years | Stovetop, oven, hot plate, soldering iron | Standard cooking temperatures with adult present | 1 adult present |
Ages 4-6: Observation and Warm Materials Only
Young children are still learning cause and effect, so the safest approach is observation. Place materials in the sun, in warm water, or near a radiator, and let your child feel the results. A great starter activity is putting three identical bowls of water in the sun, on the counter, and in the fridge, then comparing temperatures with a child-safe thermometer.
Ages 7-9: Supervised Warm Water Activities
Once kids understand basic safety rules and can follow multi-step instructions, you can introduce warm water experiments. The classic dissolving, insulation, and heat-transfer activities all work well in this range. Always keep the water below 120 degrees F (49 C) and never let a child of this age operate a kettle or stove.
Ages 10-12: Limited Stovetop Experiments
At this age, kids can assist with stovetop activities, but the adult should remain the operator. Have them measure, stir, and time, while you control the burner. This builds real kitchen skills alongside science understanding.
Ages 13 and Up: Advanced Heat Projects
Teens can take more responsibility, but supervision should still be present for any flame-based work, soldering, or chemistry involving exothermic reactions. Use this age to deepen their understanding of thermodynamics and laboratory safety.
Supervision Requirements and Temperature Control
Good supervision is more than just being in the room. It means actively watching, anticipating problems, and stepping in before a small mistake becomes a serious injury. Here is how I structure supervision during home heat experiments.
Position yourself so you can see your child’s hands and face at all times. Avoid dividing your attention between cooking dinner and watching the experiment. If you cannot give full focus, save the experiment for another time.
Control temperature by starting cold and adding heat gradually. This applies to water baths, hot plates, and chemical reactions. Gradual heating gives you time to intervene if something looks off. Keep a kitchen thermometer nearby so you can confirm actual temperatures rather than guessing.
Work in a clear, uncluttered space with no flammable materials within reach. Paper towels, plastic bags, and loose clothing should be moved away from heat sources before you begin. I use a designated baking sheet as a heat-safe work surface for most experiments.
Step-by-Step Safe Heat Experiments for Kids
The five experiments below are ordered from easiest to most advanced, and each one doubles as a teaching opportunity for the safety rules we covered earlier. Read through the full instructions before starting, and gather all materials first.
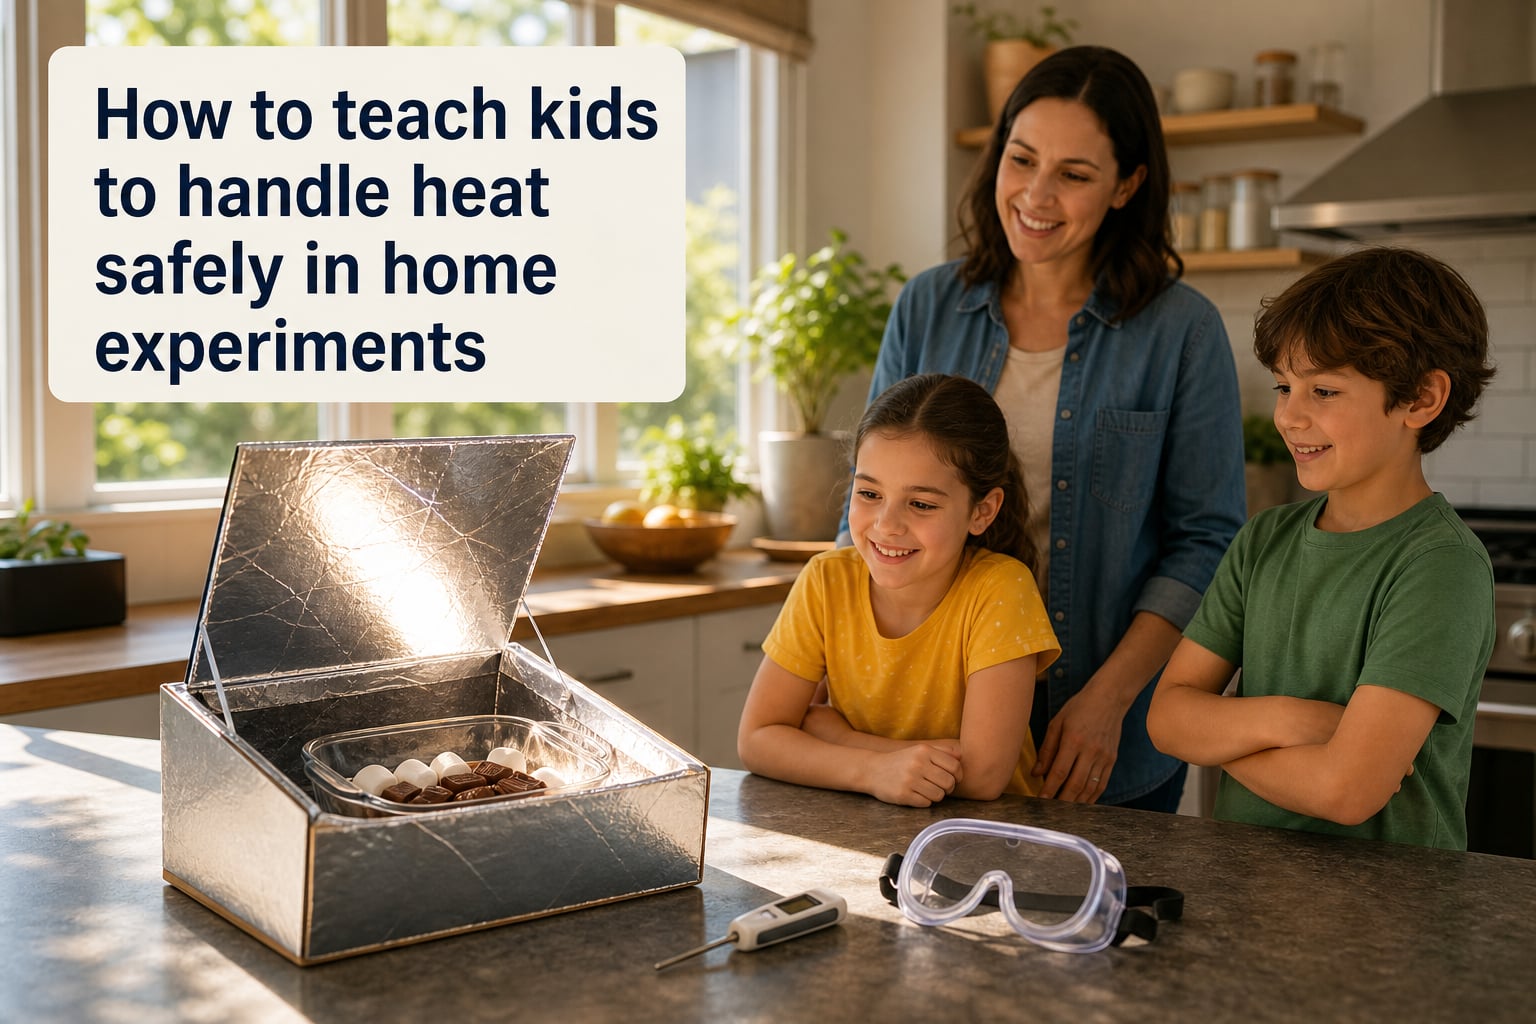
Experiment 1: Solar Oven S’mores
This is a perfect first heat experiment because the sun does the heating, so there is no open flame or hot stove. Kids learn about heat absorption and insulation while making a treat.
Materials: Small pizza box, aluminum foil, black construction paper, plastic wrap, graham crackers, marshmallows, chocolate
Step 1: Line the inside lid of the pizza box with aluminum foil, shiny side up.
Step 2: Place black paper on the bottom of the box to absorb heat.
Step 3: Tape plastic wrap over the opening to create a greenhouse effect.
Step 4: Place s’more ingredients on the black paper and close the lid.
Step 5: Position the box in direct sunlight for 1-3 hours.
Safety note: The box will get warm but not dangerously hot. Have kids check temperature with the back of their hand before removing the s’more.
Experiment 2: Homemade Thermometer
Building a thermometer teaches how liquids expand when heated. This is an observation-only experiment with no burn risk.
Materials: Small glass bottle, clear plastic straw, modeling clay, food coloring, bowl of warm water, bowl of cold water
Step 1: Fill the bottle halfway with colored water.
Step 2: Insert the straw so it touches the water but does not touch the bottom.
Step 3: Seal the opening with clay so no air can escape.
Step 4: Place the bottle in cold water and watch the liquid level drop inside the straw.
Step 5: Move the bottle to warm water and watch the liquid rise.
Experiment 3: Endothermic Reaction (Cooling)
This is my favorite first experiment for ages 7 and up because it focuses on cooling rather than heating. The reaction absorbs heat, which is why it feels cold.
Materials: 2 tablespoons citric acid, 1 tablespoon baking soda, 1/2 cup water, thermometer, small bowl
Step 1: Mix citric acid and baking soda in the bowl.
Step 2: Slowly add water while stirring.
Step 3: Insert the thermometer to watch the temperature drop.
Safety note: Goggles are required because citric acid can irritate eyes. Wash hands after handling.
Experiment 4: Insulation Investigation
Test which materials keep heat in and which let it escape. This builds intuition about conduction and insulation.
Materials: 4 identical jars with lids, hot water, thermometer, plus materials to wrap jars (newspaper, aluminum foil, bubble wrap, no wrap)
Step 1: Wrap each jar in a different material, leaving one unwrapped as control.
Step 2: Pour hot water into each jar and seal.
Step 3: Record the temperature every 10 minutes for one hour.
Step 4: Compare which jar kept heat longest.
Safety note: An adult handles the hot water. Kids can wrap the jars and take measurements.
Experiment 5: Color Heat Absorption Test
Place identical containers of water in the sun, wrapped in different colors of paper, and measure temperature change. Black absorbs the most heat, white reflects the most. This is a great visual experiment for ages 10 and up.
Materials: 4 white paper cups, black, white, red, and aluminum foil paper, equal amounts of water, thermometer, sunny spot
Step 1: Wrap each cup with one color of paper.
Step 2: Pour equal amounts of water into each cup.
Step 3: Place all cups in direct sun.
Step 4: Measure temperature every 15 minutes.
Recognizing Heat-Related Illness and Injury Signs
Even with careful planning, accidents can happen. Knowing what to look for helps you respond quickly and appropriately. Here are the warning signs to watch for during and after heat experiments.
First-degree burns show as red, painful skin without blisters. They often feel dry and may swell slightly. Second-degree burns have blisters and look wet or shiny. Third-degree burns appear white, charred, or leathery and may be surprisingly painless because nerve endings are damaged.
Heat exhaustion symptoms include dizziness, nausea, headache, cool and clammy skin, and muscle cramps. If your child shows these signs, move them to a cool place, give water, and apply cool compresses. Heat stroke is more serious, with hot dry skin, confusion, and rapid pulse. Call 911 immediately if you suspect heat stroke.
For burns specifically, watch for shock signs like pale skin, rapid breathing, or fainting. These warrant emergency care.
Emergency Procedures for Heat Injuries
If a burn or heat injury happens during an experiment, follow these steps in order. Practicing the routine before an emergency means you will remember it when seconds count.
Step 1: Stop the Heat Source
Turn off burners, move the child away, and remove any hot equipment. Do this before anything else.
Step 2: Cool the Burn Under Running Water
Place the burn under cool (not cold) running water for 20 minutes. This is the single most effective first aid treatment for burns and should begin immediately. Do not use ice, butter, or ointments.
Step 3: Remove Tight Items
Take off rings, bracelets, and tight clothing near the burned area before swelling starts.
Step 4: Cover the Burn
Use a clean, non-stick bandage or cling wrap loosely over the burn. Do not wrap tightly.
Step 5: Seek Medical Care
Call your doctor for any burn larger than 3 inches, any burn on the face, hands, feet, or joints, and any second or third-degree burn. For third-degree burns, call 911 right away.
For heat illness, move the child to a cool location, remove excess clothing, and apply cool compresses. Give water if they are alert and not vomiting. Call 911 if symptoms do not improve within 15 minutes or if they lose consciousness.
Building Long-Term Heat Safety Habits
The five rules you teach today become the instincts your child uses tomorrow. Building lasting habits takes repetition, conversation, and modeling. Here is how to make heat safety stick over the long term.
Run a short safety briefing before every experiment, no matter how simple. Even a 60-second review of the rules reinforces them as a normal part of any heat-related activity. Over time, your child will start running the briefing themselves.
Connect heat safety to everyday life, not just experiments. Talk about it when cooking dinner, lighting candles, or using the fireplace. The more contexts kids see these rules apply in, the more automatic they become.
Celebrate safe behavior. When your child remembers to test for heat before touching, or reminds you about the rules, acknowledge it. Positive reinforcement makes safety feel like competence, not restriction.
Keep a printable checklist on your fridge or in your experiment kit. I have included the key points at the end of this guide so you can print and use them today.
Frequently Asked Questions About Heat Safety for Kids
What temperature is safe for kids science experiments?
For children ages 4-6, keep temperatures under 100 degrees F (38 C). Ages 7-9 can work with materials up to 120 degrees F (49 C), while ages 10-12 can handle up to 150 degrees F (66 C) with adult supervision. Teens 13 and older can work with standard cooking temperatures as long as an adult is present in the room. Always use a thermometer to confirm actual temperatures rather than guessing, and never let young children operate kettles, stoves, or other heating devices.
How do you prevent burns in science experiments at home?
Prevent burns by establishing five core rules before any experiment: always have adult supervision, wear protective gear like closed-toe shoes and goggles, keep a safe distance from heat sources, test objects for heat by hovering a hand above them before touching, and know basic burn first aid. Work in a clear, uncluttered space with no flammable materials, control temperature by starting cold and heating gradually, and keep a kitchen thermometer nearby. Most burns in home experiments happen when an adult steps away or a child assumes something is cool without testing.
What age can children start doing heat experiments?
Children as young as 4 can participate in observation-based heat experiments using sunlight and warm materials under 100 degrees F. Ages 7-9 can handle warm water activities with supervision, while ages 10-12 can assist with stovetop experiments where the adult operates the burner. Teens 13 and older can take on more advanced projects like soldering, chemistry with exothermic reactions, and full stovetop cooking. The right age depends on the child’s maturity, ability to follow multi-step directions, and how well they respect safety boundaries.
How do I teach my child about heat safety?
Start by establishing the five core safety rules and reviewing them before every experiment. Use the hover test to teach kids how to check if something is hot before touching it, and practice the 20-minute cool-water burn treatment so the routine becomes automatic. Connect heat safety to everyday activities like cooking, lighting candles, and using the fireplace, not just science experiments. Run a short safety briefing before each activity, and celebrate when your child remembers the rules on their own. Repetition and positive reinforcement turn safety rules into lifelong habits.
What should I do if my child gets burned during a science experiment?
First, stop the heat source and move the child away from danger. Place the burned area under cool running water for 20 minutes, which is the most effective first aid treatment. Remove any tight clothing or jewelry near the burn before swelling begins, then cover loosely with a clean, non-stick bandage. Do not use ice, butter, or ointments on the burn. Call your doctor for any burn larger than 3 inches or any burn on the face, hands, feet, or joints. For third-degree burns or signs of shock, call 911 immediately.
Final Thoughts on Teaching Kids Heat Safety
Learning how to teach kids to handle heat safely in home experiments is one of the most valuable gifts you can give as a parent or educator. The five core rules, age-appropriate guidelines, and emergency procedures in this guide are the same ones I use in my own workshops, and they work because they treat kids as capable learners who deserve real information rather than fear.
Start with observation-based activities, run a safety briefing before every experiment, and celebrate the moments when your child remembers the rules without being asked. Over time, those habits will follow them into kitchens, workshops, and labs for the rest of their life. Print the safety checklist, gather your materials, and try your first heat experiment this week.