
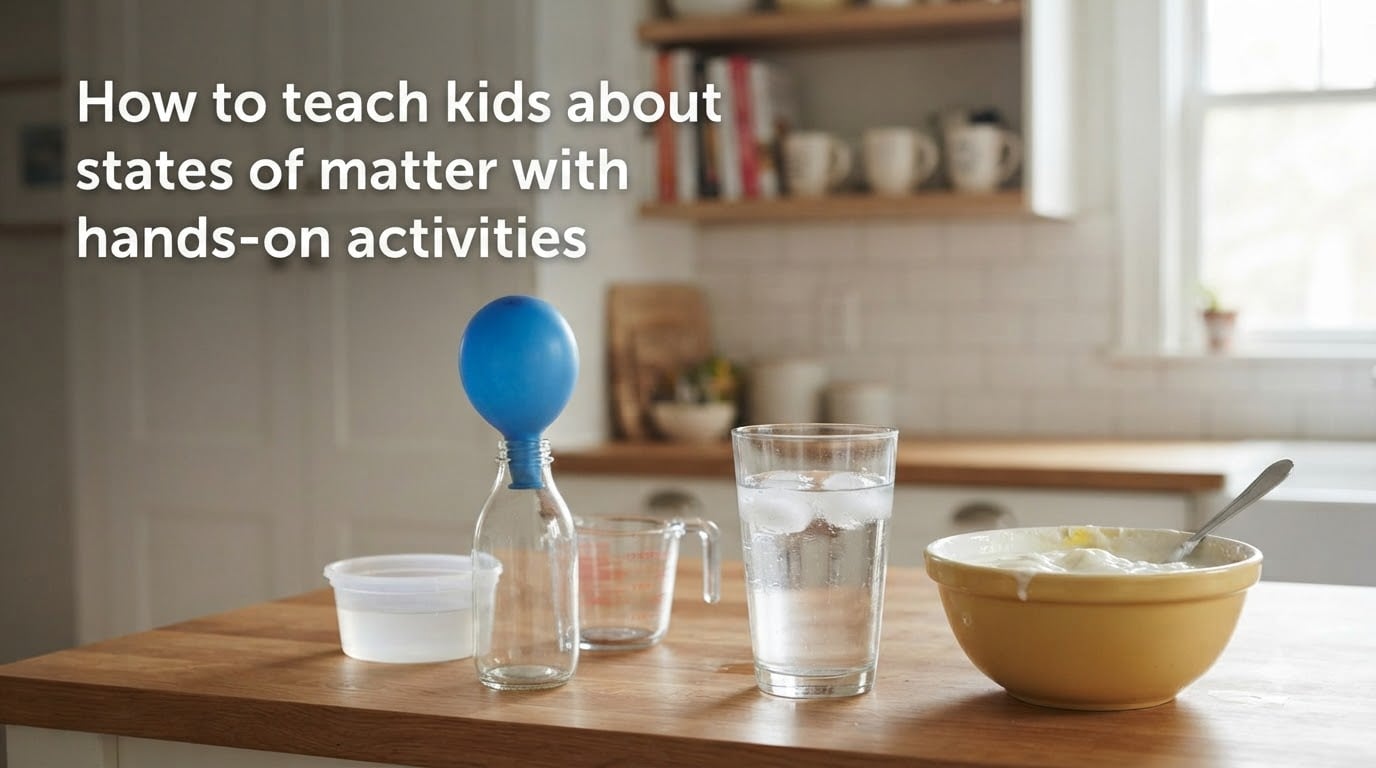
Picture a glass of ice water sitting on the kitchen counter on a warm afternoon. Within minutes, your child watches ice turn to liquid, water droplets form on the outside of the glass, and steam curl from a nearby mug of tea. That everyday moment is a full chemistry lesson waiting to happen.
Learning how to teach kids about states of matter with hands-on activities opens the door to one of the most foundational concepts in all of science. When children can see, touch, and manipulate matter, abstract ideas suddenly make sense. They stop memorizing definitions and start understanding how the world works.
Our team has spent years working with parents, classroom teachers, and homeschool educators to figure out which experiments actually click with kids. We have tested these activities in real kitchens and classrooms, not just in theory. What follows is a complete guide packed with age-appropriate activities, clear explanations, and practical tips you can use today.
By the end of this guide, you will know exactly how to explain solids, liquids, and gases to any age group. You will have a toolkit of inexpensive experiments, answers to the most common kid questions, and strategies for avoiding the misconceptions that trip up even experienced teachers.
Table of Contents
What Is Matter? A Simple Explanation for Kids
Matter is anything that has mass and takes up space. If you can touch it, hold it, weigh it, or see it, it is made of matter. The chair you sit on, the air you breathe, and the juice in your cup are all matter.
When explaining this to a child, I like to use the “everything is stuff” approach. Everything around us is made of tiny building blocks called particles, and those particles arrange themselves in different ways. How they arrange determines whether something feels solid like a rock, flows like water, or floats invisibly like the air in a balloon.
A great hook for young children is to ask them to look around the room and point at things. Then ask: “Is that made of matter?” Almost everything they point to will be. The fun exception is light and heat, which are energy, not matter. That distinction becomes a wonderful “gotcha” moment that gets kids thinking.
Understanding matter is foundational because it sets up every future chemistry and physics lesson. Once kids grasp that the same substance can exist in different forms, concepts like weather, cooking, and even human biology become easier to explore.
The Three States of Matter: Solid, Liquid, and Gas
Matter exists in three main states that kids encounter every day: solid, liquid, and gas. Each state behaves differently because of how its particles are arranged and how much they move.
Solids: Matter That Holds Its Shape
A solid keeps its own shape and does not flow. The particles in a solid are packed tightly together and only vibrate in place. Think of a wooden block, an ice cube, or a metal spoon. Solids feel firm because their particles barely budge.
Encourage kids to squeeze a rubber ball or press on a table. Even though we cannot see particles, the resistance they feel is those tightly packed particles refusing to move apart.
Liquids: Matter That Takes the Shape of Its Container
A liquid flows and takes the shape of whatever container holds it, but it keeps the same amount of space (volume). The particles slide past each other, which is why water poured into a round glass looks round but poured into a square pan looks square.
Water is the perfect example because kids already know it. Pour the same cup of water into a tall glass, a wide bowl, and a squeeze bottle. Ask them: “Did the amount of water change?” This simple activity reveals that liquids change shape but not volume.
Gases: Matter That Fills Any Space
A gas spreads out to fill its container completely, with no fixed shape or volume. The particles move freely and quickly in all directions. Air in a balloon, steam from a kettle, and the oxygen we breathe are all gases.
Because gases are mostly invisible, they feel abstract to children. The trick is to make gas visible. Blow up a balloon and let it go, or watch bubbles form in a glass of soda. Both activities show gas taking up space and moving around.
Here is a quick comparison to share with kids. Solids hold their shape. Liquids take the shape of their container but keep the same amount. Gases fill all the available space. Same particles, different behavior.
How Particles Move in Each State of Matter
The reason solids, liquids, and gases behave so differently comes down to one thing: particle movement. This is the heart of understanding matter, and it is also where many kids get confused.
Think of particles as tiny dancers on a stage. In a solid, the dancers are standing shoulder to shoulder, barely wiggling. They stay in their spots and just vibrate. That is why a rock feels hard and keeps its shape.
In a liquid, the dancers relax a little. They slide past each other and trade places, but they still stay close together on the dance floor. That sliding motion is why liquids flow and pour. It is also why water takes the shape of its container.
In a gas, the dancers break free entirely. They bounce off the walls, zoom across the room, and fill every inch of available space. This constant, rapid motion is why gases spread out and why you can smell popcorn from across the house.
I have found that acting this out physically works wonders. Have kids stand tight together and wiggle for solids, walk around in a small circle for liquids, and run freely around the room for gases. Their bodies will remember what their minds struggle to picture.
Hands-On Activities to Teach States of Matter
This section is the heart of teaching states of matter through experience. I have organized these activities by age group so you can jump straight to what works for your kids. Every activity here uses inexpensive materials you likely already have at home or in the classroom.
Forum teachers on Reddit consistently recommend a few principles: keep setups simple, choose activities that produce visible results, and always let kids predict what will happen before the experiment begins. That prediction step is where real learning happens.
Activities for Preschool and Kindergarten (Ages 4-6)
Young children learn through play and direct sensory experience. Keep explanations short and focus on what they can see, touch, and feel.
1. Mystery Bag Sort. Fill a bag with solid objects (blocks, spoons, small toys) and ask kids to reach in and describe what they feel. Then do the same with a container of water. The contrast between firm solids and flowing liquids builds early vocabulary.
2. Ice Cube Race. Give each child an ice cube and let them find ways to melt it fastest. Some will hold it, some will breathe on it, some will put it in sunlight. This introduces melting and the idea that heat changes matter.
3. Pour and Compare. Set out three containers of different shapes. Pour the same amount of water into each and watch how the liquid changes shape. This is the classic demonstration of liquid properties for preschoolers.
4. Balloon Blow-Up. Let kids blow up balloons and feel the air inside. Then release the balloon and let it fly. They can see and feel gas taking up space, even though they cannot see the gas itself.
Activities for Early Elementary (Grades 1-3)
Children at this age can handle slightly more structured experiments and simple recording sheets. Have them draw what they observe before and after each activity.
5. Baking Soda and Vinegar Balloon. This is the classic experiment that Reddit teachers recommend most often. Put baking soda in a balloon using a funnel. Pour vinegar into a bottle. Stretch the balloon over the bottle neck, lift the balloon so the baking soda falls in, and watch the balloon inflate with carbon dioxide gas. It is visually stunning and directly shows gas being created.
6. Ice Cream in a Bag. Fill a small zip-top bag with cream, sugar, and vanilla. Place it inside a larger bag filled with ice and rock salt. Shake for 10 minutes. The liquid cream turns into solid ice cream. This is consistently mentioned as a kid-favorite because they get to eat the results while learning about freezing.
7. Cloud in a Jar. Pour hot water into a jar. Place a barrier of ice on top. Watch a cloud form inside. This popular demonstration shows condensation in action and connects directly to weather discussions.
8. Melting Race. Place identical ice cubes on different surfaces: metal, plastic, wood, and paper. Have kids predict which melts fastest and time the results. This introduces the idea that different materials conduct heat differently.
Activities for Upper Elementary (Grades 4-5)
Older students can handle abstract particle explanations and longer experiments. Encourage them to write hypotheses and record detailed observations.
9. Water Cycle in a Bag. Draw a sun and clouds on a zip-top bag. Add a small amount of warm water, seal it, and tape it to a sunny window. Over several hours, kids will see evaporation, condensation, and precipitation all happening inside one bag.
10. Dissolving Solids in Liquids. Test how much salt, sugar, and baking soda dissolve in cold versus warm water. This connects states of matter to solutions and shows how temperature affects particle interaction.
11. Marshmallow Faces. Draw a face on a marshmallow with edible marker. Place it in a vacuum-sealed container or a syinge and pull the air out. The marshmallow expands as gas particles inside spread out. Release the pressure and watch it shrink. This makes particle movement tangible and memorable.
Kitchen Chemistry Experiments
The kitchen is the best science lab in your house. Cooking is chemistry in action, and states of matter are everywhere in food preparation.
12. Chocolate Phase Changes. Melt chocolate chips in the microwave or a double boiler. Pour the liquid chocolate into molds. Refrigerate until solid. Kids can see melting and freezing in a single, delicious experiment. Discuss how the chocolate changed from solid to liquid and back without becoming a different substance.
13. Boiling and Evaporation. Heat water in a clear pot and watch the stages: small bubbles forming at the bottom, larger bubbles rising, steam appearing at the surface. Have kids observe where the steam goes and discuss evaporation. This single pot shows liquid turning to gas in real time.
14. Butter from Cream. Pour heavy cream into a jar and shake vigorously for 10 to 15 minutes. The liquid separates into solid butter and liquid buttermilk. This physical change stuns kids because they can see liquid literally become solid through motion alone.
Non-Newtonian Fluids: Oobleck and Slime
Non-Newtonian fluids are substances that do not follow the normal rules of liquids. They blur the line between solid and liquid, and kids find them absolutely fascinating.
15. Oobleck. Mix two parts cornstarch with one part water. When you press it, it feels solid. When you let it sit, it flows like a liquid. This simple mixture, named after the Dr. Seuss book, is the most popular non-Newtonian fluid demo in classrooms. Kids can punch it, squeeze it, and watch it ooze. It is safe, cheap, and endlessly engaging.
16. Homemade Slime. Mix school glue with a small amount of contact lens solution and baking soda. The result stretches and flows but holds together when pulled quickly. Slime is technically a polymer, and it gives kids a tactile introduction to how some materials behave in ways that are not simply solid or liquid.
Use these activities to start a conversation: is Oobleck a solid or a liquid? The answer is both, depending on the force applied. This challenges the simple three-state model and opens the door to deeper scientific thinking for curious kids.
Teaching Phase Changes: Melting, Freezing, Evaporation, and Condensation
Phase changes happen when matter moves from one state to another. These changes are driven by adding or removing heat, and they are happening all around us every day.
Melting is when a solid becomes a liquid. Add heat, and particles gain enough energy to break free from their fixed positions. Ice melting on a sidewalk and chocolate melting in your hand are everyday examples. Demo idea: place an ice cube on a plate and time how long it takes to fully melt.
Freezing is the reverse: a liquid becomes a solid when heat is removed. Water turning to ice in the freezer is the most familiar example. Demo idea: pour water into an ice cube tray, mark the level, freeze it, and observe how the solid ice takes up slightly more space than the liquid did.
Evaporation is when a liquid becomes a gas. Puddles drying in the sun, sweat cooling your skin, and steam from hot soup all involve evaporation. Demo idea: leave a shallow dish of water by a window for a few days and measure how the water level drops.
Condensation is when a gas becomes a liquid. Water droplets on the outside of a cold glass are condensed water vapor from the air. This is the same process that forms clouds and fog. Demo idea: fill a glass with ice water and let kids observe the droplets forming on the outside.
Two additional phase changes worth mentioning for advanced students are sublimation (solid directly to gas, like dry ice) and deposition (gas directly to solid, like frost forming). Dry ice experiments should always be performed by an adult due to safety concerns, as teachers on Reddit frequently emphasize.
Common Misconceptions About States of Matter (And How to Fix Them)
No competitor thoroughly addresses the misconceptions kids develop about states of matter. Our research surfaced several persistent misunderstandings that can undermine learning if left uncorrected.
Misconception 1: Gases have no mass. Many children think air is weightless. Fix this by weighing a deflated balloon and an inflated one on a sensitive scale. The inflated balloon weighs more, proving that gas has mass.
Misconception 2: Matter disappears when it evaporates. Kids watch puddles dry up and assume the water is gone. Fix this by placing a clear bag over a wet cloth and sealing it. Condensation will form inside the bag, showing that the water just changed state.
Misconception 3: Cold moves into things to freeze them. Children often think cold is something that enters an object. In reality, heat leaves the object. Reframe freezing as “heat being removed” rather than “cold being added.”
Misconception 4: All solids are hard. Sand, flour, and salt are solids even though they pour. Help kids understand that individual grains keep their shape; they just flow as a group. This is called a granular material and it trips up many students.
Misconception 5: Only water changes states. Kids see ice, water, and steam so often that they assume only water has three states. Show them that chocolate, candle wax, and metals all melt and solidify to broaden their understanding.
Tips for Teaching States of Matter Effectively
Based on forum discussions with real teachers and parents, here are the strategies that make the biggest difference in helping kids truly understand matter.
Always start with a prediction. Before any experiment, ask kids what they think will happen. This engages their brains and makes the actual result more memorable. Even wrong predictions are valuable because they create a moment of surprise.
Use household materials whenever possible. Teachers consistently report that experiments requiring specialty supplies get skipped. The best activities use items already in your kitchen, and kids connect more with materials they recognize from daily life.
Connect to the real world constantly. Cooking, weather, and even breathing are all states of matter in action. The more you tie experiments to everyday experiences, the deeper the understanding goes.
Address safety directly. Dry ice, hot stoves, and some chemicals require adult supervision. Reddit teachers strongly recommend making safety expectations clear before any experiment begins, especially in classroom settings.
Assess understanding through explanation, not memorization. Instead of asking kids to recite definitions, ask them to explain why something happened in their own words. A child who can describe why ice melts in sunlight understands more than one who memorizes “melting is solid to liquid.”
For cross-curricular connections, try having kids draw the particles in each state of matter for an art connection. Use measuring and timing during experiments for math integration. Have them write predictions and observations for literacy practice. These connections make the science richer and easier to remember.
Frequently Asked Questions
What are the three states of matter for kids?
The three main states of matter are solid, liquid, and gas. Solids hold their shape (like a rock), liquids take the shape of their container (like water), and gases fill all available space (like air in a balloon). The same substance can exist in all three states depending on temperature.
How do you teach states of matter to children?
Teach states of matter through hands-on experiments kids can see and touch. Start with simple sorting activities for young children, use balloon experiments and ice observations for early elementary, and explore phase changes and particle movement with older students. Always let kids predict outcomes before each experiment.
What are some easy states of matter experiments?
Easy experiments include ice cube melting races, baking soda and vinegar balloons that show gas production, ice cream in a bag for freezing, cloud in a jar for condensation, and Oobleck (cornstarch and water) for non-Newtonian fluids. All use inexpensive household materials.
How do you explain matter to a child?
Tell children that matter is anything that takes up space and has weight. If you can touch it, hold it, or see it, it is made of matter. Everything around them, from their toys to the air they breathe, is matter. A fun activity is to look around a room and identify things made of matter together.
What grade do kids learn states of matter?
Kids typically begin learning about states of matter in second or third grade, with more detailed study of particle movement and phase changes in fourth and fifth grade. However, basic concepts like solid, liquid, and gas can be introduced as early as preschool through simple play-based activities.
Is Oobleck a solid or a liquid?
Oobleck is a non-Newtonian fluid, meaning it does not fit neatly into the solid or liquid category. When you apply force by squeezing or pressing it, it behaves like a solid. When you let it rest, it flows like a liquid. This makes it a great tool for showing kids that matter can behave in complex ways.
Wrapping Up: Making States of Matter Stick
Teaching kids about states of matter works best when you combine clear explanations with memorable, hands-on activities. The experiments in this guide are designed to make abstract particle concepts concrete and tangible for children of every age.
Start with the basics: what matter is, the three states, and how particles behave. Then layer in experiments sorted by age group, phase change demonstrations, and conversations about common misconceptions. The more senses you engage, the deeper the learning goes.
Now that you know how to teach kids about states of matter with hands-on activities, pick two or three experiments to try this week. Grab some cornstarch for Oobleck, fill a balloon with baking soda, or freeze juice into popsicles. The best science lesson is the one your kids cannot wait to tell their friends about.