
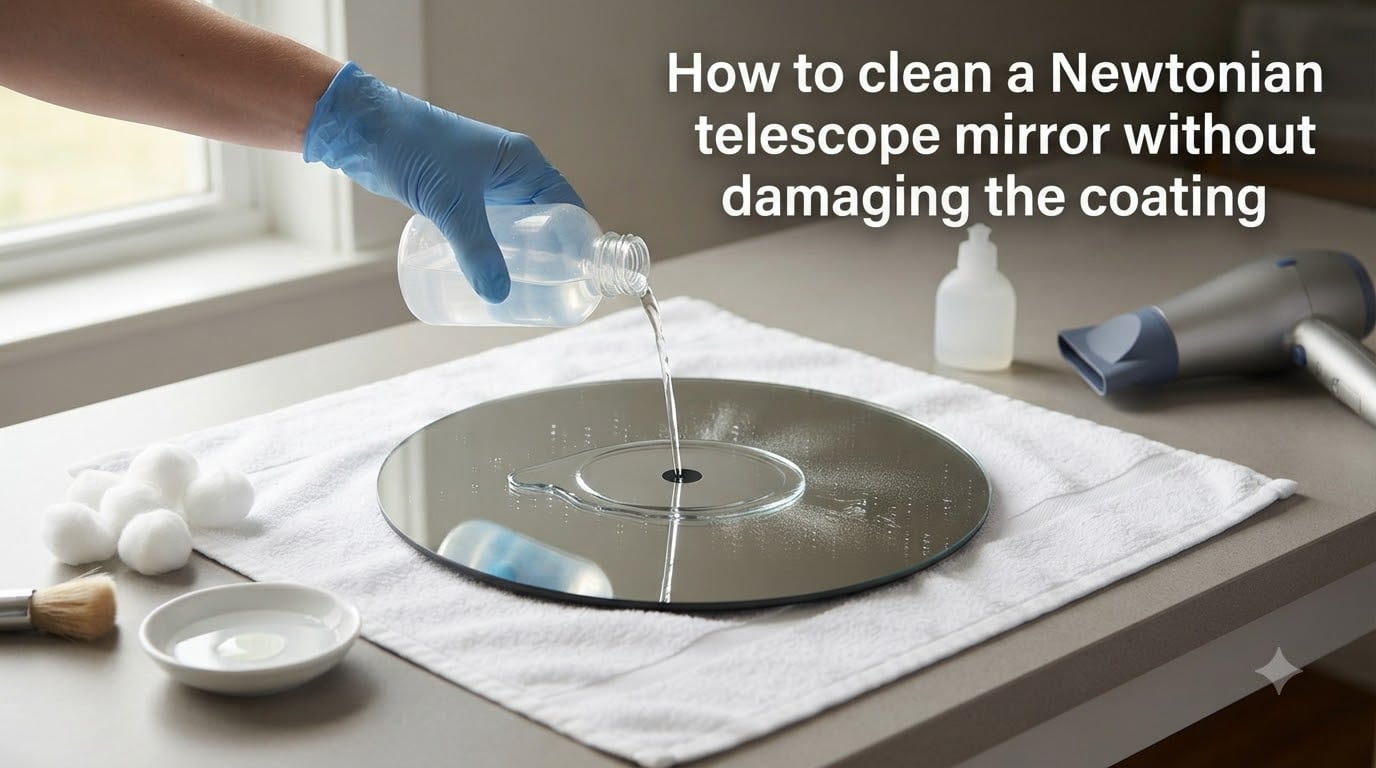
Cleaning a Newtonian telescope mirror strikes fear into many amateur astronomers, and for good reason. The mirror in your reflector is a first-surface optic with an aluminum coating measured in millionths of an inch. One wrong move with the wrong material can leave permanent scratches or strip the coating entirely.
The good news is that cleaning a telescope mirror is straightforward once you understand the process. I have cleaned dozens of reflector mirrors over the years using the same method that experienced observers on Cloudy Nights and other astronomy forums have refined through years of trial and error. This guide walks through the exact steps, materials, and safety precautions you need to clean a Newtonian telescope mirror without damaging the coating.
You will learn how to identify when cleaning is actually necessary, what materials are safe to use, the proper cleaning technique, how to handle common problems like stuck screws, and how to tell whether your mirror just needs a wash or has reached the point of needing professional recoating.
Table of Contents
Understanding Your Newtonian Mirror Coating
Before touching your mirror, it helps to understand what you are actually cleaning. A Newtonian telescope mirror is a first-surface mirror, meaning the reflective coating sits on the front of the glass, directly exposed to air, dust, and moisture. This is the opposite of a bathroom mirror, where the silvering is protected behind glass.
Most Newtonian primary mirrors use an aluminum coating applied in a vacuum chamber. The aluminum layer is extremely thin, typically around 100 nanometers. A protective overcoat, usually quartz (silicon monoxide) or silicon dioxide, gets deposited on top of the aluminum to slow oxidation and add durability.
Standard aluminum coatings reflect about 89-90% of incoming light. Enhanced aluminum coatings push that to 92-93% by adding multiple dielectric layers. Some premium mirrors use dielectric coatings that can reach 95-97% reflectivity. All of these coatings are durable enough for careful cleaning but fragile enough that abrasive contact will scratch them.
The key thing to remember is that the coating is metallic and bonded to glass at a molecular level during manufacturing. It will not rub off from gentle liquid cleaning. What damages it is physical friction from abrasive materials, chemical attack from harsh solvents, and corrosion from prolonged moisture exposure.
When to Clean a Newtonian Telescope Mirror (and When to Leave It Alone)
The single most common mistake beginners make is cleaning too often. Dust on your mirror looks alarming under a flashlight, but it has surprisingly little effect on image quality. A mirror can look terrible and still perform well.
Here is the reality: a thin film of dust reduces light throughput by only a fraction of a percent. Even a visibly dusty mirror will show no noticeable difference in visual observing. The main symptom that actually calls for cleaning is a degradation in contrast, not raw brightness.
Use this checklist to determine when cleaning is actually warranted:
You can see obvious smudges, fingerprints, or liquid spots on the surface
The mirror has visible sticky residue or sap-like deposits
You live in a humid climate and the mirror has been exposed to moisture for weeks
There are water spots that were left after dew or condensation dried
Image contrast has noticeably degraded compared to when the mirror was clean
It has been 12-18 months since the last cleaning and the mirror is visibly dirty
If none of these apply, leave the mirror alone. Overcleaning causes more coating damage than dirt ever will.
Climate plays a big role in cleaning frequency. Observers in dry climates like the American Southwest may go two years between cleanings. Those in humid coastal or tropical environments may need to clean every 6-12 months because moisture accelerates coating corrosion.
One quick test I use: shine a flashlight at an angle across the mirror surface in a dark room. If you see a scattering of tiny dust particles, that is normal and harmless. If you see large smudges, hazy patches, or spots that do not match the surrounding surface, it is time to clean.
What You Need: Materials Checklist
Gather all materials before starting. You do not want to be searching for supplies with a wet mirror sitting on your counter.
Here is what you need:
One gallon of distilled water (not tap water, not bottled drinking water)
A few drops of mild dish soap (plain Dawn or similar, no moisturizers or antibacterial additives)
Isopropyl alcohol, 90% or higher, for stubborn spots only
Clean surgical cotton wool or sterile cotton pads
A pack of unscented, lotion-free facial tissues or Kimwipes for final blotting
A large clean bath towel for your work surface
A plastic basin or clean sink (no metal grates touching the mirror)
A blow dryer with a cool air setting
Flathead screwdriver or hex wrench set for mirror cell clips
Clean nitrile gloves to prevent fingerprints
Notice what is not on this list: paper towels, tissues with lotion, glass cleaner, Windex, abrasive powders, ammonia-based cleaners, or tap water for the final rinse. These are the materials that ruin coatings.
How to Clean a Newtonian Telescope Mirror: Step-by-Step Procedure
This is the core procedure. Follow each step in order and do not skip ahead. The entire process takes 30-45 minutes from removal to reinstallation.
Step 1: Remove the Mirror from the Telescope
Never clean a mirror while it is still mounted in the telescope tube. You need full access to the surface and you risk getting liquid into the mirror cell or tube assembly.
For solid tube Newtonians and Dobsonians, point the telescope straight up and remove the mirror cell cover at the bottom of the tube. Most mirror cells are held by three clips or a retaining ring with screws. Remove the screws carefully and place them in a container so they do not get lost.
If the screws are stuck, do not force them with a screwdriver. Apply a small drop of penetrating oil (like WD-40) and wait 15 minutes. Forum users on Cloudy Nights report that gentle heat from a hair dryer on the warm setting can also free stuck screws by expanding the metal slightly. Never use pliers or excessive force on mirror cell hardware.
For truss tube Dobsonians, the process is the same but you may need to detach the mirror box from the rocker arm first. Lay the mirror box on its side on your towel-covered surface.
Wear your nitrile gloves before touching the mirror. Lift the mirror out by the edges only. Never touch the reflective surface with your fingers.
Step 2: Initial Rinse with Room-Temperature Water
Place the mirror face up in your clean basin or hold it under a gentle stream of room-temperature water. The water should be lukewarm, not hot. Hot water can cause thermal shock and crack the glass, and it can also degrade the coating bond.
Rinse the entire surface for about 30 seconds. Let the water flow across the mirror gently. This initial rinse removes loose dust and debris without any physical contact. Most of the loose material comes off in this step alone.
You can use tap water for this initial rinse. The minerals in tap water will not damage the coating during a brief rinse. The final rinse, however, must use distilled water to prevent water spots.
Step 3: Prepare the Soap Solution
Fill your basin with about two inches of room-temperature water. Add two or three drops of mild dish soap. Swirl gently to mix without creating foam.
The soap solution breaks down oils and organic residue on the mirror surface. You do not need much soap. Too much soap leaves a film that requires extra rinsing.
Step 4: The Gentle Drag Technique
This is the step where most damage occurs, so pay close attention to technique.
Dip a piece of surgical cotton wool into the soap solution. Gently lay the soaked cotton on the mirror surface. With almost zero pressure, drag the cotton in a straight line from the center of the mirror to the edge. Lift the cotton off at the edge and discard it.
Use a fresh piece of cotton for each stroke. Dragging the same piece back across the surface means any particles it picked up on the first pass can scratch the coating on the return stroke. This is the single most important rule of mirror cleaning: one stroke, one direction, one piece of cotton.
Work your way around the mirror in overlapping radial strokes from center to edge. Cover the entire surface with about 12-16 strokes total. The entire process should take under two minutes of contact time.
Do not rub in circles. Do not apply pressure. Do not go back and forth. Let the soap solution do the work, not friction.
Step 5: Rinse with Distilled Water
Rinse the mirror thoroughly with distilled water. Pour it slowly and evenly across the surface. You want to remove every trace of soap solution.
If you see any areas where water beads up rather than sheeting off smoothly, there is still soap residue. Keep rinsing until the entire surface sheets water evenly. This usually takes about 16-32 ounces of distilled water.
For stubborn spots that did not come off with soap, you can apply a small amount of 90% isopropyl alcohol to a cotton pad and do a single gentle drag across the spot. Isopropyl alcohol will not damage standard aluminum or enhanced aluminum coatings, but use it sparingly and only where needed.
Step 6: Drying the Mirror
The final step is drying, and it matters as much as the cleaning. Water left on the surface will evaporate and leave mineral deposits, even with distilled water.
Tilt the mirror at a slight angle to let excess water run off. Then use a blow dryer set to the cool air setting, never heat. Hold the dryer about 12 inches away and move it continuously across the surface. The goal is to evaporate the thin film of water quickly and evenly.
Alternatively, you can let the mirror air dry by standing it on edge on a clean towel. Air drying takes longer but eliminates any risk of forcing air-borne particles onto the surface.
If a few water droplets remain, take a corner of a Kimwipe or lint-free tissue and gently touch the edge of the droplet to wick it away. Do not drag the tissue across the surface.
Step 7: Inspect and Reinstall
Hold the mirror up to a bright light and inspect the surface at an angle. You should see a clean, uniform reflective surface. Small dust particles that settled during drying are harmless and will not affect performance.
Place the mirror back in the cell with the reflective side facing up. Secure the clips or retaining ring. Tighten the screws until snug, not cranked down. Overtightening clips can pinch the glass and cause optical distortion.
Put the mirror cell cover back on the telescope tube. You are done with the cleaning process, but there is one more important step.
What NOT to Do: Common Mistakes That Damage Coatings
More mirrors are damaged by well-intentioned cleaning mistakes than by neglect. Here are the specific actions to avoid at all costs:
Do not use paper towels. Paper towels are wood-based products with abrasive fibers. Dragging one across your mirror creates micro-scratches in the coating that accumulate over time and reduce reflectivity.
Do not use standard cotton balls. Regular cotton balls from the drugstore are bleached and treated. They shed fibers and can trap abrasive particles. Use surgical cotton wool or sterile cotton pads instead.
Do not scrub in circles. Circular motions trap particles under your cleaning tool and grind them into the coating. Always drag from center to edge in one direction.
Do not use hot water. Water above lukewarm temperature risks thermal shock to the glass and can weaken the coating bond. Room temperature is the upper limit.
Do not use glass cleaners or ammonia products. Ammonia-based cleaners like Windex can attack the protective overcoat and accelerate coating degradation. The only liquids that should touch your mirror are water, mild dish soap, and isopropyl alcohol.
Do not reposition your cleaning tool mid-stroke. If you start a drag from center to edge, complete it in one motion. Lifting and reapplying pressure mid-stroke can trap particles and scratch.
Do not clean in a dusty environment. Your kitchen counter during meal prep is not the place. Choose a clean, low-traffic area and give surfaces a wipe-down before starting.
Cleaning the Secondary Mirror
The secondary mirror (also called the diagonal) in a Newtonian telescope is much smaller than the primary, typically 1.25 to 3 inches depending on telescope aperture. It collects dust just as readily but requires even more careful handling due to its small size.
Removing the secondary mirror is more involved than removing the primary. It is usually held in a spider vane assembly at the top of the tube. The secondary is attached to a holder with an alignment screw. Loosen the center screw carefully and support the mirror as you remove it.
The cleaning technique is identical to the primary mirror method, just scaled down. Use smaller pieces of cotton wool and shorter strokes. A single gentle rinse and a few radial drags are usually sufficient.
In practice, secondary mirrors need cleaning far less often than primaries. The secondary faces downward at an angle, so it collects less dust. If you see visible dust on the secondary but no degradation in image quality, leave it alone.
One common question from forum users: the black circle in the exact center of the secondary mirror is a center marker used for collimation. It is supposed to be there. Do not try to clean it off.
How to Tell Corrosion from Dirt
Not every mirror problem can be fixed with cleaning. Corrosion is a chemical degradation of the coating that cleaning cannot reverse. Knowing the difference saves you from frustration and unnecessary cleaning attempts.
Dirt appears as discrete particles, smudges, or films on the surface. It sits on top of the coating and moves when you rinse. Dirt responds to the cleaning procedure described above.
Corrosion appears as cloudy or hazy patches that look like they are beneath the surface. You might see small pinholes where the coating has eaten through entirely, exposing the bare glass underneath. These spots do not respond to cleaning because the damage is in the coating layer itself.
Corrosion is caused by prolonged exposure to moisture, acidic contaminants, and certain chemicals. A common culprit is ferric chloride residue that some manufacturers leave on mirrors after the coating process. If you see small brown or orange spots clustered near the edge of the mirror, that may be ferric chloride contamination that accelerates coating breakdown.
The progression of corrosion looks like this: first, tiny pinholes appear where the coating has oxidized through. Over months or years, these pinholes expand and merge into larger bare patches. Eventually, the coating develops a cloudy, semi-transparent appearance across large areas.
If your mirror has a few pinholes but is still mostly reflective, cleaning is still worthwhile to remove dirt and slow further corrosion. If more than 15-20% of the coating shows corrosion damage, it is time to consider recoating.
Truss Tube vs Solid Tube Dobsonian: Care Differences
Your telescope design affects how often you need to clean and how you should store your mirror between sessions.
Solid tube Newtonians and Dobsonians offer better dust protection. The enclosed tube shields the mirror from airborne particles, insects, and most moisture. These mirrors typically need cleaning only once every 12-24 months in normal conditions. The trade-off is that solid tubes can trap moisture if stored in a damp location, so always store with dust caps in place and keep the telescope in a climate-controlled area.
Truss tube Dobsonians are more exposed by design. The open structure means the primary mirror sits closer to open air, especially during transport and setup. Truss tube owners in dusty environments report needing to clean twice as often as solid tube owners with similar observing habits.
For truss tube owners, I recommend a few extra precautions. Always cover the mirror box when the telescope is assembled but not in use. Use a shower cap-style cover for the mirror during transport. Consider a removable light shroud that also serves as a dust barrier. After observing sessions in high dew conditions, let the telescope dry completely before packing it away.
In humid climates (the Gulf Coast, Southeast US, tropical regions), moisture is the primary enemy of coatings regardless of telescope type. Store the telescope with a desiccant pack near the mirror cell if possible. Check for signs of corrosion every few months rather than waiting for visible performance degradation.
Collimation After Cleaning
Any time you remove and reinstall a primary mirror, you will need to check and likely adjust collimation. The mirror cell clips and support points rarely return to their exact original position after removal.
Collimation is the process of aligning the primary and secondary mirrors so that they share a common optical axis with the eyepiece. Even a small misalignment degrades image quality significantly.
After cleaning and reinstalling your mirror, perform a collimation check using either a Cheshire eyepiece, a laser collimator, or the star test method. Start with the secondary mirror alignment, then fine-tune the primary. The center dot on your primary mirror (if present) serves as the reference point for most collimation tools.
If you are new to collimation, the process takes 15-20 minutes the first time and gets faster with practice. A laser collimator is the easiest tool for beginners because it provides a clear visual indication of alignment. Insert it in the focuser and adjust the mirror screws until the laser beam reflects back onto its own aperture.
Do not skip this step. A clean mirror with poor collimation performs worse than a dirty mirror with perfect collimation.
When Recoating Becomes Necessary
Even with perfect care, every mirror coating eventually degrades to the point where cleaning is no longer sufficient. The typical lifespan of a standard aluminum coating is 7-10 years with good care, sometimes longer in dry climates. Enhanced aluminum and dielectric coatings can last 10-15 years.
Signs that your mirror needs recoating rather than cleaning:
Large areas of the coating appear cloudy or semi-transparent even after thorough cleaning
Numerous pinholes are visible across the surface and their numbers are increasing
The coating has a visible brownish or grayish tint that does not come off with cleaning
Reflectivity has noticeably decreased compared to when the mirror was new
The mirror is more than 10 years old and has never been recoated
Recoating is a professional service. The old coating is stripped chemically (using acids or specialized strippers in a controlled environment), the glass is polished and cleaned to optical specifications, and a new aluminum coating is deposited in a vacuum chamber.
Several reputable companies offer mirror recoating services in the United States, including Optic Wave Labs, Majestic Coatings, and Spectrum Coatings. The cost typically ranges from $50 to $150 depending on mirror size and coating type. Turnaround time is usually 4-8 weeks.
I strongly advise against DIY recoating. The stripping process uses dangerous chemicals like ferric chloride and hydrochloric acid. The vacuum deposition process requires specialized equipment costing tens of thousands of dollars. Amateur recoating attempts almost always produce inferior results and risk permanently damaging the glass itself.
Frequently Asked Questions
How do you clean a Newton telescope mirror?
Remove the mirror from the telescope, rinse it with room-temperature water, then apply a mild dish soap solution using surgical cotton wool. Drag the cotton gently from center to edge in straight lines, using a fresh piece for each stroke. Rinse thoroughly with distilled water and dry with a blow dryer on the cool setting. Never scrub in circles or use paper towels.
How to clean a dirty telescope mirror?
First assess whether cleaning is necessary by checking for smudges, sticky residue, or contrast degradation rather than just dust. If cleaning is warranted, use the rinse and drag method with distilled water, mild soap, and surgical cotton wool. Avoid overcleaning, as most dusty mirrors perform fine without intervention.
Will isopropyl alcohol damage a mirror?
Isopropyl alcohol at 90% concentration or higher is safe for standard aluminum and enhanced aluminum telescope mirror coatings when used sparingly. Apply it to a cotton pad and do a single gentle drag across stubborn spots. Do not soak the mirror in alcohol or use it as a primary cleaning agent.
How to recoat a telescope mirror?
Recoating is a professional service where the old coating is chemically stripped, the glass is repolished, and a new aluminum coating is deposited in a vacuum chamber. Companies like Optic Wave Labs, Majestic Coatings, and Spectrum Coatings offer this service for $50 to $150 depending on mirror size. DIY recoating is not recommended due to hazardous chemicals and specialized equipment requirements.
Can I use tap water to clean my telescope mirror?
Tap water is safe for the initial rinse to remove loose dust, but you must finish with a distilled water rinse. Tap water contains minerals that leave spots and deposits when they evaporate. Distilled water for the final rinse ensures no residue remains on the coating.
How often should I clean my Newtonian telescope mirror?
Most mirrors need cleaning every 12 to 24 months depending on climate and storage conditions. Humid environments may require cleaning every 6 to 12 months, while dry climates can go two years or more. Clean only when you see smudges, sticky deposits, or contrast degradation, not just because the mirror looks dusty under a flashlight.
How do I remove stuck screws from the mirror cell?
Apply a small drop of penetrating oil like WD-40 and wait 15 minutes. Alternatively, use a hair dryer on the warm setting to gently heat the screw and surrounding metal, which expands the metal and can break the corrosion bond. Never use excessive force or pliers on mirror cell hardware, as this can damage the cell or crack the glass.
Conclusion
Cleaning a Newtonian telescope mirror without damaging the coating comes down to three principles: clean only when necessary, use the right materials, and let liquids do the work instead of friction. The one-stroke center-to-edge drag technique with surgical cotton wool, followed by a distilled water rinse and cool air drying, is a method proven by thousands of amateur astronomers.
Remember that the aluminum coating on your first-surface mirror is thin but resilient. It can handle gentle liquid cleaning without issue. What it cannot handle is abrasion, harsh chemicals, and overcleaning. When in doubt, wait. A dusty mirror performs better than a scratched one.
Take your time, gather your materials beforehand, and work in a clean environment. Your mirror will reward you with sharp, high-contrast views for years before recoating ever becomes a consideration.