
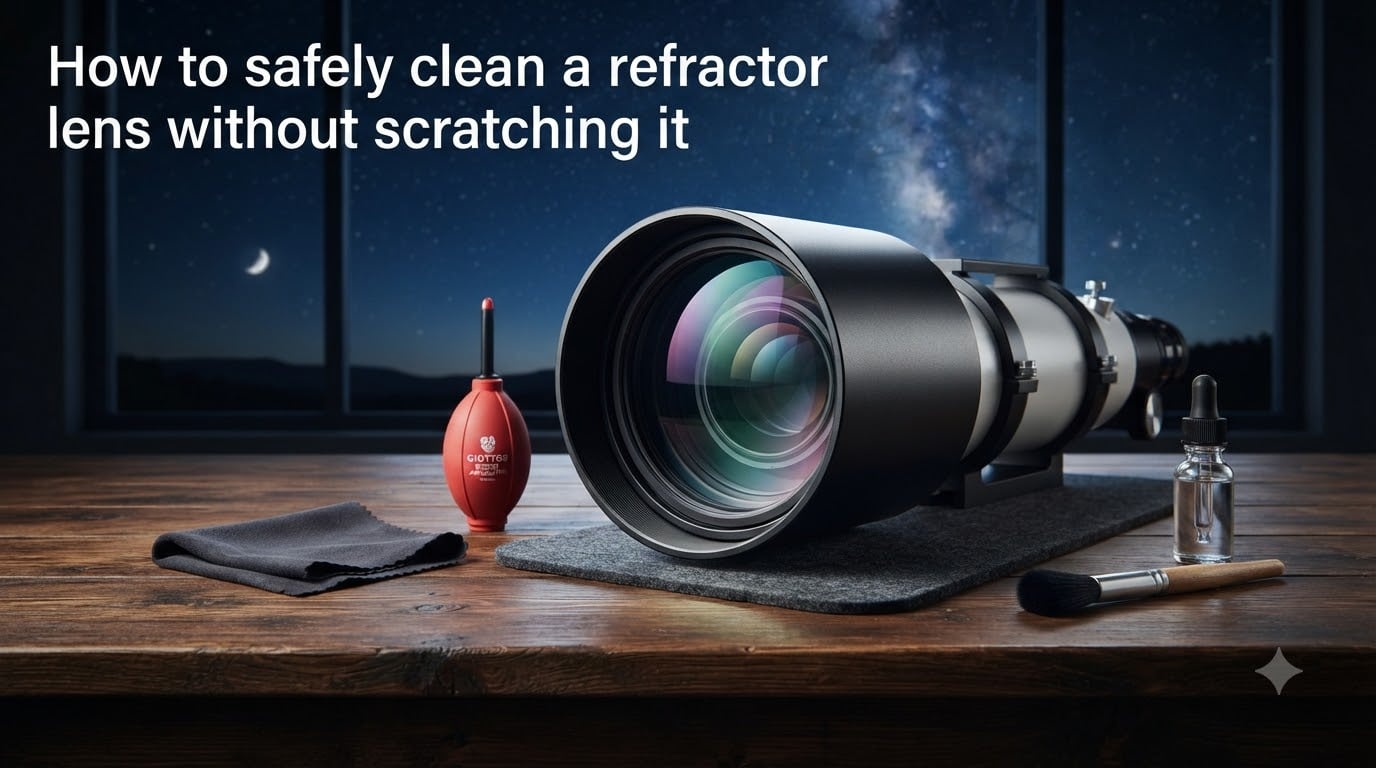
Let me guess. You have been staring at your refractor telescope for weeks, maybe months, noticing a smudge or a layer of dust on the objective lens. You want to clean it, but every forum post you read warns about permanently scratching the glass or ruining the optical coatings. So you do nothing, and that smudge keeps staring back at you.
I have been there. Every telescope owner has. The fear of damaging a lens that costs as much as a used car is real, and it keeps people from ever cleaning their optics at all. But here is the truth: cleaning a refractor lens is not dangerous if you follow the right process with the right tools.
This guide covers exactly how to safely clean a refractor lens without scratching it. I will walk you through when to clean (and when to leave it alone), what tools you actually need, the three-phase cleaning process step by step, and the mistakes that ruin lenses so you can avoid every single one.
One quick reassurance before we start: a few dust particles on your objective lens have almost zero effect on what you see through the eyepiece. Even a fingerprint will not wreck your views, though it will scatter light and reduce contrast over time. So there is no rush. Take a breath, gather your supplies, and we will do this properly.
Table of Contents
When to Clean Your Refractor Lens (and When to Leave It Alone)
The single most important rule of telescope lens cleaning is this: clean only when the contaminants are actually affecting your viewing experience. Most telescope owners clean far too often, driven by the anxiety of seeing dust on their prized objective lens.
Here is the reality check that experienced astronomers give newcomers all the time. The Harlan J. Smith Telescope at McDonald Observatory had a bullet hole in its primary mirror, and it still produced useful scientific data. A few specks of dust on your 4-inch refractor are not going to ruin your views of Jupiter.
Dust is essentially invisible to the light path in small amounts. The light from a star passes right around tiny particles. You will not see shadows, dark spots, or degradation from a thin film of dust across the lens surface. What you might notice is a slight reduction in contrast when the accumulation gets heavy.
So when should you actually clean? The threshold is when you notice specific problems:
- A visible fingerprint or skin oil smudge on the lens surface
- Dried dew spots that leave a water mark across a large area
- Pollen residue or tree sap stuck to the glass after a spring observing session
- A thick layer of dust that visibly scatters light when you shine a flashlight at the lens
- Reduced contrast or a hazy appearance in bright objects like the Moon
For most backyard astronomers, cleaning once or twice per year is plenty. If you observe in a dusty environment or store your telescope in a garage, you might need to clean more often. But the default should always be to leave the lens alone unless you have a specific reason to clean it.
The psychological fear of cleaning is the biggest barrier, not the cleaning itself. Once you learn the proper technique, you will realize that a careful clean done with the right materials is perfectly safe for your optics. The damage comes from rushing, using the wrong tools, or cleaning when it is unnecessary.
Tools and Materials You Need
Cleaning a refractor lens safely requires specific tools. You cannot grab a paper towel and some Windex and expect good results. Here is what you need to assemble before you start.
For dry cleaning (dust removal):
- Bulb blower: A hand-squeezed rubber bulb with a nozzle, like a Giottos Rocket Blower. This is your first line of defense for blowing loose dust off the lens surface.
- Len brush: A soft camel hair or synthetic brush designed for optical surfaces. Some brushes attach to the end of a blower bulb for convenience.
For wet cleaning (smudges and spots):
- Microfiber cloth: A clean, lint-free optical microfiber cloth. Reserve one specifically for telescope use and never use it on anything else.
- Optical wipes or lens tissue: Disposable, lint-free sheets like Zeiss lens wipes or Kimtech dry wipes. These are single-use, which prevents recontamination.
- Cleaning solution: Distilled water, 90 percent or higher isopropyl alcohol, or a commercial lens cleaning fluid (covered in the next section).
- Cotton swabs: High-quality cotton swabs (Q-tips work fine) for targeting stubborn spots in small areas.
Optional but helpful:
- LensPen: A dual-ended tool with a retractable brush on one end and a carbon-impregnated cleaning pad on the other. Great for fingerprints.
- First Contact polymer: A liquid polymer that you brush on, let dry, and peel off. It lifts contaminants away without any wiping. This is the safest option for expensive optics.
Tools to absolutely avoid:
- Compressed air cans (the propellant can freeze the lens and blast particles at high speed)
- Paper towels, facial tissue, or toilet paper (wood fibers scratch coatings)
- Household glass cleaners like Windex (ammonia strips optical coatings)
- Tap water (minerals leave deposits and spots)
- Any cloth that has been used for other purposes
- Your shirt sleeve, no matter how soft it feels
Understanding Cleaning Solutions: Isopropyl Alcohol, Distilled Water, and Commercial Cleaners
The cleaning solution you choose matters because different contaminants respond to different liquids. You do not need a chemistry degree, but you should understand what each option does before applying anything to your lens.
Distilled water is the safest liquid you can put on a refractor lens. It dissolves water-soluble contamination like dried dew spots and pollen residue without any risk to optical coatings. If your lens only has light water spots, distilled water on a microfiber cloth may be all you need.
Isopropyl alcohol is safe for telescope lenses when you use 90 percent or higher concentration. It dissolves oils, fingerprints, and organic residue that water alone cannot handle. Many experienced astronomers use a 50/50 mixture of isopropyl alcohol and distilled water as their go-to cleaning solution. The alcohol breaks down oils while the water helps the solution spread evenly and evaporate without streaks.
Commercial lens cleaning solutions like Zeiss Lens Cleaner, Baader Optical Wonder Fluid, and Eclipse Optic Cleaner are formulated specifically for coated optical glass. They contain surfactants and other additives that help lift oils without leaving residue. They are a good choice if you want a ready-made solution rather than mixing your own.
Now to answer a common question: is lens cleaner just rubbing alcohol? No, it is not. Commercial lens cleaners contain surfactants and conditioning agents that pure isopropyl alcohol lacks. These additives help the liquid spread evenly across the coated surface and evaporate cleanly without leaving streaks or spots. Rubbing alcohol from the drugstore also often contains water and additives that are not present in high-purity isopropyl alcohol, so stick with the 90 percent or higher grade if you go the alcohol route.
One critical rule for all solutions: never spray or pour liquid directly onto the lens. Apply the solution to your cloth or wipe first, then bring the damp cloth to the lens. Pouring liquid on the lens risks seepage into the lens cell, where it can sit between glass elements and cause fogging or coating damage over time.
How to Safely Clean a Refractor Lens Without Scratching It: Step-by-Step
The cleaning process has three phases: dry removal, wet cleaning, and final buffing. Follow these steps in order, and do not skip ahead. Each phase builds on the last, and jumping straight to wet cleaning is how lenses get scratched.
Step 1: Blow off loose dust with a bulb blower.
Hold the telescope so the lens faces slightly downward, letting gravity help. Squeeze the bulb blower in short bursts across the entire lens surface, working from the center outward in a spiral pattern. The goal is to dislodge every loose particle before anything touches the glass. Do not wave the blower tip around randomly. Be systematic and thorough.
Never use compressed air cans for this step. The propellant in those cans can spray liquid refrigerant onto your lens, which freezes and cracks coatings. A bulb blower gives you clean, propellant-free air every time.
Step 2: Sweep remaining particles with a lens brush.
After blowing, some dust will stubbornly cling to the lens surface due to static charge. Use a clean lens brush to gently sweep these particles off. Use light, flicking strokes from the center of the lens toward the edge, working your way around the circumference. Never press the bristles into the glass. Let the soft hairs glide across the surface.
If your brush has not been used in a while, give it a few quick puffs of air first to remove any dust trapped in the bristles. A dirty brush will just redeposit particles and potentially scratch the lens.
Step 3: Apply cleaning solution to your wipe, not the lens.
Once all loose dust is gone, you are ready for wet cleaning. Take a fresh optical wipe or a clean section of microfiber cloth and apply a few drops of your chosen cleaning solution to it. The cloth should be damp, not dripping wet. If you can wring liquid out of it, you have used too much.
Step 4: Clean in circular motions from center to edge.
Place the damp cloth gently on the center of the lens. Using very light pressure, move in small circular motions and gradually spiral outward from the center to the edge of the lens. Work slowly and let the solution do the work rather than scrubbing. Cover the entire surface in one or two passes.
The center-to-edge direction matters. Any particles that survived the blower and brush steps will be pushed off the edge of the lens rather than dragged across the center where they could scratch. Never wipe in a back-and-forth linear motion, as this can grind debris across the glass in both directions.
Use only small areas of the wipe at a time. Once a section of the cloth has contacted the lens and picked up contamination, shift to a clean section for the next pass. Reusing a contaminated section just spreads the dirt around and increases scratch risk.
Step 5: Target stubborn spots with a cotton swab.
If a fingerprint, sap droplet, or dried spot resists the general wipe, take a cotton swab lightly moistened with cleaning solution and gently roll it across the spot. Roll the swab rather than dragging it, so you are constantly presenting a clean surface of cotton to the lens. Use a fresh swab for each stubborn spot.
For especially persistent contaminants, let the solution sit on the spot for 30 seconds to soften it before wiping. Patience beats pressure every time.
Step 6: Final buff with a dry microfiber cloth or lens tissue.
Once the lens is clean, use a fresh, dry microfiber cloth or a sheet of lens tissue to gently buff away any remaining moisture or streaks. Use the same light circular motion from center to edge. Inspect the lens under a bright light at an angle to check for streaks or residue. If you see any, repeat the buff with a clean section of cloth.
Your lens should now be clean and clear. Put the dust cap back on and you are done.
Special Care for ED Glass and Fluorite Lenses
If your refractor uses ED (extra-low dispersion) glass or fluorite elements, you need to take extra precautions. These premium optical materials are softer than standard glass and more susceptible to scratching and coating damage.
Use only the lightest possible pressure when cleaning ED or fluorite lenses. Let the cleaning solution do all the work of breaking down oils and contamination. If you find yourself pressing harder to remove a spot, stop. Apply more solution and wait longer for it to soften the contaminant instead.
For really valuable optics, consider using First Contact polymer instead of traditional wiping. You brush the polymer on, let it dry into a flexible film, and then peel it off. It lifts dust, oils, and particles away from the surface without any abrasive contact. It is more expensive than standard cleaning supplies, but for a lens that costs thousands of dollars, the investment is worth it.
If you are dealing with severe contamination on a premium lens and you are not confident in your technique, contact the manufacturer or a professional optical cleaning service. Professional cleaning can be expensive, sometimes approaching half the value of a budget telescope, but on a high-end refractor it is a small price compared to replacing a scratched objective.
Common Mistakes That Scratch Lenses (and How to Avoid Them)
Most lens damage comes from a handful of preventable mistakes. Knowing what they are is half the battle. Here are the top errors that scratch refractor lenses, and how to avoid each one.
Mistake 1: Wiping before removing dust. This is the number one cause of scratches. If you drag a cloth across a dusty lens, you are essentially sandblasting the glass surface. Always blow and brush first. If you remember nothing else from this guide, remember that dry dust removal comes before wet cleaning. Every time.
Mistake 2: Using compressed air cans. The propellant in canned air can spray liquid refrigerant onto your lens surface, causing thermal shock and coating damage. The high-velocity blast can also drive particles deeper into the lens cell. Use a bulb blower instead.
Mistake 3: Applying solution directly to the lens. Liquid that runs to the edge of the lens can seep into the gap between the glass and the lens cell. Over time, trapped moisture causes fogging between lens elements and degrades the anti-reflection coating. Always wet the cloth, not the lens.
Mistake 4: Using household glass cleaners. Products like Windex contain ammonia and other chemicals that strip optical coatings. These coatings are what reduce glare and light loss on your multi-coated lens. Once they are damaged, the lens performance drops permanently. Use only solutions designed for optical surfaces.
Mistake 5: Using paper products. Paper towels, facial tissues, and toilet paper contain wood fibers that are harder than glass. Dragging these across a coated lens leaves micro-scratches that accumulate over time. Stick with microfiber cloths, optical wipes, and lens tissue.
Mistake 6: Pressing too hard. More pressure does not equal a cleaner lens. It equals a scratched lens. The cleaning solution breaks down oils chemically. Your job is just to guide the cloth gently across the surface. If something is not coming off, add more solution and wait longer.
Mistake 7: Cleaning too frequently. Every time you touch the lens, even with proper technique, you introduce some risk. The less often you clean, the less opportunity there is for damage. Clean only when contamination is actually degrading your views, not every time you see a speck of dust.
How to Handle Stubborn Spots: Tree Sap, Pollen, and Dried Dew
Some contaminants resist standard cleaning and need targeted techniques. Here is how to deal with the most common tough spots on a refractor lens.
Tree sap and resin are sticky, organic compounds that bond tightly to glass. Dampen a cotton swab with 90 percent isopropyl alcohol and hold it against the sap spot for 15 to 30 seconds. The alcohol dissolves the resin. Then gently roll the swab across the spot to lift it away. Use a fresh swab for a final wipe to remove any residue.
Pollen residue can leave a yellowish film across the lens after spring observing sessions. Distilled water usually dissolves pollen effectively. Apply a few drops to a microfiber cloth and wipe gently. If the film persists, try the alcohol and distilled water mixture.
Dried dew spots are mineral deposits left when water evaporates from the lens surface. They appear as ring-shaped marks. Distilled water is your best tool here. Dampen a cloth, let it sit on the spot for a few seconds to rehydrate the minerals, then wipe gently from center to edge.
The saliva enzyme technique is an old astronomer trick for spots that nothing else seems to remove. The enzymes in human saliva can break down stubborn organic residue. Touch a clean cotton swab to your tongue, then gently roll it across the spot. Follow with a proper cleaning solution wipe to remove any remaining saliva. It sounds odd, but experienced observers swear by it for last-resort spots.
When to call a professional: if you have tried everything and a spot will not come off, or if you suspect the contamination is on the inside of a multi-element lens, stop cleaning. Forcing it will cause damage. Contact the manufacturer or a professional cleaning service.
Storage and Prevention: Keeping Your Lens Clean Longer
The best way to deal with lens cleaning is to need it less often. A few simple habits will dramatically reduce how frequently you have to clean your refractor objective.
Always cap the lens when the telescope is not in use. Both the front dust cap and the rear cap should be in place whenever the telescope is stored. This single habit prevents 90 percent of dust accumulation.
Store your telescope in a dry, dust-free environment. A climate-controlled room is better than a garage or shed. If you store it somewhere humid, consider keeping desiccant packets near the telescope to absorb moisture and prevent dew spots.
Never touch the lens surface with your fingers. Skin oils are the most common cause of smudges that require wet cleaning. When handling the telescope near the objective, be conscious of where your hands are at all times.
If dew forms on the lens during an observing session, let it evaporate naturally rather than wiping it off. Wiping dew introduces the same risks as wet cleaning. If you want to speed up evaporation, use a small fan or wait until you are indoors in a dry environment. Then cap the lens once it is completely dry.
During transport, make sure both caps are secure and the telescope is protected from vibration and impact. Dust that gets shaken loose inside the telescope tube during transport can settle on the lens surface over time.
Frequently Asked Questions
How to clean a refractor lens?
First, blow off loose dust with a bulb blower. Second, sweep remaining particles off with a soft lens brush. Third, apply cleaning solution to a microfiber cloth or optical wipe and clean the lens in gentle circular motions from the center to the edge. Finally, buff dry with a clean section of cloth. Never apply solution directly to the lens, and always remove all dust before wiping.
Can I use isopropyl alcohol to clean a telescope lens?
Yes, isopropyl alcohol at 90 percent or higher concentration is safe for cleaning telescope lenses with optical coatings. Many astronomers use a 50/50 mixture of isopropyl alcohol and distilled water. Apply it to your cloth, never directly on the lens, and use gentle pressure. Avoid rubbing alcohol from drugstores, which may contain additives that leave residue.
Is lens cleaner just rubbing alcohol?
No, commercial lens cleaners like Zeiss Lens Cleaner contain surfactants and conditioning agents that pure rubbing alcohol does not have. These additives help the liquid spread evenly across coated glass and evaporate without streaks. Lens cleaners are formulated specifically for optical surfaces, while rubbing alcohol is a general purpose solvent.
How often should I clean my refractor lens?
Most refractor lenses only need cleaning once or twice per year. Clean only when you notice fingerprints, dried dew spots, or contamination that visibly reduces contrast. Dust in small amounts does not affect image quality, so there is no need to clean just because you see a few particles on the glass.
Can I use compressed air to clean my telescope lens?
No, avoid compressed air cans. The propellant can spray liquid refrigerant onto the lens, causing thermal shock and coating damage. The high-velocity air can also drive particles deeper into the lens cell. Use a hand-squeezed bulb blower instead, which provides clean air without propellants.
What happens if I do not clean my telescope lens?
A small amount of dust has almost no effect on image quality, so leaving it alone is safe. However, fingerprints, skin oils, and acidic contaminants like pollen can slowly degrade optical coatings if left for extended periods. Clean when you notice these types of contamination, but do not worry about a little dust.
Conclusion
Cleaning a refractor lens is not something to fear. The key is knowing how to safely clean a refractor lens without scratching it by following the right process: remove dust first with a blower and brush, then clean gently with solution on a soft cloth using circular motions from center to edge, and finish with a light buff.
Remember that less cleaning is better. Most lenses only need attention once or twice a year, and a few dust particles will not affect your views. Clean when you see fingerprints, dried dew, or heavy contamination that reduces contrast, not because you are anxious about a speck of dust.
Assemble your cleaning kit now so it is ready when you need it. A bulb blower, lens brush, microfiber cloth, optical wipes, and a bottle of cleaning solution are all it takes. With the right tools and a careful approach, you will keep your refractor performing at its best for years to come.