
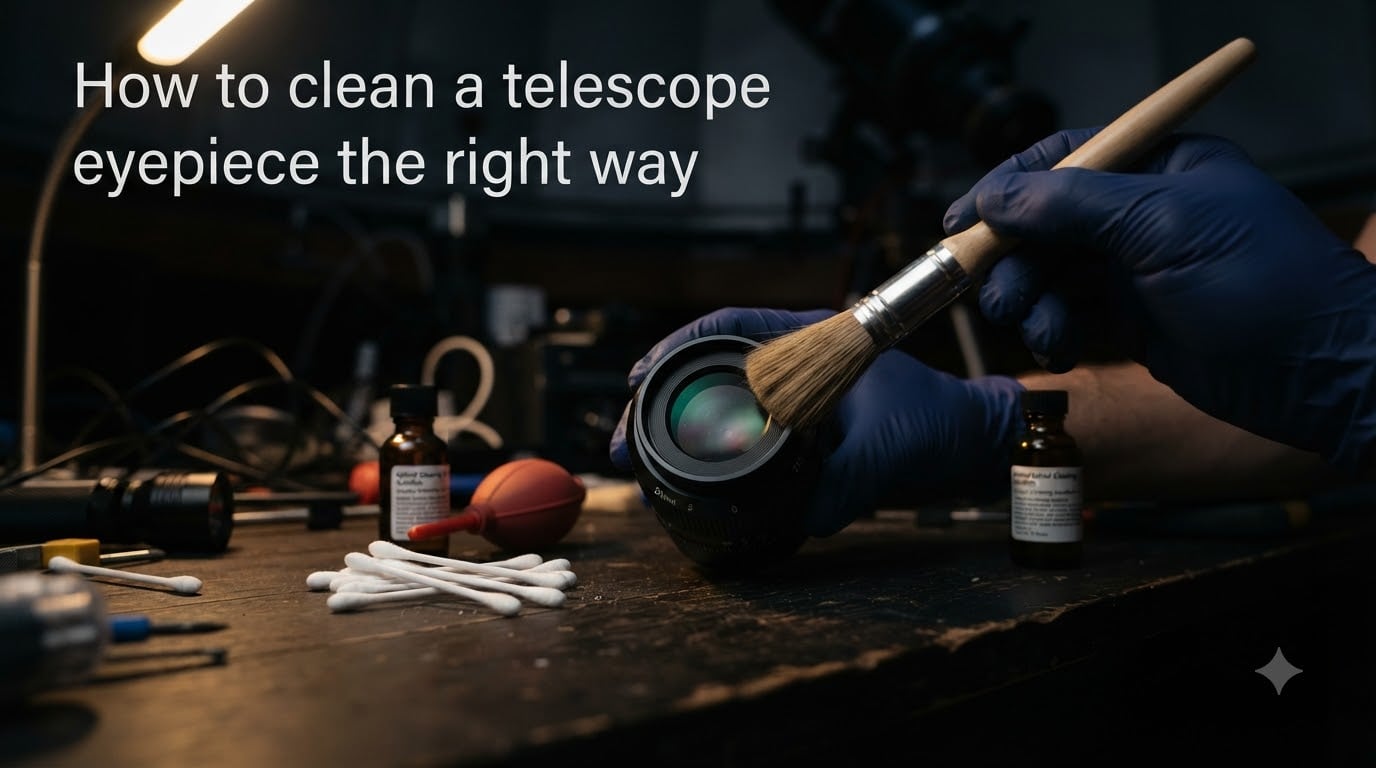
If you are reading this, you probably have a telescope eyepiece that looks like it has been through a dust storm. And like most amateur astronomers, you are terrified of touching it. I get it. Those multi-coated glass surfaces look fragile, and one wrong move could scratch coatings that took precision engineering to apply.
But here is the truth: cleaning a telescope eyepiece is not as dangerous as it feels. The fear comes from not knowing the right technique, not from the cleaning itself. Once you understand the proper steps, you can remove dust, fingerprints, and smudges without risking your optics.
In this guide, I will walk you through exactly how to clean a telescope eyepiece the right way. We will cover when to clean (and when to leave it alone), the tools you need, a complete step-by-step process, and the mistakes that actually cause damage. Everything here is based on methods recommended by experienced astronomers from forums like Cloudy Nights, Reddit’s r/telescopes, and guides from Tele Vue and Explore Scientific.
By the end, you will have the confidence to clean your eyepieces properly and keep them performing at their best for years.
Table of Contents
Why Eyepiece Cleaning Matters (And Why You Shouldn’t Panic)
Every time you use your telescope, tiny contaminants build up on the eyepiece. Dust from the air, skin oils from your eyelids pressing against the eye lens, pollen during spring sessions, and even moisture from dew all leave their mark. Over time, these deposits scatter light and reduce contrast in your views.
But here is what most guides will not tell you: a few dust particles will not noticeably affect what you see through the eyepiece. Light passes through dust. The real performance killers are fingerprints, smudges, and oily films that scatter light in all directions.
The bigger danger is not the dirt. It is over-cleaning. Every time you wipe a coated lens, you risk micro-abrasions on the optical surface. Astronomers on Cloudy Nights and Reddit consistently warn that cleaning too frequently does more harm than a bit of dust ever could. The golden rule across every expert source is simple: clean only when necessary.
So do not panic when you see a few specks. Reserve cleaning for when you can see visible smudges, fingerprints, or a film that affects your viewing experience. Your coatings will thank you.
When to Clean Your Telescope Eyepiece?
Knowing when to clean is just as important as knowing how. Clean too often and you risk scratching the coatings. Clean too rarely and oily buildup can permanently etch into the glass.
Here are the clear signs it is time to clean your eyepiece:
You can see visible fingerprints or smudge marks when you hold the eyepiece at an angle to a light source.
There is a visible oily film across the lens surface that does not blow away.
Bright stars show excess glow or scatter that was not there before.
Pollen or sticky residue is stuck to the glass after a spring or summer observing session.
You accidentally touched the lens with your fingers.
On the flip side, here is when you should leave the eyepiece alone:
A few scattered dust particles are visible but there is no smudging or film.
The eyepiece looks clean when held at an angle under light.
You just cleaned it within the last few weeks and it has been stored properly.
From my experience and the consensus across astronomy forums, a typical eyepiece used weekly needs a wet cleaning maybe two to four times per year. Dry cleaning with a blower can happen more frequently after each session, but actual lens contact should be rare.
If you notice dew condensing on the eyepiece during a session, let it air dry completely before storing. Never wipe a wet lens dry unless there is a reason to, as the moisture itself will evaporate cleanly in most cases.
Tools and Materials You Need
The right tools make all the difference between a safe clean and a scratched lens. Here is everything you need, along with what to avoid at all costs.
Essential Cleaning Tools
Bulb blower: This is your first line of defense. A simple rubber bulb with a nozzle that puffs air to remove loose dust. Never use your mouth to blow on a lens; your breath carries moisture and tiny food particles. A Giottos Rocket Air Blaster is the most recommended model in astronomy communities.
Camel hair brush (or equivalent soft lens brush): For dust that the blower cannot dislodge. The bristles are extremely soft and will not scratch coatings when used gently. Some astronomers prefer a clean makeup brush as an affordable alternative.
Isopropyl alcohol (99% or higher): The standard cleaning agent for optical glass. It evaporates quickly and cuts through oils. Higher concentrations leave less residue. Avoid rubbing alcohol from the drugstore, which often contains additives and water.
Distilled water: Essential for the final mop-up pass. Tap water contains minerals that leave spots. Distilled water is cheap and available at any grocery store.
Cotton swabs (Q-tips): Use these for applying solution and the water rinse pass. The Tele Vue method relies on Q-tips for the final mop-up. Use high-quality cotton swabs that do not shed fibers.
Disposable lens wipes or microfiber cloth: Zeiss pre-moistened lens wipes are widely recommended by experienced astronomers. If using a microfiber cloth, it must be perfectly clean and never used for anything else. Wash it regularly and air dry.
LensPen (optional): A handy tool with a retractable brush on one end and a carbon-impregnated cleaning tip on the other. Good for quick fingerprint removal in the field, but use sparingly.
What NOT to Use
Compressed air cans: Forum users repeatedly warn that canned air can spray liquid propellant onto your lens, which leaves a residue worse than what you started with. The force can also damage thin optical elements. Stick to a bulb blower.
Tap water: Contains dissolved minerals that dry as spots on your glass. Always use distilled water.
Tissue paper or toilet paper: These are abrasive and shed fibers. They are not designed for optical surfaces.
Household glass cleaners (Windex, etc.): These contain ammonia and other chemicals that can damage anti-reflective coatings permanently.
Acetone: While sometimes used on uncoated optics, acetone can dissolve adhesives inside eyepiece assemblies and damage certain coatings. Keep it away from your eyepieces.
How to Clean a Telescope Eyepiece the Right Way: Step-by-Step
This is the core process that Tele Vue, Explore Scientific, and experienced forum contributors all agree on. Follow these steps in order and your eyepiece will come out clean without a scratch.
Step 1: Remove Loose Dust (Dry Cleaning First)
Always start with dry cleaning. Never apply liquid to a lens that has dust particles on it, because the liquid turns dust into abrasive grit that you then drag across the coating.
Remove the eyecup and any dust caps from the eyepiece. Hold the eyepiece with the lens facing down so dislodged dust falls away from the glass. Squeeze the bulb blower several times, directing puffs of air across the entire lens surface from different angles.
If stubborn dust particles remain after the blower, very lightly sweep the surface with a clean camel hair brush. Use the lightest possible touch, brushing from the center outward. If a particle will not budge, leave it for the wet cleaning step rather than forcing it.
Step 2: Mix Your Cleaning Solution
The most trusted DIY solution is a simple mix of isopropyl alcohol and distilled water. The ratio that Tele Vue and experienced forum users recommend is roughly 50/50, though some prefer a higher alcohol concentration for stubborn oils.
Pour a small amount into a clean container. You only need enough to dampen a Q-tip. Never apply solution directly to the lens, as it can seep into the eyepiece housing and reach internal elements.
If you prefer a commercial option, pre-moistened Zeiss lens wipes work well and remove the guesswork. They are individually sealed and designed for coated optics.
Step 3: Wet Clean with Q-Tips
Dip a fresh Q-tip into your cleaning solution, then touch it against the inside of the container rim to remove excess liquid. The Q-tip should be damp, not dripping.
Starting at the center of the lens, gently wipe in a circular spiral motion moving outward toward the edge. Use almost no pressure. Let the solution do the work of dissolving oils and residue.
Throw away the Q-tip after one pass across the lens. Never reuse a Q-tip, because any dust it picked up will scratch the coating on the return pass. For a heavily soiled eyepiece, you may need two or three fresh Q-tips with solution.
Work fairly quickly. Isopropyl alcohol evaporates fast, and you do not want the solution to dry on the lens mid-clean, which can leave streaks.
Step 4: The Distilled Water Mop-Up
This is the step that Tele Vue made famous and that Cloudy Nights users swear by. The alcohol solution can leave a faint residue as it evaporates. A distilled water mop-up pass removes that residue completely.
Dampen a fresh Q-tip with distilled water only. Using the same gentle center-to-edge spiral motion, lightly pass across the entire lens surface. This picks up any remaining cleaning solution and dissolved oils.
You may see a slight fog appear and then clear as the water evaporates. That is normal. If you see spots remaining, repeat with another damp Q-tip.
Step 5: Final Inspection and Drying
Hold the eyepiece at an angle under a bright light. Tilt it back and forth to catch reflections across the full surface. You should see clean glass with no streaks, spots, or fingerprints.
If you notice a stubborn spot, repeat the wet cleaning and water mop-up steps with fresh Q-tips. Do not press harder to remove it. Gentle repetition is always safer than force.
Let the eyepiece air dry for a few minutes before reinstalling the eyecup and dust caps. Store it in its case once you are certain it is completely dry.
Waterproof vs Conventional Eyepieces: Does It Change the Process?
This is one of the most common sources of confusion in astronomy forums. Many modern premium eyepieces are nitrogen-purged and waterproof, while older or budget eyepieces are conventional designs that are not sealed. The cleaning process differs slightly between the two.
Waterproof eyepieces, like many from Explore Scientific, Tele Vue (Ethos and Nagler lines), and Celestron, have internal seals that prevent moisture and dust from entering between the lens elements. This means you can clean them more aggressively on the exterior surfaces without worrying about liquid seeping inside. You can even rinse them under a gentle stream of distilled water for stubborn contamination.
Conventional eyepieces lack these internal seals. Liquid that touches the edge of the lens can wick into the housing through gaps between the lens elements and the barrel. Once inside, it can fog internal surfaces or even promote fungal growth over time.
If you are unsure whether your eyepiece is waterproof, treat it as conventional. The safe approach is always to apply liquid only to the Q-tip, never directly to the lens, and to avoid letting any liquid pool near the edges of the glass.
Check your manufacturer’s documentation if you want to confirm. Explore Scientific and Tele Vue clearly state which models are waterproof in their product specifications. When in doubt, contact the manufacturer directly.
How to Clean the Inside of a Telescope Eyepiece?
This is where things get tricky and where many astronomers feel genuine anxiety. Internal contamination shows up as foggy patches, spots between lens elements, or a hazy film that no amount of exterior cleaning will fix.
First, determine whether the contamination is actually inside. Hold the eyepiece under a light and look through it from both ends. Rotate it slowly. If the spot moves with the rotation on a specific internal surface, it is inside the eyepiece. If it stays fixed relative to the outer glass, it is on the exterior.
Internal contamination typically comes from one of three sources: moisture that seeped in over time and dried leaving mineral deposits, fungal growth that appears as branching thread-like patterns, or dust that entered through unsealed gaps.
For conventional eyepieces, do not attempt to disassemble them yourself unless you are experienced. Eyepieces contain multiple lens elements that are precisely aligned and spaced. Disassembly without proper tools and a clean environment will almost certainly make things worse.
Waterproof eyepieces are sealed at the factory and should never be opened. If internal contamination develops in a waterproof eyepiece, contact the manufacturer. Many premium eyepieces come with lifetime warranties that cover internal issues.
If the internal issue is minor dust that does not affect the view, the best advice from experienced astronomers is to leave it alone. Dust inside an eyepiece barely affects image quality because it is not at the focal plane.
For fungal growth or severe internal haze, professional cleaning or manufacturer service is the right call. The cost of professional cleaning is often a fraction of replacing a premium eyepiece, and you avoid the risk of permanent damage from a botched DIY attempt.
Common Cleaning Mistakes to Avoid
Most lens damage does not happen from normal use. It happens during cleaning. Here are the mistakes that experienced astronomers see over and over again.
Using compressed air cans: Despite the convenience, canned air is one of the most commonly cited causes of lens damage. The propellant can spray as liquid onto your glass, leaving a greasy residue. The pressure can also crack thin lens elements. Always use a bulb blower instead.
Reusing Q-tips or wipes: Once a Q-tip has touched the lens, it has picked up microscopic dust particles. Reusing it drags those particles across the coating like sandpaper. One pass per Q-tip, then throw it away.
Pressing too hard: Coatings are thin, typically only a few molecules deep. Heavy pressure combined with any trapped dust will leave permanent scratches. Use the lightest touch you possibly can and let the solution dissolve the contamination.
Cleaning in a circular buffing motion: Aggressive circular buffing can create friction heat and wear on coatings. Use gentle single-direction or slow spiral passes instead of rapid rubbing.
Cleaning too frequently: Every cleaning contact removes a tiny amount of coating material over years. Clean only when you see actual smudges or films that affect performance. A few dust particles are not worth the risk.
Using tap water or tap-water-based solutions: Minerals in tap water dry as hard spots on glass that are difficult to remove without scratching. Distilled water costs about a dollar per gallon and eliminates this risk entirely.
DIY Cleaning Solution Recipe
Making your own lens cleaning solution is simple, cheap, and uses ingredients you can find at any pharmacy or grocery store. Here is the recipe that astronomy forums recommend most often.
Mix equal parts 99% isopropyl alcohol and distilled water in a small, clean container. For example, one tablespoon of each. Stir gently to combine. This 50/50 mix dissolves oils effectively while evaporating cleanly.
Some astronomers add a single drop of dish soap (without moisturizers or antibacterial agents) for extra cleaning power on stubborn smudges. This is optional and should be used sparingly, as soap residue requires extra rinsing with distilled water.
If you prefer a ready-made option, Zeiss pre-moistened lens wipes are the forum favorite. They are individually packaged, designed for coated optics, and cost very little per wipe. Keep a box in your observing kit for field use.
Never mix your solution in advance and store it for months. Fresh solution each cleaning session ensures your alcohol has not absorbed water from the air, which reduces its effectiveness.
Storage and Maintenance Tips to Reduce Cleaning Frequency
The best cleaning is the one you never have to do. Proper storage dramatically reduces how often your eyepieces need attention.
Always replace dust caps on both ends of every eyepiece immediately after use. The eye lens cap and the barrel cap work together to keep dust out. If you lose a cap, order replacements from the manufacturer or use a universal rubber cap.
Store eyepieces in a dedicated case with individual slots. A foam-lined case prevents eyepieces from knocking against each other and keeps dust out. Hard cases are better than soft pouches for long-term protection.
Add silica gel desiccant packets to your eyepiece case. These absorb moisture from the air and prevent condensation and fungal growth, especially important in humid climates. Replace or recharge the packets every few months.
Avoid touching the lens surfaces with your fingers. When handling eyepieces, grip the barrel only. If you wear glasses while observing, be especially careful that your eyepieces do not pick up oils from contact.
Let dew-covered eyepieces dry completely before capping them. Trapped moisture under a dust cap creates the perfect environment for fungal growth. Leave them uncapped in a dry room until fully dry, then cap and store.
Professional Cleaning vs DIY: When to Call an Expert
Most eyepiece cleaning is perfectly safe to do at home. But there are situations where professional service is the smarter choice.
If you have a premium eyepiece that cost several hundred dollars and it develops internal fogging, fungal growth, or contamination between elements, a professional cleaning service is worth the investment. Forum users report paying somewhere in the range of half the eyepiece’s value for a full professional clean and reassembly, which is far better than risking permanent damage to expensive optics.
For budget eyepieces under fifty dollars, DIY cleaning almost always makes more economic sense. The cost of professional service on a budget eyepiece may approach the replacement cost.
Consider professional service when you see branching, web-like patterns inside the lens, which indicate active fungal growth. Fungus can permanently etch glass coatings and spread to other optics in your collection if not addressed properly.
Some manufacturers offer cleaning and servicing for their own products. Tele Vue, for instance, is known for responsive customer support and can service their eyepieces directly. Check your warranty before paying a third party.
Frequently Asked Questions
Can I use isopropyl alcohol to clean a telescope lens?
Yes, isopropyl alcohol at 99% concentration is safe for cleaning telescope eyepieces with optical coatings. It is the most commonly recommended cleaning agent in astronomy communities. Dilute it with an equal amount of distilled water and apply it with a Q-tip using gentle pressure. Avoid rubbing alcohol from drugstores, which contains additives and excess water that can leave residue.
Why is my eyepiece blurry?
Blurry views can come from several sources: fingerprints or oily film on the lens surface, dust or smudges on the eye lens, dew condensation during cold sessions, poor focus, or the telescope not being properly collimated. Start by checking the eyepiece for visible smudges under a light. If the glass looks clean, verify your focus and check collimation before assuming an optics problem.
How to clean the inside of a telescope lens?
Cleaning inside a telescope eyepiece is risky and usually requires disassembly, which can misalign lens elements. For waterproof eyepieces, do not attempt this at all since they are factory-sealed. For conventional eyepieces, minor internal dust is best left alone since it barely affects image quality. If you see fogging, haze, or fungal growth inside, contact the manufacturer or a professional cleaning service rather than risking permanent damage.
Why can’t I see anything through my telescope eyepiece?
If you see complete darkness or extreme blur, first check that you have removed the dust cap from the telescope. Then verify the eyepiece is fully seated in the focuser. Start with your lowest power (longest focal length) eyepiece to find your target, then switch to higher power. If the image is bright but blurry, try slowly adjusting focus. A dirty eyepiece causes degraded image quality but rarely makes the view completely blank.
Conclusion
Learning how to clean a telescope eyepiece the right way comes down to one core principle: gentle patience. Start with a bulb blower, move to a wet cleaning solution of isopropyl alcohol and distilled water applied with fresh Q-tips, and finish with a distilled water mop-up pass. Clean only when you see real smudges or films, not every time you spot a dust particle.
Your eyepieces are tougher than you think, but their coatings deserve respect. Use the right tools, avoid the common mistakes we covered, and store everything properly between sessions. With this approach, your optics will stay sharp for years of clear nights under the stars.
Now grab your bulb blower and give those eyepieces the care they deserve. Clear skies.