
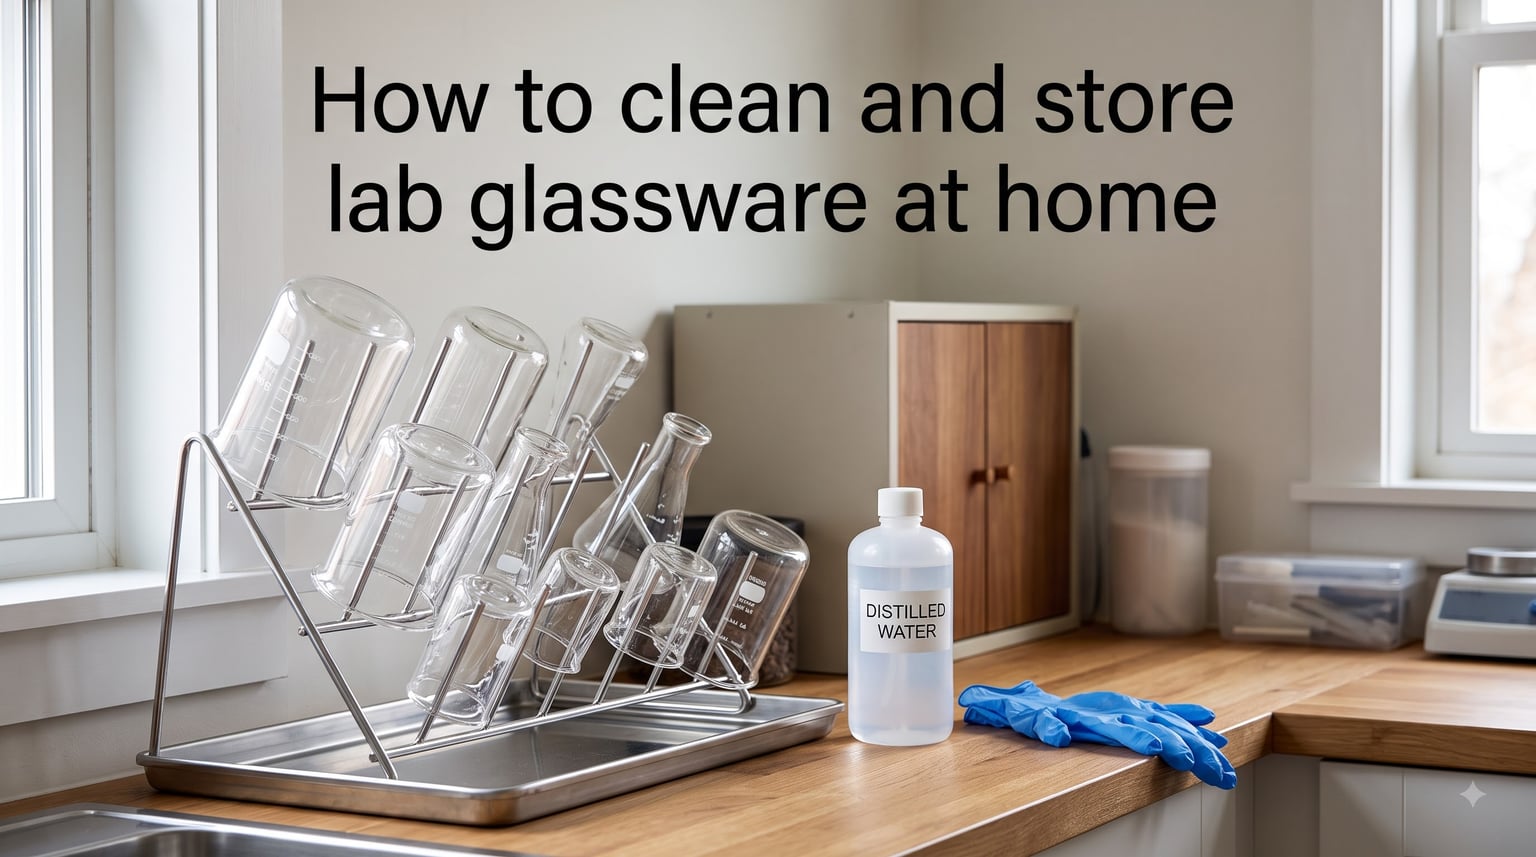
When I set up my first home chemistry corner, I made every mistake possible. I left beakers to “soak overnight” and came back to residue so stubborn it took a week to scrub off. I dried glassware with a kitchen towel and wondered why my next experiment had specks floating in it. If you want to know how to clean and store lab glassware at home without those headaches, this guide walks you through everything I wish someone had told me on day one.
Whether you’re an amateur chemist, a student running weekend experiments, or a hobbyist with a small home laboratory, clean glassware is the difference between accurate results and frustrating contamination. I’ve spent the past few years refining a routine that actually works in a kitchen or garage setting, and I’m sharing the full process below.
Table of Contents
Why Cleaning Lab Glassware Matters for Home Scientists?
Clean glassware isn’t just about looking tidy. A single trace of residue can throw off an entire experiment. When I tested a pH calibration last year with what I thought was a “clean” beaker, my readings were off by nearly 0.4 units. The culprit was a thin film of old soap scum I couldn’t even see.
Contamination affects three things in your home laboratory: experiment accuracy, safety, and equipment lifespan. A leftover solvent in a flask can react with new chemicals in unpredictable ways. Grease on a ground-glass joint can cause stopcocks to seize, and I’ve personally cracked two expensive pieces trying to free one. Mineral deposits from tap water can also etch borosilicate glass over time, weakening it where you least expect.
For amateur chemists, the stakes are different from professional labs but the standards should be the same. Cross-contamination between experiments ruins reproducibility. Biological residue can promote mold growth in stored flasks. And dull, spotted glassware simply makes accurate measurements harder to read.
How to Clean and Store Lab Glassware at Home: The 5-Step Process
This is the routine I follow every single time, whether the glassware held water or reacted chemicals. The five steps below form the backbone of any reliable home lab cleaning protocol, and they align with ISO 4787:2010 guidelines used in professional settings.
Step 1: Initial Rinse Right After Use
Rinse glassware immediately after your experiment ends. Don’t let residue dry onto the surface. I keep a large plastic basin next to my work area specifically for this purpose. Use warm tap water to flush out the bulk of any chemicals, swishing it around so it touches every interior surface.
If the glassware held something hazardous, do this first rinse in a sink with the water running rather than in a basin. For most home chemistry work, a quick rinse within five minutes of finishing your experiment is enough to prevent dried-on deposits that turn into hours of scrubbing later.
Step 2: Wash with the Right Cleaner
For most home lab work, a dilute solution of lab-grade detergent works better than dish soap. I switched to Alconox two years ago after reading recommendations on r/chemistry, and the difference in cleanliness was noticeable within a week. Mix about one tablespoon per gallon of warm water. Submerge the glassware and let it soak for 10 to 15 minutes.
If you don’t have lab detergent, a mild dish soap works for general cleaning. Avoid anything with heavy fragrances, moisturizers, or antibacterial additives. Those leave residues that are notoriously hard to rinse off and can interfere with chemical reactions. I learned this the hard way when a “gentle” dish soap produced a wettability problem on my volumetric flasks.
Step 3: Scrub Stubborn Residue
For anything that won’t budge from soaking, use a brush. Match the brush size to the glassware: large brushes for beakers and Erlenmeyer flasks, narrow brushes for test tubes, and pipe cleaners or specialized brushes for burets and pipets. I keep a small set of brushes in a dedicated container so they don’t pick up kitchen grime.
For dried-on residue that won’t respond to detergent, try an overnight soak in a warm detergent solution. For tougher cases, the r/chemistry community often suggests a soak in dilute nitric acid (about 10%) for inorganic residues, followed by thorough rinsing. Always handle acids with gloves and eye protection.
Step 4: Final Rinse with Distilled or Deionized Water
Tap water leaves mineral spots and can introduce ions that contaminate sensitive experiments. Always do a final rinse with distilled or deionized water. I keep a one-gallon jug of distilled water on my workbench specifically for this final rinse.
The rinse technique matters more than people think. Don’t just dip the glassware. Fill it partway with distilled water, swirl, and pour. Repeat at least twice for items used in quantitative work. For volumetric flasks and burets, three rinses are better than two.
Step 5: Dry Completely Before Storage
Moisture promotes mold and mineral deposits, so glassware must be dry before storage. I’ll cover drying methods in detail below, but the key principle is simple: air dry in a dust-free area or use a low-temperature oven.
The Right Cleaning Agents for Home Lab Glassware
Choosing the right cleaner depends on what your glassware was used for. Below is a quick comparison of the most common options home chemists use.
| Cleaner | Best For | Home Lab Notes |
|---|---|---|
| Dish soap (mild) | General cleaning | Avoid moisturizers and fragrances |
| Lab detergent (Alconox) | Quantitative work | Dissolves oils and residues well |
| Dilute nitric acid (10%) | Inorganic residues, metals | Requires PPE, full rinsing |
| Chromic acid solution | Organic residue, stubborn films | Toxic, mostly avoided by home chemists |
| Acetone | Grease, organic films | Use sparingly, vent well, don’t rinse with water after |
| White vinegar (eco option) | Mineral deposits | Cheap, safe, but slower acting |
For environmentally friendly cleaning, white vinegar and warm water work well on mineral scale. Baking soda paste handles light residue without harsh chemicals. I keep both on hand for non-critical glassware and they handle most of my everyday cleaning needs.
Avoid using chromic acid in a home setting if possible. It’s an excellent cleaner but it’s also a known carcinogen and requires careful disposal that home labs typically can’t manage safely. The risks outweigh the benefits for amateur work.
Drying Methods That Prevent Contamination
Drying sounds simple, but the wrong method reintroduces contaminants right when you thought you were done. I learned this after drying a perfectly clean volumetric flask with what I thought was a clean kitchen towel and finding lint fibers embedded in it the next morning.
Air drying is the safest method for most home lab glassware. Invert items on a dedicated drying rack placed in a dust-free area. I built a simple PVC rack that fits inside a cabinet with a small fan running for 30 minutes to speed up the process. Avoid drying on countertops where dust settles quickly.
For faster results, a low-temperature oven (around 60 to 80 degrees C) works for borosilicate glass. Don’t use high heat, as thermal shock can crack glass. Let glassware cool gradually inside the oven before removing it. Rapid temperature changes are the number one cause of unexpected cracks in my own collection.
Never use paper towels or regular cloth to dry glassware intended for experiments. Lint and fibers transfer easily. If you need to wipe something, use a lint-free laboratory wipe or let it air dry completely.
How to Store Lab Glassware Without Dust or Damage?
Storage matters as much as cleaning. Even perfectly clean glassware picks up dust, airborne contaminants, and odors if stored carelessly. Here’s the system I refined over three years of running a home lab out of a converted garage corner.
Choose a Dust-Free Cabinet or Drawer
A closed cabinet is better than open shelving. I use a small glass-front cabinet with doors that seal reasonably well. It keeps dust off glassware between uses and prevents accidental knocks. If you don’t have a dedicated cabinet, even a covered shelf with a clean cloth draped over the items helps.
For extremely sensitive work, I store volumetric glassware in a sealed plastic bin with a desiccant packet. This is overkill for most home experiments, but it’s helpful if you’re running moisture-sensitive reactions or precise quantitative work.
Separate Glassware by Type
Don’t nest beakers inside each other. It looks tidy, but pieces touching each other can scratch, chip, and even fuse at ground-glass joints. I keep beakers on one shelf, Erlenmeyer flasks on another, and specialty items like separatory funnels in their own designated area.
For items with stopcocks, place a small piece of paper or plastic wrap between the joint surfaces. This prevents the stopcock from sticking, which is one of the most common frustrations I see in r/chemistry threads. A stuck stopcock often means broken glassware when you try to free it.
Label and Organize
Label glassware that you reserve for specific uses. I use small labels on dedicated beakers for things like “pH only” or “acid waste.” This prevents cross-contamination and reminds you which pieces to never mix with food-safe or general-use items.
Keep a simple inventory list taped inside the cabinet door. It sounds obsessive, but it’s saved me from buying duplicate flasks more than once. Nothing worse than finishing a cleaning session only to discover the flask you needed is already clean but lost somewhere in the back of a drawer.
How to Know if Your Glassware Is Truly Clean: The Uniform Wetting Test
The uniform wetting test is a simple visual check borrowed from professional labs and codified in ISO 4787:2010. It catches the invisible residue that even thorough washing can miss.
Here’s how it works. Fill the clean, dry glassware with distilled water, then pour it out. Hold the piece up to the light and look at the interior surface. If the water sheets off evenly, leaving a continuous wet film with no breaks or beads, the glass is clean. If water beads up or forms droplets, there’s still a film of oil, grease, or detergent residue on the surface.
This test works because clean borosilicate glass is naturally hydrophilic, meaning water spreads evenly across it. Any hydrophobic contamination breaks that wetting pattern. I’ve caught “clean” glassware that failed this test more times than I expected. When it fails, I just rewashed the piece and retested. It almost always passes on the second try.
Safety Precautions Every Home Chemist Should Follow
Home laboratories don’t have safety officers walking by, which means the responsibility falls entirely on you. Always wear nitrile gloves when handling cleaning acids or solvents. Eye protection is non-negotiable, even for what seems like a simple dish soap wash, because hot detergent solutions can splash unpredictably.
Work in a ventilated area. I keep a window cracked whenever I use acetone, nitric acid, or any volatile solvent. If you don’t have good ventilation, avoid those cleaners entirely or take the work outside. The r/labrats community regularly reminds beginners that fume buildup in a closed room is a serious health risk, not just an annoyance.
Never mix cleaning agents unless you know exactly what happens. Bleach and acids produce chlorine gas, which is dangerous in any setting. Always label your cleaning solutions clearly and store them separately from your experimental chemicals.
Common Mistakes That Damage Home Lab Glassware
The biggest mistake I made early on was thermal shock. I once pulled a hot beaker from a water bath and ran cold tap water over it. It cracked down the side immediately. Now I let glassware cool to room temperature before any temperature change.
Another frequent error is using abrasive scrubbers. Steel wool and rough scouring pads scratch glass permanently. Those scratches harbor contamination and weaken the piece. Use only soft brushes and non-abrasive pads designed for laboratory use.
Finally, don’t ignore chips and cracks. A small crack in a flask can turn into a sudden break under vacuum or temperature change. I’ve replaced about three pieces over the past two years because of minor damage that I kept hoping was fine. Better to lose a $15 flask than risk a chemical exposure from a sudden break.
Frequently Asked Questions
What should I clean lab glassware with at home?
For most home lab work, a dilute solution of lab-grade detergent like Alconox is the best choice. Mix about one tablespoon per gallon of warm water and soak glassware for 10 to 15 minutes. For general cleaning, a mild dish soap without moisturizers or fragrances also works. Use dilute nitric acid for inorganic residues and acetone for grease, but always with proper PPE and ventilation.
Can I use regular dish soap on lab glassware?
Yes, mild dish soap works for general cleaning of home lab glassware, but choose one without antibacterial additives, heavy fragrances, or moisturizers. These additives leave residues that interfere with experiments and are difficult to rinse completely. For quantitative or sensitive work, lab-grade detergent is a more reliable option.
How do I know if my glassware is truly clean?
Use the uniform wetting test. Fill the glassware with distilled water, pour it out, and inspect the interior surface in good light. Clean glass will hold an even film of water with no breaks or beads. If water beads up or pulls away from the surface, a hydrophobic film of oil, grease, or detergent residue is still present and the piece needs another wash.
How should I store lab glassware to avoid contamination?
Store glassware in a closed cabinet or covered area to keep out dust. Don’t nest pieces together because contact causes scratches and stuck stopcocks. Place a small piece of paper between ground-glass joint surfaces to prevent seizing. Label reserved glassware for specific uses and keep an inventory to avoid losing pieces.
Final Thoughts
Knowing how to clean and store lab glassware at home comes down to consistency. The five-step process above takes only a few extra minutes per session, but it saves hours of troubleshooting later. I’ve kept the same routine for two years and my glassware still looks and performs like new.
Start with the basics: rinse immediately, wash with appropriate cleaner, scrub stubborn spots, rinse with distilled water, and dry in a dust-free area. Add the uniform wetting test to your workflow once a month to catch hidden residue. With these habits, your home laboratory will produce more reliable results and your glassware will last for years.