
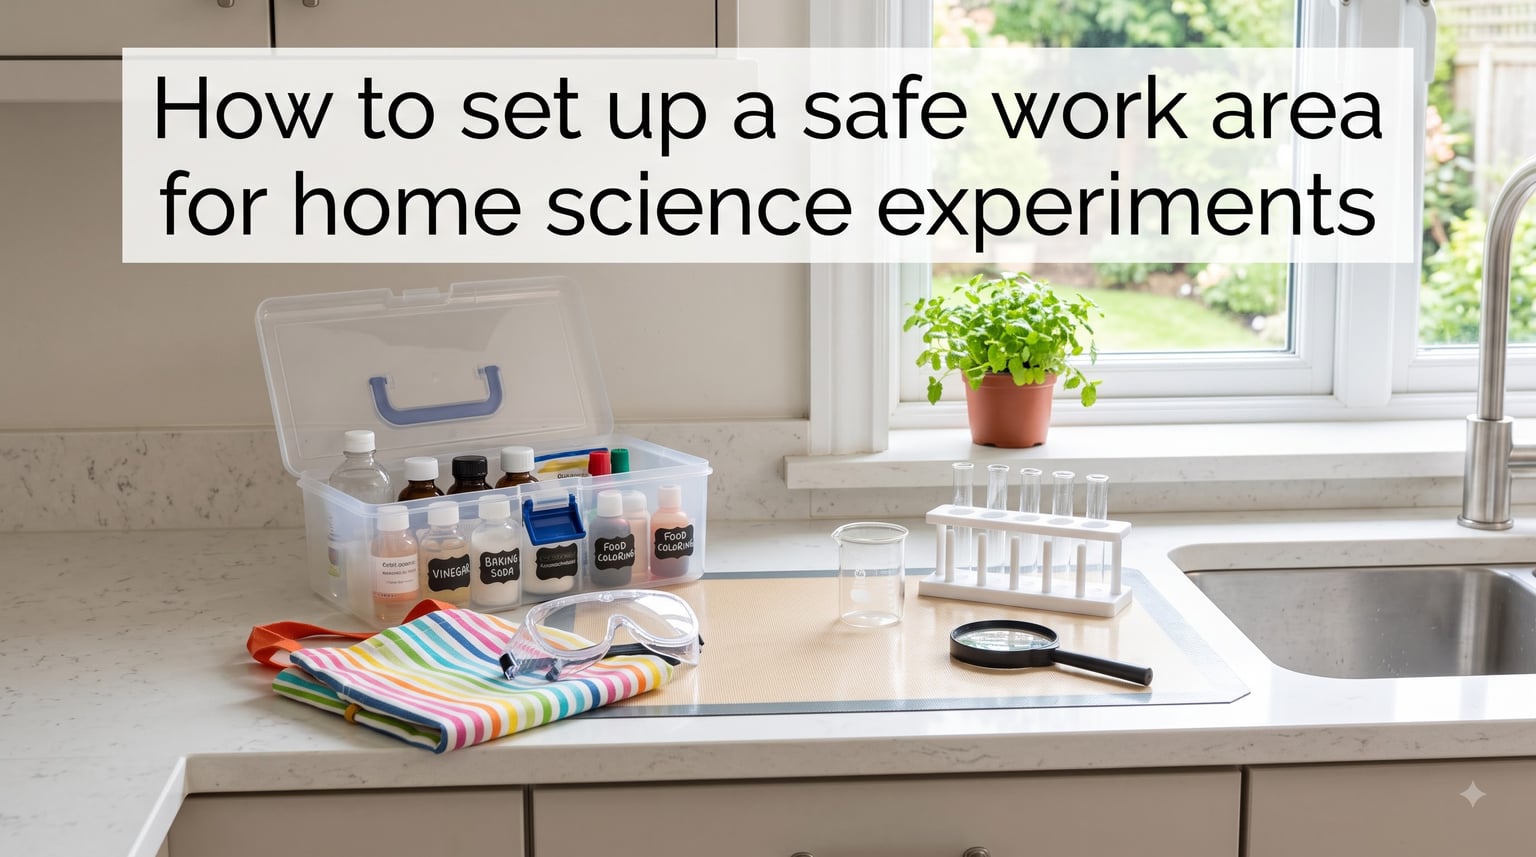
If you have ever watched a child mix baking soda and vinegar and erupt into a volcano of fizz, you already understand the power of hands-on science at home. I have helped families and classrooms set up kitchen-counter chemistry for years, and the same lesson always surfaces: the experiment is the fun part, but the safe work area is what makes learning stick. Knowing how to set up a safe work area for home science experiments protects your kids, your kitchen, and your nerves, while letting curiosity run wild.
In this guide, our team walks through the exact steps we use when we set up a science corner at home, from choosing the right spot on the kitchen table to labeling chemicals and stocking a first aid kit. You will find age-by-age supervision guidance, an essential PPE checklist, and a printable-style safety plan you can follow in one afternoon.
Table of Contents
How to set up a safe work area for home science experiments: a complete step-by-step guide
Setting up a safe work area for home science experiments does not need to be expensive or intimidating. Our team’s repeatable setup takes about 90 minutes from start to finish and has worked for families with toddlers, elementary kids, and curious teenagers. We use it for volcano eruptions, slime labs, microscope nights, and basic chemistry demonstrations.
Here is the broad workflow that ties the rest of this guide together.
Pick a flat, well-ventilated, well-lit workspace away from food prep and soft furnishings.
Gather your PPE: safety goggles, gloves, aprons, and a properly stocked first aid kit.
Set up a chemical-safe zone with locked storage, labeled bottles, and a Safety Data Sheet (SDS) folder.
Establish clear ground rules for adult supervision, never-experiment-alone, and what to do in an emergency.
Practice your first experiment end-to-end before turning the kids loose.
Clean up thoroughly and document results in a science journal.
We will unpack each step in detail in the sections that follow, with practical tips drawn from real family labs and chemistry forums alike.
Choosing the right location for your home science lab
The single most important decision when you set up a science area is location. Get this right and almost every other safety choice becomes easier. According to the National Science Teaching Association, you want a stable, flat surface with access to water and supplies, ideally a kitchen counter or a dedicated table in a low-traffic zone of the house. Most families we work with pick one of three spots.
Kitchen counter or island: Best access to water and a sink, but keep raw food and lab supplies completely separate.
Dedicated folding table: Portable, easy to move outside for messy experiments, and creates a hard psychological boundary between science and daily life.
Basement, garage, or laundry room corner: Best ventilation for anything that smells or smokes, but only if lighting and adult presence are reliable.
Three practical factors matter most for any home science lab setup: ventilation, lighting, and clearances. You want a well-ventilated space (a window that opens, a range hood, or a door you can crack), bright overhead light plus a focused task lamp, and at least 60 cm of clear space behind the workspace in case you need to step back fast. Hard floors (tile, vinyl, sealed concrete) beat carpet every time because spills clean up in seconds.
Pick a spot away from pets, curious toddlers, and heavy foot traffic. I learned this the hard way when my dog knocked a beaker of cabbage juice off a coffee table in under four seconds. A clear exclusion zone with a small folding barrier or even a piece of painter’s tape on the floor tells the rest of the family: science is happening here, do not walk through.
Essential safety equipment and personal protective equipment (PPE)
PPE is the line that separates exciting science from medical bills. Real chemists on forums like r/chemistry repeat the same mantra: gloves, goggles, ventilation, blast shields where needed, and a clear face mask when an experiment demands it. For a home setup you can stay simpler, but you should not skip the basics.
Safety goggles: Look for ANSI Z87.1 rated chemical splash goggles, not just sunglasses. The NSTA recommends impact-rated eye protection for any experiment involving flying particles or chemicals.
Disposable nitrile gloves: Cheap, comfortable, and available at most drug stores. Keep at least three sizes for different hands in your family.
Aprons or old lab coats: A long-sleeve cotton apron protects clothing from dyes, acids, and stains. Thrift store button-down shirts work in a pinch.
First aid kit: Sterile gauze, adhesive bandages, eye-wash solution, burn cream, and a digital thermometer. Restock yearly.
Fire extinguisher: A small ABC-rated kitchen extinguisher within arm’s reach covers grease, electrical, and chemical fires.
Phone with emergency numbers: Poison Control (1-800-222-1222 in the US), local fire, and your pediatrician pre-programmed.
When our team reviews home setups, we always look for one specific failure: kid-sized goggles that are actually costume glasses. Real chemical splash goggles form a seal against the forehead and are independently rated. Spend a few extra dollars; this is the single piece of equipment you cannot cheap out on.
Hang the PPE on hooks near the work area so putting it on becomes part of the experiment ritual. We treat it like a football team suiting up for a game: goggles and apron go on before the beaker touches the table. That tiny ritual reduces accidents more than any rule we have ever written.
Adult supervision: age-appropriate guidelines for kids
No list of equipment replaces a calm adult in the room. Across chemistry and education forums, the rule is consistent: never experiment alone. You may need an extra pair of eyes or hands if something goes wrong, and that second person is rarely the first responder if you are the one who is hurt.
Here is the age-by-age framework our team uses. Treat it as a floor, not a ceiling; you can always supervise more closely, never less.
Ages 3 to 5 (preschool): Hand-over-hand supervision for every step, no tasting, no pouring, no tools sharper than a plastic spoon. Use simple, visual experiments such as color mixing or sink-or-float.
Ages 6 to 9 (early elementary): Constant line-of-sight supervision, adult pours all chemicals, child measures and mixes. Goggles and apron required even for “safe” experiments to build the habit.
Ages 10 to 13 (upper elementary and middle school): Direct supervision in the same room. Child can read SDS sheets and run simple reactions with permission. Introduce cleanup responsibility.
Ages 14 to 17 (teens): Same-room supervision for any flame, electricity, glassware, or anything producing fumes. Adult checks setup before each experiment and reviews the cleanup afterward.
Ages 18+: Independent work allowed, but per the chemistry community, an adult should always know you are experimenting and have a check-in time.
Parents often ask whether their tween can “graduate” to unsupervised experiments. Our honest answer in 2026: not yet, because most ER visits from home science still involve school-age kids experimenting alone with household chemicals. The day your teen earns unsupervised time is the day they have demonstrated, multiple times, that they follow the full safety checklist without being prompted.
Chemical and material safety at home
The safest home labs use a tight, predictable set of materials and respect them. The TASB Risk Management Foundation recommends that every chemical, even a bottle of vinegar, have access to its Safety Data Sheet (SDS). An SDS tells you the hazards, first aid steps, and disposal rules in plain language. Search “[chemical name] SDS” in any browser and you will find a free PDF in seconds.
Build your starter chemical library around low-hazard, household-grade substances. Vinegar (acetic acid), baking soda (sodium bicarbonate), washing soda, table salt, sugar, vegetable oil, rubbing alcohol (70 percent isopropyl), and food coloring cover 80 percent of classic home experiments. Avoid draining household cleaners, lye, bleach, ammonia, or any product labeled “danger” or “corrosive” unless an adult is running a controlled demo with gloves and ventilation.
Storage rules that prevent 90 percent of accidents
Lock it up: A simple plastic toolbox with a latch keeps chemicals out of reach of small children.
Label everything: Even if you can tell baking soda at a glance, your child cannot. Use a label maker or paint pen.
Separate by type: Acids (vinegar) away from bases (baking soda) and away from flammables (rubbing alcohol).
Original containers when possible: Off-brand decanting leads to mix-ups. If you must, label immediately.
Cool, dry, dark storage: A high kitchen cabinet away from the stove is the most reliable spot.
We keep one laminated “chemical cheat sheet” taped to the inside of the storage box with hazard pictograms, the SDS link, and the date opened. It turns a 30-second glance into the difference between a calm cleanup and a panicked 911 call.
Emergency preparedness and incident response
Even the most disciplined home lab has spills, splashes, and the occasional small flame. The point of safety equipment is to limit those incidents; the point of emergency prep is to handle them with zero panic. Spend 20 minutes pre-planning what to do in each scenario, and you will never wish you had.
Walk through this response plan with the whole family once a quarter.
Skin or eye contact with a chemical: Rinse at the sink for at least 15 minutes. Call Poison Control even if symptoms seem minor.
Small fire or flare-up: Smother with a lid or use the ABC extinguisher. Never use water on a grease fire.
Inhalation of fumes: Move to fresh air immediately, open windows, and stay out until the smell clears.
Burns: Cool under running water for 10 minutes, cover with clean gauze, and seek medical care for anything larger than a coin.
Glass break: Stop the experiment, isolate the area, and sweep with a damp paper towel, not bare hands. Dispose in a stiff cardboard box labeled “broken glass.”
Post the emergency plan in large print near the work area. Include the home address so a babysitter or grandparent can read it to a dispatcher without hesitation. In our own home setup, we taped ours inside the cabinet door above the lab supplies, where kids naturally look when they open the cabinet.
Cleanup, storage, and long-term organization
Cleanup is not optional homework; it is the third act of every experiment. Forum users who have run home labs for decades repeat the same rule: gloves come off and hands are washed as I leave the lab. Make this a non-negotiable close to every session.
Wipe down the workspace with a damp cloth and a mild all-purpose cleaner.
Rinse glassware and set it on a drying rack rather than re-shelving wet.
Return chemicals to the locked storage box by name and place.
Log results, photos, and observations in a science journal.
Dispose of reaction leftovers per the SDS; never pour unknowns down the drain.
A science journal is the single cheapest piece of equipment that pays back the most learning. A simple notebook, one entry per experiment (date, question, hypothesis, what we did, what we saw) is enough. Our team has watched kids who could not spell “hypothesis” in October write multi-page lab reports by spring because the journal held them accountable.
Once a month, audit the lab: check expiration dates, restock the first aid kit, and confirm labels are still readable. This 15-minute habit catches nearly every long-term safety drift before it becomes a problem.
Common mistakes to avoid when setting up a home science lab
Even well-meaning parents fall into a few predictable traps. None are fatal, but each cuts the safety margin in half.
Skipping ventilation: A “harmless” vinegar-baking soda reaction in a closed bathroom is a lung irritant and teachable moment in the wrong direction.
Reusing food containers: A water bottle labeled with a Sharpie that once held rubbing alcohol is a textbook ingestion accident waiting to happen.
Letting the workspace become a storage shelf: A cluttered bench pushes chemicals toward the edge and confuses cleanup. Less stuff equals fewer mistakes.
Treating goggles as optional: If the child can talk you out of wearing them once, they will try again. Hold the line.
Skipping the SDS review: Five minutes with the Safety Data Sheet prevents five hours of regret.
Our team’s most repeated advice: pick the smallest setup that supports the experiments you actually plan to run, master it, and only then add materials. Most home lab accidents happen during the “let’s try something new” leap, not during the experiments you have rehearsed.
Frequently Asked Questions
What are two ways an at-home lab area could be safe?
An at-home lab area can be made safe by ensuring proper ventilation (open windows or a range hood) and by requiring personal protective equipment such as ANSI Z87.1 rated chemical splash goggles, nitrile gloves, and an apron for every experiment, no matter how simple.
What are three key factors to making your lab workspace safe?
The three key factors are a stable, flat surface with hard flooring, reliable ventilation that moves fumes out of the room, and clear separation between food prep and lab materials, supported by a stocked first aid kit and an ABC fire extinguisher within reach.
How to be safe when doing science experiments?
To stay safe, always read the Safety Data Sheet before handling any chemical, wear goggles and gloves, never experiment alone, keep an adult in line of sight for school-age children, and clean the workspace thoroughly when the experiment ends.
How to set up a science lab at home?
Set up a home science lab by choosing a flat well-ventilated area like a kitchen counter or folding table, stocking PPE and a first aid kit, locking chemicals in a labeled toolbox with SDS sheets, and writing a written safety plan that the whole family reviews before each experiment.
What age can kids do science experiments alone?
Children should not experiment alone until late teens; under 10 requires constant supervision, ages 10 to 13 need an adult in the same room, and even teens working with flame, electricity, or fumes should have a check-in time with a responsible adult.
What is the most important safety equipment for home experiments?
The most important safety equipment for home experiments is properly rated chemical splash goggles paired with a well-stocked first aid kit, because eye injuries and minor burns are the most common home experiment incidents and are also the most preventable with immediate response.
A final word on building safe science habits at home
Knowing how to set up a safe work area for home science experiments is one of the most rewarding parenting skills you can build in 2026. Pick your spot, gather the essentials, write the rules down, and run the first experiment end-to-end before expanding. The habits you build will outlast any single volcano or slime batch.
Your next step is a 90-minute setup sprint this weekend: choose the location, order a set of ANSI goggles, label the chemical box, and run a one-step dry run with your kids. When the first real experiment goes smoothly, you will have built a science corner the whole family can trust.