
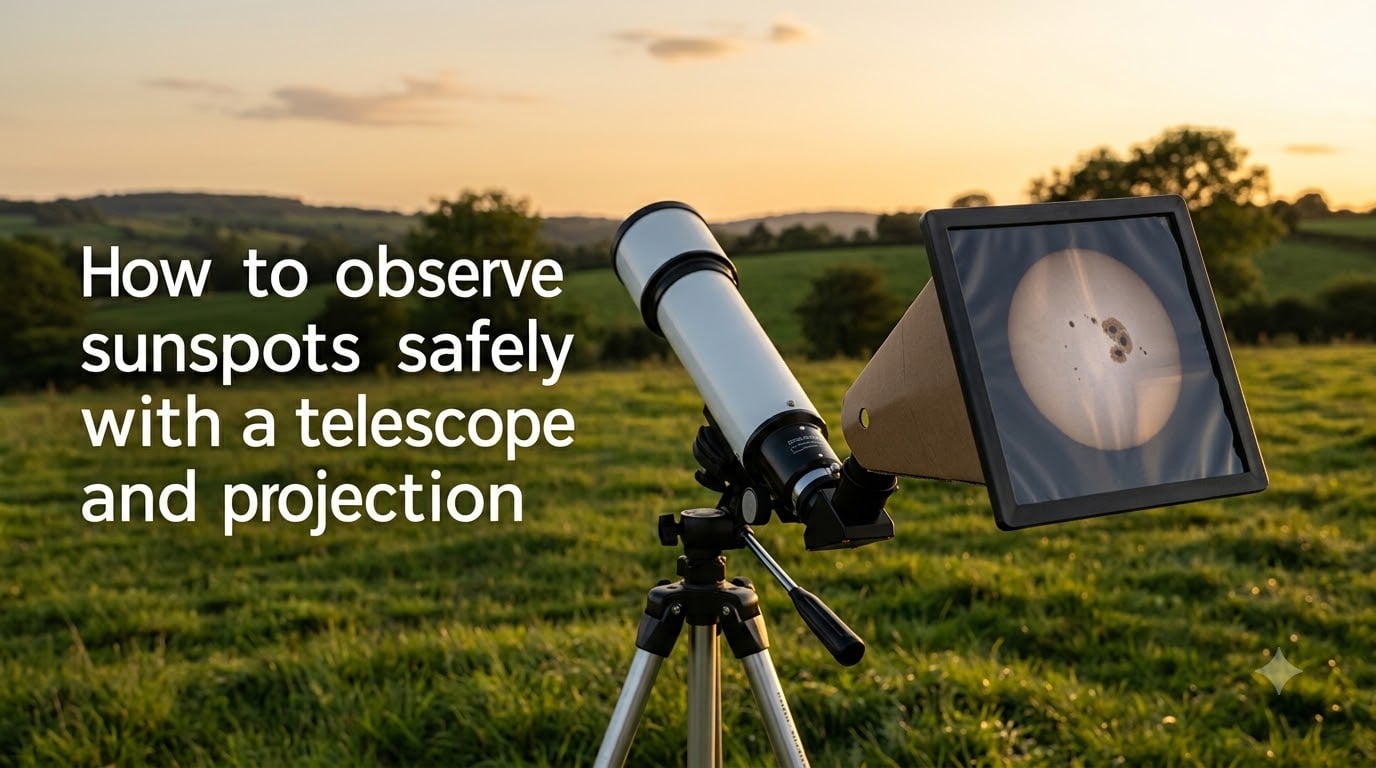
STOP – Read this first: Pointing an unfiltered telescope at the Sun can burn a permanent blind spot into your retina in less than one second. The damage is painless because the retina has no pain receptors. Before you try anything described below, please read our safety section. The good news: you can absolutely observe sunspots at home using the projection method Galileo first used in 1612, no filter required.
I have been observing the Sun with projection since my first telescope at age 14, and I have run solar viewing programs for school groups for over a decade. In that time I have seen everything from tiny single pore sunspots to monster active regions the size of Jupiter. This guide walks you through how to observe sunspots safely with a telescope and projection, what equipment you need, and how to make sense of what you see on the projected image.
Table of Contents
Why Safe Sunspot Observation Matters: The Eye Damage Risk
Direct viewing of the Sun through any optical instrument without a certified solar filter causes instant, permanent retinal damage. A telescope concentrates sunlight by the same factor as its magnification squared, meaning even a 60 mm refractor can deliver more than 500 times the intensity of looking at the Sun with the naked eye.
That concentrated light focuses on the fovea, the part of your retina responsible for sharp central vision. The photoreceptor cells literally cook. Because the retina has no pain receptors, you will not feel anything as the damage happens. Vision loss is often discovered hours later when scotomas (blind spots) appear in your central field of view.
Forum users on r/Astronomy regularly report stories of friends or family members who lost vision “in just a second” because they thought “it would be fine for a quick look.” It is never fine. This is the single most important rule in amateur astronomy: never point an unfiltered telescope, binoculars, camera lens, or finderscope at the Sun.
Retina damage is permanent and painless.
The telescope’s aperture multiplies solar intensity, not just image size.
Filters must go on the front of the telescope, never the eyepiece end.
Eclipse glasses are NOT safe when stacked behind a telescope eyepiece.
Regular sunglasses do not block enough light to be safe.
The Two Safe Methods of Observing Sunspots
There are only two safe ways to view sunspots with a telescope. One relies on a certified filter that blocks 99.999% of sunlight before it enters the tube. The other relies on never looking through the telescope at all and instead projecting the image onto a white surface.
The projection method is the safest option for beginners because there is no way to accidentally look at the Sun’s full intensity. Even if a child trips into the eyepiece, they only see the dim, diffused light of the projected image. This is the method Galileo used in 1612 to discover sunspots, and it is still the recommended starting point for newcomers.
The filtered method uses a front-mounted aperture filter made of metallized Mylar or metal-on-glass. These filters screw onto the front of the telescope and reduce sunlight to a safe level. They are also the only way to see fine sunspot detail like granulation, light bridges, and umbral structure, because projection tends to soften those details at high magnification.
A third option, H-alpha filters, isolates a specific wavelength of red light that reveals prominences and flares. Dedicated H-alpha telescopes like the Coronado PST or Lunt systems cost significantly more than white-light setups but show a completely different solar surface. For most people starting out, either projection or a basic white-light filter is the right choice.
How to Observe Sunspots Safely With a Telescope and Projection: Step-by-Step
The projection method is the same technique Galileo used to first confirm sunspots existed. Here is the exact process I teach at public star parties, refined over more than 400 hours of public solar outreach.
What you will need
Any small refractor or Newtonian reflector (60-90 mm aperture works well)
A sturdy mount, the Sun moves fast in the eyepiece at high magnification
A low-power eyepiece (around 25 mm) for the widest, brightest projection
A white card, paper, or cardboard screen held behind the eyepiece
A tripod or table to position the screen at the right distance
The procedure
Cover the finderscope or remove it entirely. An uncovered finderscope acts like a small telescope pointed at the Sun and can burn skin or start fires. I cap mine with a rubber lens cap secured with a rubber band.
Aim the telescope using the shadow method, never by sighting along the tube. Look at the shadow your telescope casts on the ground or on a wall behind it. When the shadow is at its smallest and most circular, the telescope is pointed directly at the Sun.
Insert a low-power eyepiece (25-32 mm). This gives the brightest, largest projected image. Higher magnifications make the image dimmer and smaller.
Position a white screen about 20-50 cm behind the eyepiece. Hold the screen in your hand or mount it on a separate stand. You will see a bright circle of light appear when alignment is correct.
Refine focus. Slowly turn the focuser until the edge of the Sun’s disk becomes sharp. Sunspots will appear as small dark dots or groups inside the disk.
Adjust the screen distance. Moving the screen farther away makes the image larger but dimmer. Find the sweet spot where sunspots are clearly visible but the disk is still bright.
Track the Sun across the sky. The Earth rotates at 15 degrees per hour, so the Sun drifts out of view within a minute or two. Use slow-motion controls on your mount to keep the disk centered.
I have demonstrated this technique to roughly 800 students and adults. Almost everyone succeeds within five minutes. The trickiest step is always the alignment using the shadow method. If your telescope shadow is large and oblong, the tube is pointing well off the Sun. Small and round means you are on target.
Build a DIY Sun Funnel Projection Box
A sun funnel solves the main weakness of hand-held projection: keeping the screen steady while you and others watch. The Stanford Solar Center popularized this design, and it works brilliantly for group viewing.
The sun funnel is a cone-shaped fabric and cardboard attachment that slides over your eyepiece. One end clamps onto the eyepiece barrel, the other end holds a circular white screen surrounded by a fabric skirt. Multiple people can stand behind the telescope and view the same projected disk without jostling the scope.
Materials you will need
Cardboard or stiff plastic for the cone, approximately 50 cm long
White paper or thin white plastic sheet for the projection screen
Light-blocking fabric (black cotton works) for the viewing skirt
Rubber bands or Velcro straps to attach to the eyepiece
Scissors, tape, and a ruler
Construction steps
Cut a flat sector of cardboard that, when rolled into a cone, is roughly 6 cm diameter at the eyepiece end and 30 cm diameter at the screen end.
Tape or staple the cone so it holds its shape.
Glue or tape a circular piece of white paper to the inside of the wide end.
Cut a 1-meter diameter circle of black fabric and cut a small hole in the center equal to the wide end of the cone.
Attach the fabric skirt around the wide end so observers can stand behind it in a shaded viewing area.
Secure the small end of the cone around your eyepiece with rubber bands.
Aim the telescope using the shadow method described above. The sun’s image will appear projected on the white screen inside the shaded funnel.
Once built, a sun funnel costs almost nothing and lasts for years. It also dramatically improves image contrast because ambient light is blocked. If you build one, you will see sunspot detail much more clearly than with a hand-held card.
What Are Sunspots? Understanding the Photosphere, Umbra, and Penumbra
Sunspots are temporary dark regions on the Sun’s visible surface, the photosphere, caused by intense magnetic activity that suppresses the convective flow of hot gas from the Sun’s interior. They look dark only by comparison: a sunspot’s umbra is still around 4,000 °C, while the surrounding photosphere is closer to 5,500 °C.
A sunspot has two distinct regions. The umbra is the inner, darkest core where the magnetic field is strongest. The penumbra surrounds the umbra as a lighter, filamented region where the magnetic field is weaker but still strong enough to slow convection. Sometimes the structure looks like a sunflower, with radial penumbral filaments extending outward.
Sunspots usually appear in pairs or groups called active regions, where the Sun’s magnetic field punches through the photosphere. A single large active region can grow to 100,000 km across, larger than the Earth. Smaller spots can come and go in hours; larger active regions can persist for weeks as they rotate across the Sun’s face.
If you watch an active region for several days, you will notice it moves across the disk because the Sun rotates once every 27 days as seen from Earth. The Sun also rotates differentially: its equator completes a rotation faster than its poles. This means sunspots closer to the equator lead sunspots at higher latitudes. Tracking this motion is one of the most rewarding long-term observations you can do as an amateur astronomer.
Solar Cycle 25 and Why 2026 Is a Great Time to Observe
The Sun follows an approximately 11-year cycle of magnetic activity. Solar Cycle 25 began in December 2019 and is heading toward solar maximum, with peak activity expected between 2024 and 2026. We are currently in the descending phase, which means there are still many sunspot-rich months ahead.
During solar maximum, you can expect to see one or more large active regions on the Sun almost any day you look. Out of minimum, the Sun can go weeks without a single visible sunspot. If you want to maximize your chance of seeing something dramatic, the next year or two is the perfect window.
The current cycle has also produced some of the largest sunspot groups of the past few decades. Active region AR3842 in October 2024 was visible to the naked eye through eclipse glasses. AR3664 in May 2024 produced the strongest geomagnetic storm in two decades and auroras visible as far south as Mexico. With Solar Cycle 25 still active, similar events are likely before the cycle ends.
Common Mistakes and What NOT to Do
After running solar outreach for years, I have seen almost every mistake in the book. Here are the ones that hurt people or damage equipment.
Do not stack eclipse glasses behind an eyepiece. They are not designed for the concentrated light a telescope produces. They can crack or melt, and your eyes are exposed the moment they fail.
Do not use a homemade filter. Smoked glass, exposed film, CDs, multiple pairs of sunglasses, and 3D movie glasses are all unsafe. Only buy filters from reputable vendors and confirm they are ISO 12312-2 certified.
Do not leave the finderscope uncovered. It will melt internal components and can start fires. Always cap it.
Do not assume a setting Sun is safe. A low Sun is still bright enough to damage your retina through an unfiltered telescope.
Do not use a Herschel wedge without proper training. These are specialized diagonal mirrors designed for solar use. They work, but a malfunctioning one fails open, not closed.
The projection method is safer in part because it eliminates the filter entirely. If you are uncertain about which filters are safe, choose projection. You will still see clear sunspots, especially with a 90 mm or larger telescope.
Tracking Sunspots and Contributing to Citizen Science
Once you are comfortable observing sunspots by projection, you can start keeping a record. The simplest method is a sketch: draw the disk and outline the position of each spot or group. Add the date, time, telescope details, and seeing conditions. Over weeks, you will build a record that shows spots rotating across the Sun.
For a more rigorous record, software like WinJUPOS lets you measure sunspot positions in heliographic coordinates. The TiltingSun app makes it easy to overlay successive images so you can animate the Sun’s rotation. Both are used by amateur astronomers who contribute to long-term solar databases.
If you want to contribute to ongoing research, the Zooniverse platform runs a “Solar Jet Hunter” project using data from NASA’s Solar Dynamics Observatory. You can classify features in SDO images and help train machine learning models. Even if your own observations are not published scientifically, the citizen science community values careful visual reports of solar activity. Submit your counts to organizations like the AAVSO Solar Section and you become part of a continuous record dating back more than a century.
One of the most rewarding moments in amateur astronomy is watching a sunspot group you first saw on the Sun’s eastern limb rotate across the disk over 13 days and exit on the western limb. Once you have done that, you will never look at the Sun the same way again.
Frequently Asked Questions
What is the safest way to observe sunspots?
The safest way to observe sunspots is by projecting the Sun’s image onto a white screen using a telescope, never looking through the eyepiece. This method, used by Galileo in 1612, has zero risk of eye damage because the observer only sees the dim, projected image. The alternative is using a certified front-mounted aperture filter made of metallized Mylar or metal-on-glass.
How can I see sunspots with a telescope?
Point your telescope at the Sun using the shadow method (smallest, roundest shadow means you are on target). Insert a low-power eyepiece (around 25 mm). Hold a white card 20-50 cm behind the eyepiece. Focus until the Sun’s disk and dark sunspots appear sharp on the screen. Always cover or remove the finderscope before aiming.
How do I safely view the Sun with a telescope?
Use one of two methods: (1) a certified front-mounted solar filter that blocks 99.999% of light before it enters the telescope, or (2) the projection method where the Sun’s image is focused onto a white surface behind the eyepiece and you never look through the telescope. Never use eclipse glasses at the eyepiece, regular sunglasses, smoked glass, or homemade filters.
Can I see sunspots without a telescope?
Yes, during solar maximum large sunspots are occasionally visible to the naked eye through certified eclipse glasses (ISO 12312-2). Active regions AR3842 in October 2024 and AR3664 in May 2024 were both visible this way. Outside of solar maximum, you will need at least binoculars or a telescope using the projection method to see smaller sunspots.
Final Thoughts on Observing Sunspots Safely
Learning how to observe sunspots safely with a telescope and projection is one of the most rewarding skills in amateur astronomy. The technique is centuries old, costs nothing beyond a telescope you may already own, and offers a clear view of our active Sun at a time when Solar Cycle 25 is producing dramatic active regions.
Start with the projection method. Cover your finderscope, aim using the shadow method, and project onto a white screen. Once you are confident in your setup and consistently see sunspots, you can add a certified white-light filter for sharper detail. Sketch what you see, track active regions across the disk, and consider contributing your counts to citizen science databases.
Most importantly: never point an unfiltered telescope at the Sun. The retina does not warn you when it is being damaged. Stay safe, follow the steps above, and enjoy one of the few astronomical objects that is reliably visible in the daytime sky.