
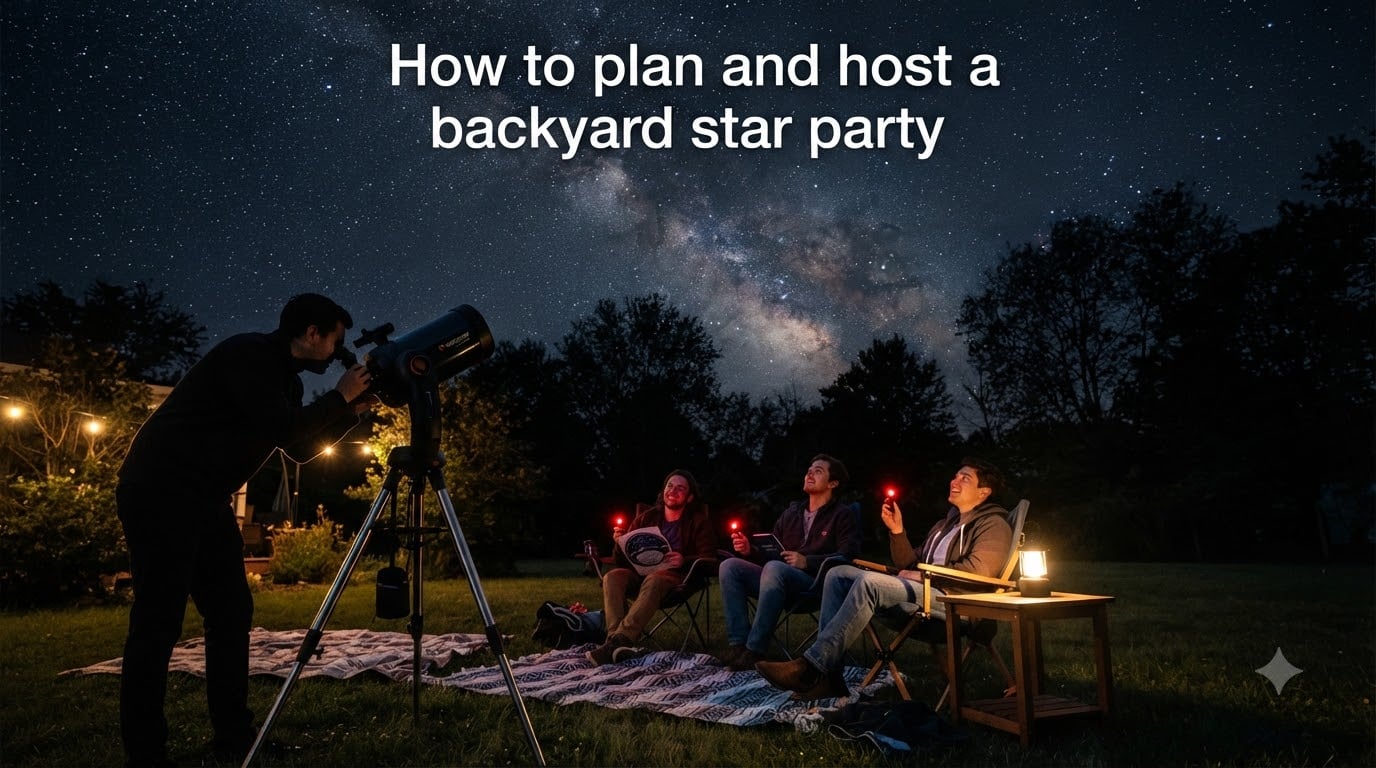
There’s something quietly powerful about stepping outside, looking up, and seeing the Milky Way with friends. A backyard star party turns that moment into a shared experience, and it’s one of the most accessible science gatherings you can host.
I hosted my first star party for eight friends on a Friday in late October. We had a borrowed Dobsonian, three red flashlights I made from paper and cellophane, and absolutely no idea what we were doing. By 11 p.m., everyone had seen Saturn’s rings, the Andromeda Galaxy, and a surprise fireball. We’ve run one every clear new-moon weekend since.
This guide walks you through how to plan and host a backyard star party from scratch. You’ll learn how to pick the right night, control light pollution in your yard, choose beginner-friendly gear, run a telescope, and keep guests of all ages engaged when the clouds roll in. No astrophysics degree required.
Table of Contents
Choosing the Right Date and Time for Your Star Party
The single most important decision for a star party is when to hold it. Pick the wrong night and you’ll spend three hours explaining why guests can barely see anything through your telescope. Pick the right night and the sky does most of the teaching for you.
Moon phase matters more than calendar date
A bright Moon washes out fainter stars, galaxies, and nebulae. Aim for a new moon weekend, or at least four days before or after a full moon. I use the Moon phase calendar on timeanddate.com and pick Saturdays within that window. Crescent and quarter phases are tolerable, but a new moon is ideal.
Best seasons for backyard stargazing
Late summer through early autumn is my favorite window. Nights get long, the Milky Way arches overhead, and meteor showers like the Perseids and Orionids light up the sky. Winter offers the clearest, driest air and long nights, but cold sets in fast. Spring is variable, with wet weather but excellent galaxy viewing in Leo and Virgo.
Start time and session length
Plan to start about 60 to 90 minutes after sunset, when astronomical twilight ends and the sky is fully dark. Most guests stay for two to three hours. Schedule around 9 p.m. for early events or 10 p.m. for late risers. For families with young kids, a 7:30 p.m. start lets you catch the Moon before bedtime.
Selecting the Right Backyard Location
You don’t need a rural property to host a successful star party. You need the darkest 20-foot square in your yard and a clear horizon in the direction you’ll be observing. Most yards have a usable spot once you identify the worst light-pollution offenders.
Test your yard for light pollution
Stand in different parts of your yard after dark and rate how many stars you can see. The spot with the most visible stars is your viewing spot. Use the free Light Pollution Map (lightpollutionmap.info) to check your Bortle scale rating. Bortle 5 suburban skies are workable. Bortle 8 or 9 city skies need extra effort on location and equipment choice.
Map your viewing horizons
Decide what direction you’ll be observing before guests arrive. Most casual observers face south for planets and overhead for the Milky Way. Check for tall trees, neighboring two-story homes, or streetlights that block your horizon. A small shift of 10 feet in your yard can put a tree line behind you instead of in your view.
Ground and trip hazards
Scout your chosen spot in daylight. Look for uneven ground, garden hoses, kid’s toys, and sprinkler heads. Guests will be walking in near-darkness and focusing on the sky, not their feet. We mark our viewing area with low battery-powered path lights in red, which doubles as a safety cue and a night-vision-friendly guide.
How to Minimize Light Pollution at Home?
You can’t control the city skyline, but you can control the light dome over your yard. Most suburban homes leak far more light than residents realize, and turning off the right lights makes an immediate, dramatic difference in sky quality.
Audit your home lighting
Walk outside 30 minutes before the party and look at your home as if you were a stargazer. Porch lights, garage lights, kitchen windows, and hallway lights are the biggest offenders. Turn them all off. Cover windows facing your viewing area with blankets or sheets. Even a small LED indicator light on a router or smoke detector can affect nearby eyes.
Coordinate with neighbors
Tell your immediate neighbors in advance. A short text or note saying “Hey, we’re hosting a small stargazing group on Saturday from 8 to 11 p.m., would you mind turning off the porch light?” works wonders. Most people are curious and helpful. I bring a small bag of cookies for the neighbors who comply.
Use shielding and timers
For lights you can’t turn off, shield them. A cardboard cutout over a downspout light, a towel over a window, or a piece of dark fabric draped over a fence fixture all help. Motion-sensor lights should be disabled for the night. We put a sticky note on our switch box listing every light we turn off so we can reset them after.
Essential Equipment Checklist for a Star Party
The gear list for a backyard star party is shorter than most people expect. Beginners often overbuy telescopes and underprepare on basics like chairs and warm drinks. Focus on comfort and orientation tools first.
Must-have items for every host
Every star party needs the following:
One red flashlight per guest (or red cellophane over a regular flashlight)
Warm layers, blankets, and lawn chairs or recliners
Star chart, planisphere, or stargazing app like Stellarium or SkySafari
Bug spray and warm drinks
Notepad for sketching or noting observations
Fully charged phones with night sky apps installed
Telescope and binocular choices
For groups of under 10 people, a single 6-inch or 8-inch Dobsonian telescope is the best beginner value. Larger telescopes aren’t necessary and are harder to set up in the dark. A pair of 10×50 binoculars complements a telescope well and lets multiple people observe at once. We use both at every party.
Optional but recommended gear
A green laser pointer (5mW or under, used responsibly) makes pointing out constellations effortless. A laser collimator keeps the telescope optics aligned. A red headlamp for the host keeps hands free. And a portable power bank charges phones without leaving the house. We also keep a small step stool so shorter guests can reach the eyepiece.
Red Light and Dark Adaptation Explained
Dark adaptation is the single most overlooked concept at first-time star parties. Walk out of a lit kitchen into your yard and your eyes will take 20 to 30 minutes to fully adjust. White light from phones or flashlights resets that clock instantly and ruins the experience for everyone nearby.
How dark adaptation works
Your retina has two types of light-sensitive cells: cones for color and rods for low-light vision. Rods are most sensitive to blue-green light and barely respond to deep red. That’s why astronomers use red light at night. It keeps your rod cells active so you can read charts and walk around without losing your night vision.
Building red flashlights with the right wavelength
Red light works best at wavelengths above 620 nanometers. Cheap red plastic often passes shorter wavelengths that hurt your night vision. We buy red LED flashlights from astronomy suppliers (Orion and Rigel Systems both sell them) or wrap a regular flashlight with two layers of red Rubylith film. A $10 solution beats a $50 one in our testing.
Common mistakes that ruin night vision
Three habits ruin dark adaptation faster than anything: looking at a phone screen, glancing at a white flashlight, and looking at a neighbor’s bright security light. Set phones to night mode or red filter apps before the party. Ask guests to text before they arrive if they need to use their phone. And remind everyone that even a brief flash of white light costs 10 to 15 minutes of recovery.
Naked Eye Observing Tips for First-Time Guests
The biggest mistake I made early on was putting guests straight on the telescope. Beginners often leave without being able to find anything on their own. Spend 20 minutes on naked-eye observing first. It builds confidence and gives everyone shared reference points for the rest of the night.
The order of objects to show
Start with bright, easy targets that don’t need a telescope. The Moon is always a winner, especially when it’s a thin crescent with earthshine. Venus, Jupiter, and Saturn are visible to the naked eye. Then move to the brightest stars and the easiest constellations. Save faint galaxies for the telescope portion.
Teaching constellation ID without equipment
Pick three constellations to teach per event, not more. We rotate through Orion, the Big Dipper, Cassiopeia, and Cygnus depending on the season. Use the stick-figure method: connect bright stars with imaginary lines and tell a story. Guests remember constellations better when they have a myth attached. Orion hunting the bull beats “those three stars” every time.
Spotting satellites and meteors together
Point out the International Space Station during passes using NASA’s Spot The Station tool. ISS passes feel magical to first-time viewers. Meteor watching is also a group activity that needs no equipment. Have everyone lie back and stare at one patch of sky for 10 minutes. Count meteors together. We’ve seen 10 to 20 per hour during peak Perseids with no gear at all.
Using Telescopes and Binoculars at Your Event
Most guests have never looked through a telescope before. The first view should be obvious, bright, and impressive. Saturn’s rings never fail. Jupiter’s moons almost always get a gasp. Save dim galaxies for the second half of the night when eyes are fully dark-adapted and crowds have thinned.
Best telescope types for beginners
Dobsonian reflectors offer the most aperture for the least money. An 8-inch Dob collects four times more light than a 4-inch refractor and costs less. For under $500, you can get a scope that will impress any group. Refractors are great for sharp planetary views but cost more per inch of aperture. Catadioptric designs like Schmidt-Cassegrains are compact but heavier and pricier.
Eyepiece choice and queue management
Use one low-power eyepiece (around 25mm to 40mm focal length) that gives a wide field of view. It makes finding objects easier and gives a “space window” feel that beginners love. Higher magnifications require steady tracking and a more experienced operator. Have guests queue up in groups of three or four. We rotate every 3 to 5 minutes.
When to add binoculars
Binoculars are underrated at star parties. A pair of 10x50s shows the craters of the Moon, Jupiter’s moons, the Andromeda Galaxy, and dozens of star clusters. They’re easy to hand to a guest and require no setup. We keep one pair per two guests on hand and pass them around. Mounting them on a small tripod reduces arm fatigue and image shake.
Safety Tips Including Laser Pointer Etiquette
Most star parties are safe, but a few simple precautions prevent the kind of accident that ruins your night and could bring legal trouble. The biggest concerns are laser pointers, trip hazards in the dark, and equipment around children.
Laser pointer rules for hosts
Only use green lasers rated 5 milliwatts or less. Anything stronger is illegal to point at aircraft and dangerous to eyes. Never aim a laser near someone’s face, even at a distance. Never aim it at a moving vehicle or aircraft. Never let children use one unsupervised. Use it only to point at the sky and turn it off when guests are at the eyepiece.
Trip hazards in the dark
Mark all telescope cables with glow-in-the-dark tape. Put red battery-powered path lights around the viewing area to show walkways. Keep a clear path between the chairs and the telescope. We learned this the hard way after a guest tripped over a tripod leg in the dark and nearly knocked over our scope. Now we lay down red rope lights before every party.
Children and equipment safety
Set up a separate kid-friendly viewing station with binoculars and a small tabletop telescope. Keep the main telescope at adult eye level. Never let a child touch the eyepiece of a solar telescope (which we don’t recommend for nighttime parties anyway). Have an adult helper watching children near tripods. We always have one designated “scope minder” plus one “kid wrangler” at events with mixed ages.
Weather Backup Planning When Clouds Roll In
Clouds are the eternal enemy of backyard star parties. Even the most careful weather check can fail. Build a backup plan before you need it so guests aren’t standing in your yard staring at overcast sky and wondering what to do.
Reliable cloud forecasting sources
Astronomers use Clear Outside, Astrospheric, and the National Weather Service cloud cover forecast. Check these at 24 hours out and again at 6 hours out. If cloud cover is over 60 percent at the planned time, consider rescheduling. We always hold one backup date on the calendar for two weekends later, so we don’t have to renegotiate schedules with everyone.
Indoor backup activities for cloudy nights
If clouds appear mid-party, don’t send everyone home. Move inside and run a backyard star party program indoors. Show NASA videos of the targets you planned to observe. Run a constellation quiz with printed star charts. Have a smartphone planetarium session walking through the sky that would have been visible. We’ve had cloudy parties turn into great indoor learning sessions.
Communicating cancellations
Send a cancellation text or email at least 12 hours before, ideally 24. Use a group chat so updates are visible to everyone. Thank guests for their flexibility. Offer the backup date right in the same message. We’ve found that a friendly message with a clear backup plan keeps attendance strong even when weather forces a reschedule.
Engaging Kids and Reluctant Guests
Not every guest arrives excited. Some parents drag reluctant teens. Some adults feel intimidated by telescopes they don’t understand. Your job is to meet them where they are and give them a win in the first 15 minutes.
Activities for mixed age groups
For kids under 10, focus on the Moon and bright planets. Hand them a sketchpad and ask them to draw the craters they see. They’ll stay engaged for an hour. For teens, hand them the laser pointer (under supervision) and let them lead constellation tours for younger kids. For adults who are skeptical, start with binoculars. They require no setup and the views are surprising.
Drawing the Moon and sketching constellations
Sketching is one of the oldest and best astronomy activities. Give each guest a clipboard, paper, and a pencil. Ask them to draw the Moon’s terminator line and count how many craters they can identify. Or ask them to sketch a constellation with stick figures. Even non-artists enjoy this. We frame the best sketches and put them on the fridge as keepsakes.
Helping shy adults feel welcome
Some guests worry they’ll ask a dumb question. They won’t. Experienced astronomers love sharing what they know with newcomers. Encourage questions by saying “The only dumb question is the one you don’t ask.” Pair shy guests with friendly outgoing ones. Always offer the telescope last so they don’t feel rushed. I’ve seen reserved guests become hosts of their own star parties within a year.
Refreshments and Comfort for a Long Night Out
Stargazing is a sedentary activity in cold or cool temperatures for two to three hours. Guests who are hungry, cold, or uncomfortable will leave early. Build comfort into your plan the same way you plan equipment.
Warming drinks and snacks
Hot cocoa, herbal tea, and coffee in insulated carafes beat anything cold. We keep a thermos of hot cider for fall events and hot chocolate for winter. Avoid messy snacks that require two hands. Granola bars, trail mix, and small cookies work well. Stay away from anything that crumbles easily in the dark.
Seating and layering strategy
Tell guests in advance to dress warmer than they think they need. Even summer nights cool off fast once the sun is down. Provide extra blankets for guests who forget. Reclining lawn chairs or zero-gravity chairs are better than upright chairs because guests can look straight up without neck strain. We keep six folding chairs and four blankets for parties of 12.
Bug and weather preparation
Bug spray is essential from late spring through early fall. Provide a non-scented option so it doesn’t interfere with observing. Citronella candles work but should be placed downwind of the viewing area. Check the dew point before the event. If temperatures will approach the dew point, plan for lenses to fog and bring a hair dryer on low to defog eyepieces.
Hosting Timeline: 4 Weeks Out to Event Night
Below is the exact planning timeline we use for our star parties. It runs four weeks from kickoff to event night and includes a buffer for weather reschedules.
4 weeks before: invite list and equipment audit
Send a save-the-date to your invite list. Take inventory of your equipment: telescope, binoculars, red flashlights, star charts, and chairs. Make a shopping list for anything missing. Decide if you’ll invite a guest astronomer from a local astronomy club to bring a second scope.
2 weeks before: confirm moon phase and send invites
Reconfirm your date falls within 4 days of a new moon. Send the formal invitation with date, time, address, what to bring, and what to wear. Ask guests to RSVP so you know how many chairs and red flashlights to set up. Begin checking weather patterns for your chosen date.
1 week before: gear prep and final invite
Test your telescope optics, charge batteries, and replace any dead flashlight bulbs. Confirm parking and bathroom access for guests. Send a reminder text one week out. Begin detailed cloud forecasts with Astrospheric or Clear Outside.
Day of: final checks and arrival
Check cloud cover at 3 p.m., noon, and again at 6 p.m. Set up chairs and telescopes at least 30 minutes before guests arrive. Pre-align your telescope on a bright target like the Moon or Jupiter. Have red flashlights ready at the entrance. Greet each guest with a warm drink and a quick sky orientation as they arrive.
Frequently Asked Questions
How to have a stargazing party?
To have a stargazing party, pick a clear night near a new moon, invite 5 to 10 guests, set up a dark area of your yard, and provide red flashlights, warm drinks, and at least one telescope or pair of binoculars. Start with bright targets like the Moon and planets, then move to constellation tours and meteor watching as eyes dark-adapt over 20 to 30 minutes.
How to plan a stargazing night?
Plan a stargazing night in four phases: pick a new-moon date four weeks out, scout your viewing location two weeks ahead, send invitations one week before, and check weather forecasts at 24 hours, 12 hours, and 6 hours before the event. Always have a backup date two weekends later and a backup indoor plan if clouds arrive mid-event.
What are some tips for beginner stargazers?
Beginner stargazers should give their eyes 20 to 30 minutes to fully dark-adapt, use only red light at night, start with the Moon and brightest planets before moving to fainter objects, learn three constellations per session rather than a dozen, and bring a star chart or stargazing app to identify what they see. Binoculars are easier to use than a telescope for a first experience.
What to wear on a stargazing date?
For stargazing, dress in warm layers even in mild weather because temperatures drop quickly after sunset. Wear closed-toe shoes to avoid trip hazards on uneven ground, bring a hat and gloves in fall and winter, and pack an extra blanket for cold nights. Avoid white or bright clothing that reflects light and disrupts other observers’ night vision.
What do I need for a star party?
You need red flashlights for every guest, comfortable seating or reclining chairs, warm drinks and snacks, blankets or warm layers, a star chart or stargazing app, and at least one telescope or pair of binoculars. Optional but recommended: a 5mW green laser pointer for pointing, a step stool for shorter guests, and bug spray for warm-weather events.
Where to have a star party?
Have a star party in the darkest part of your own backyard, ideally a spot with the lowest light pollution exposure and a clear horizon in your main viewing direction. Avoid areas directly under streetlights or near neighbor windows, and consider asking neighbors to turn off exterior lights for the night. Suburban yards rated Bortle 5 to 7 are workable with light pollution awareness.
Final Thoughts on Hosting Your First Star Party
A backyard star party is one of the cheapest, most rewarding gatherings you can host. We’ve run over 30 of them with friends, neighbors, scout troops, and school groups. The biggest lesson: equipment matters far less than the host’s energy and preparation.
Pick a new-moon weekend, darken your yard, gather a few friends, and start with the Moon. If you learn how to plan and host a backyard star party once, you’ll have a skill that brings people together for years. The universe is waiting. See you under the stars.